
Everlasting Hoarfrost: Continental Challenge High-Score Strategy
Author(Source): 2026-07-01 14:56:38
In the Continental Challenge, Travelers need to build teams using various heroes to challenge up to six bosses. This guide provides recommended team compositions and strategic insights to help you defeat each one.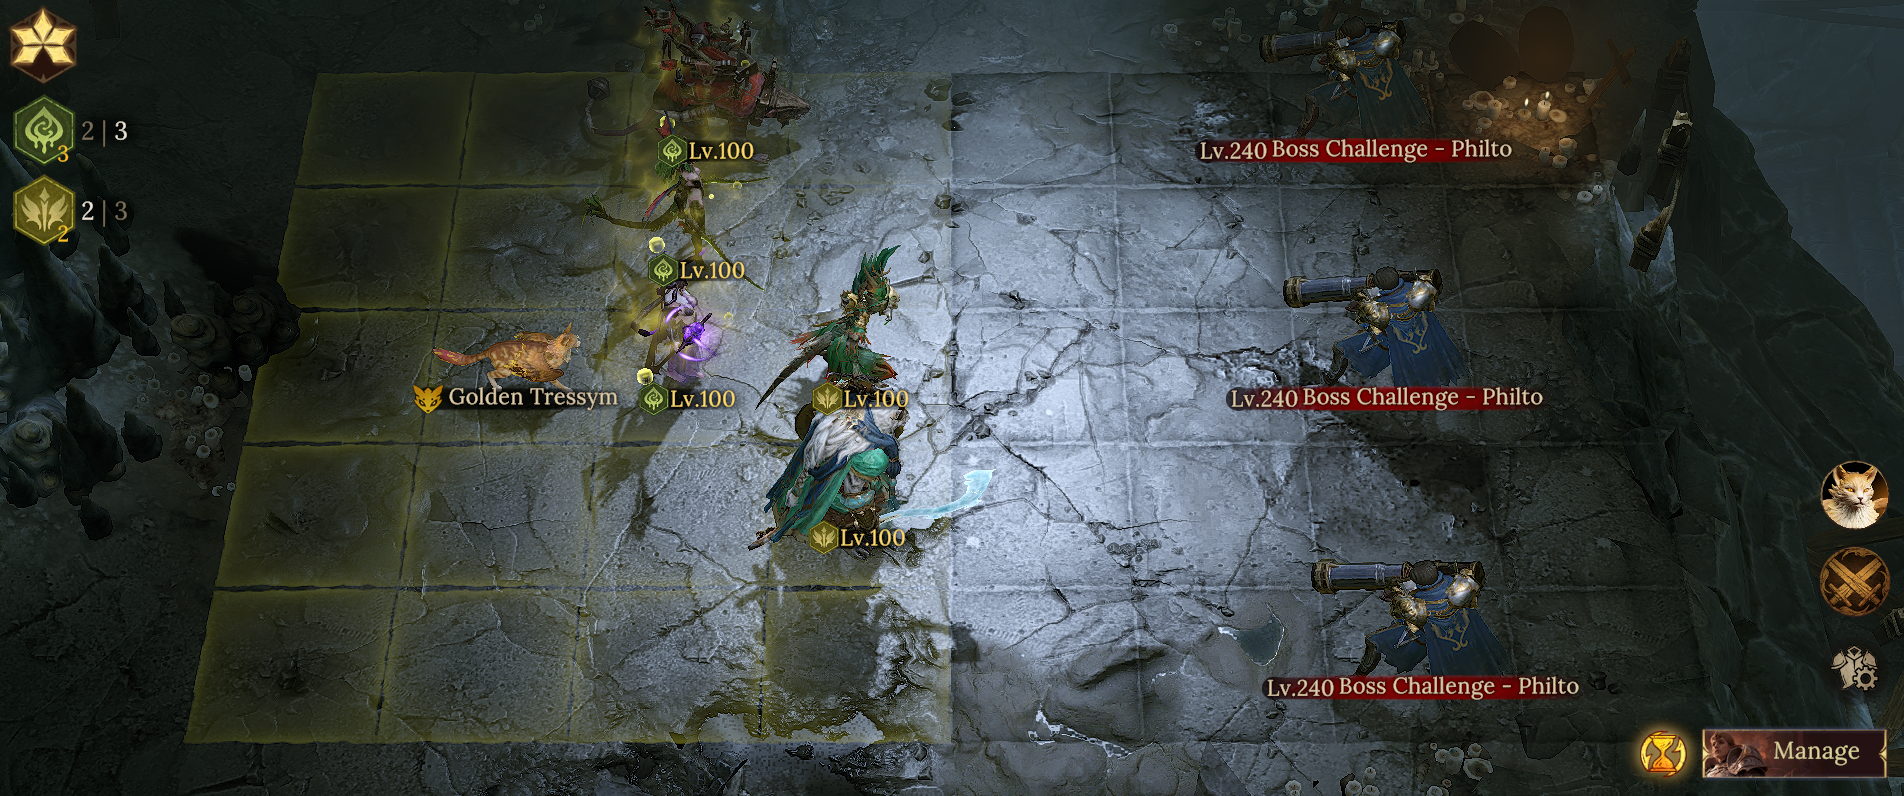 ● Team Aura / Familiar
We recommend pairing Rook's Attack Aura with the Tressym Familiar to maximize the team's damage output.
● Recommended Skill Timing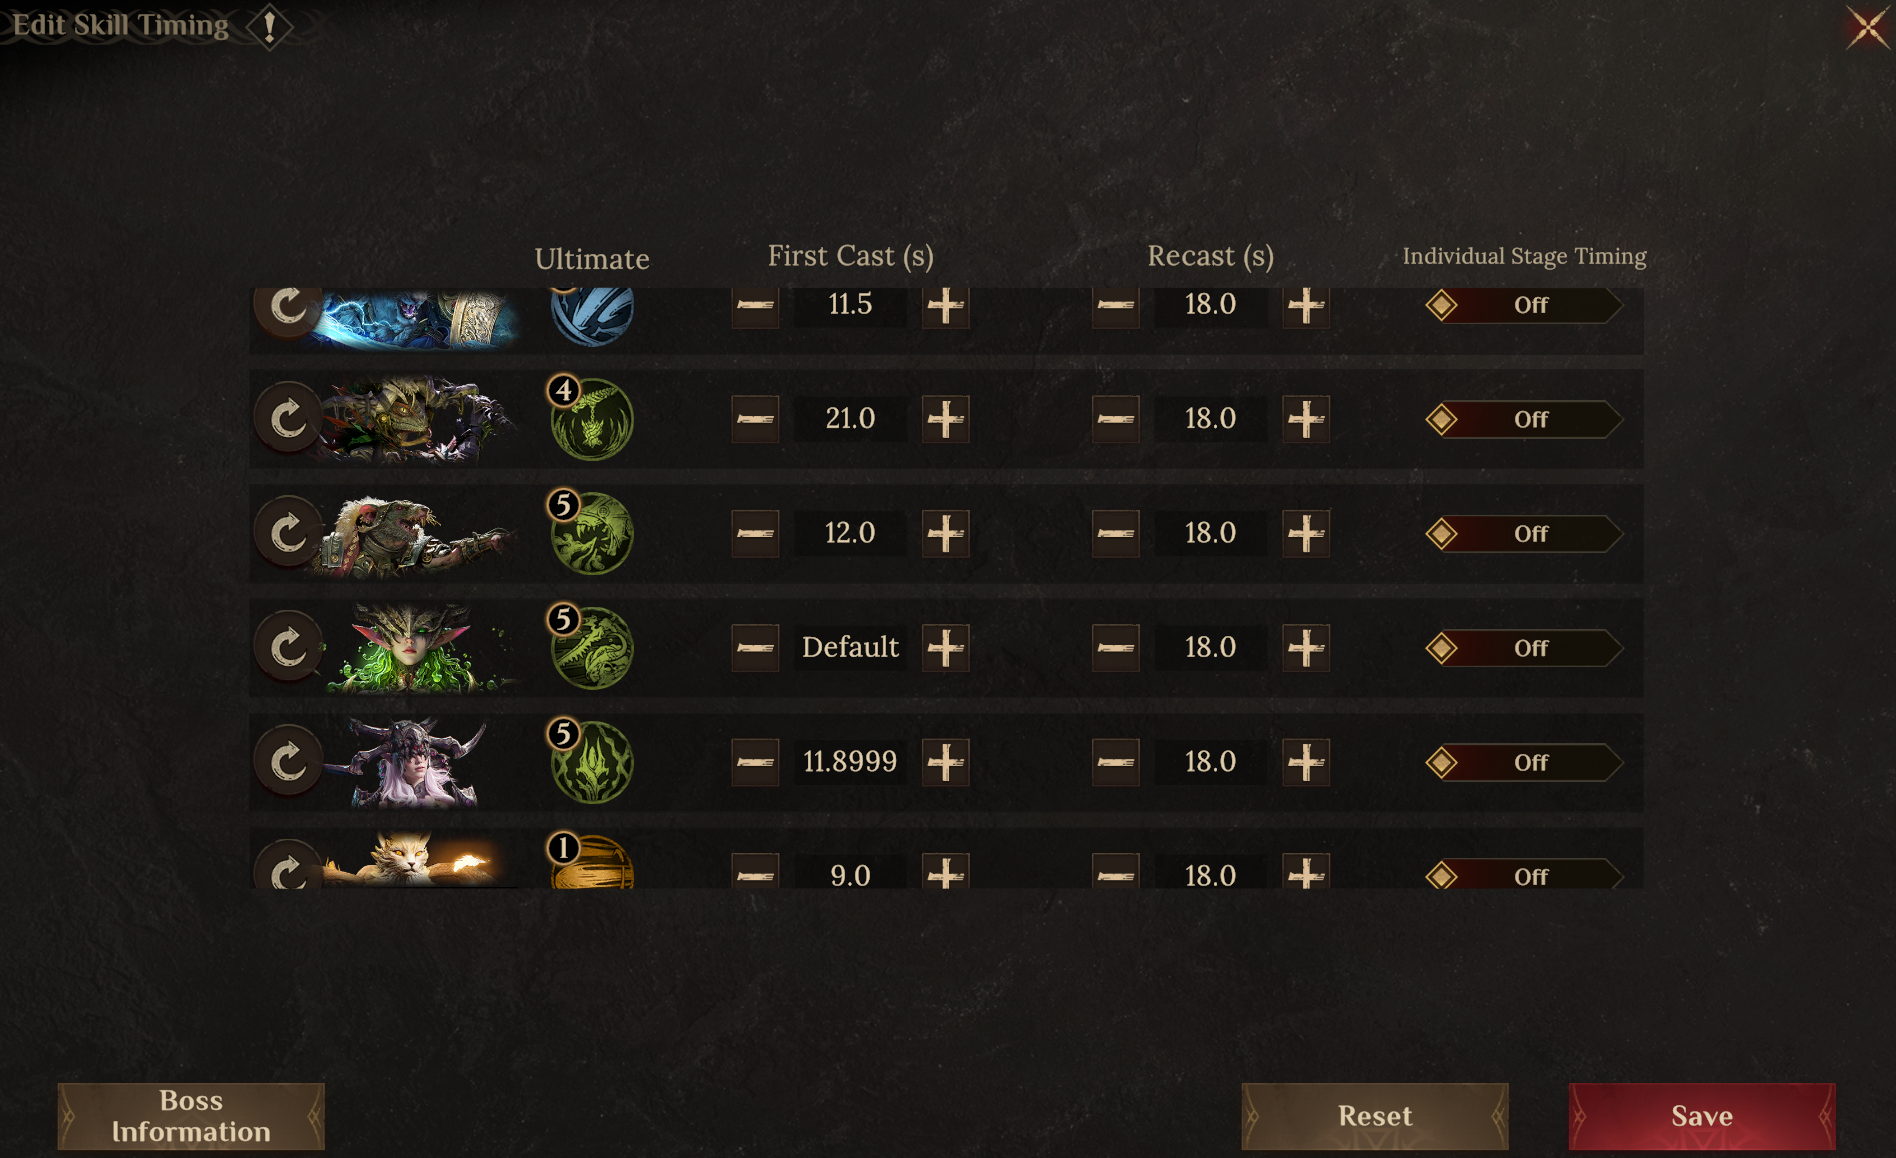 ● Important Notes
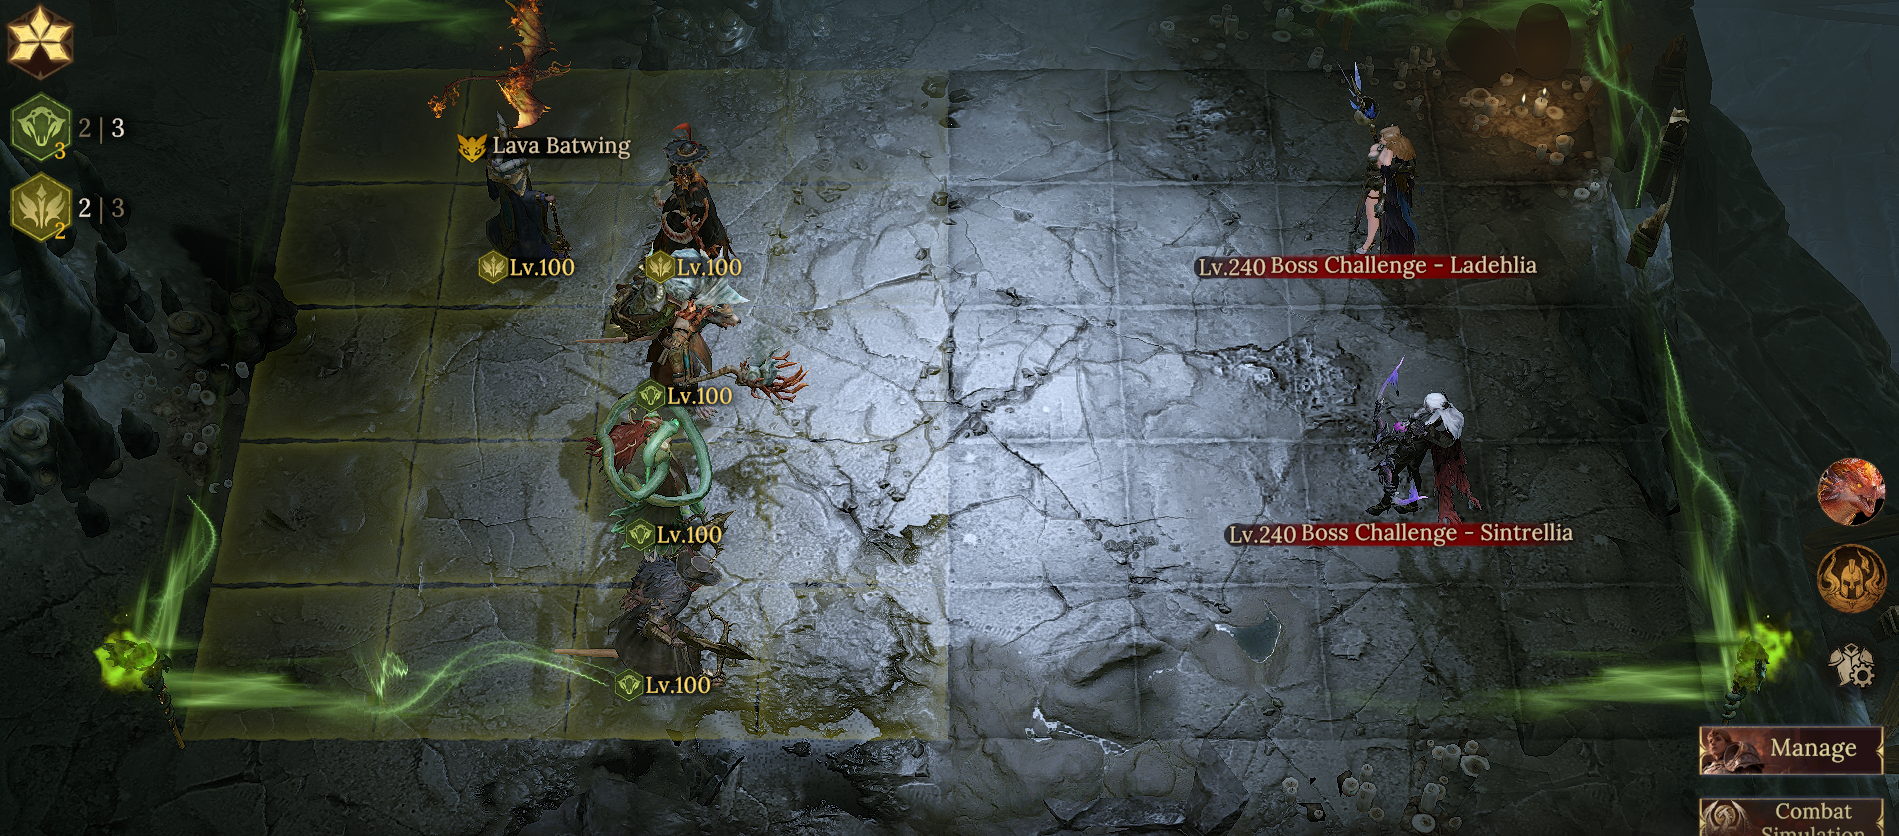
1. Position your heroes as shown to prevent the boss's skills from repeatedly hitting your backline. Reytah can be replaced with Pardis. If you don't have Maashtur, you can use Blah Blah, Oggok, or Nathaniel instead. Be sure to adjust your positioning if you make any substitutions.
2. Equip Rook with Steam Sonata or stack over 10 Skill Haste on all Corrosion heroes. This lets you manually cast Rook's ultimate skill one more time just before the challenge ends, achieving higher total damage.
● Hero Substitution Options
Maashtur: Skill Haste > 60;
Sacredeia, Maashtur, Reytah: Accuracy > 290;
Reytah: Focus on Attack and ensure Skill Haste > 12.
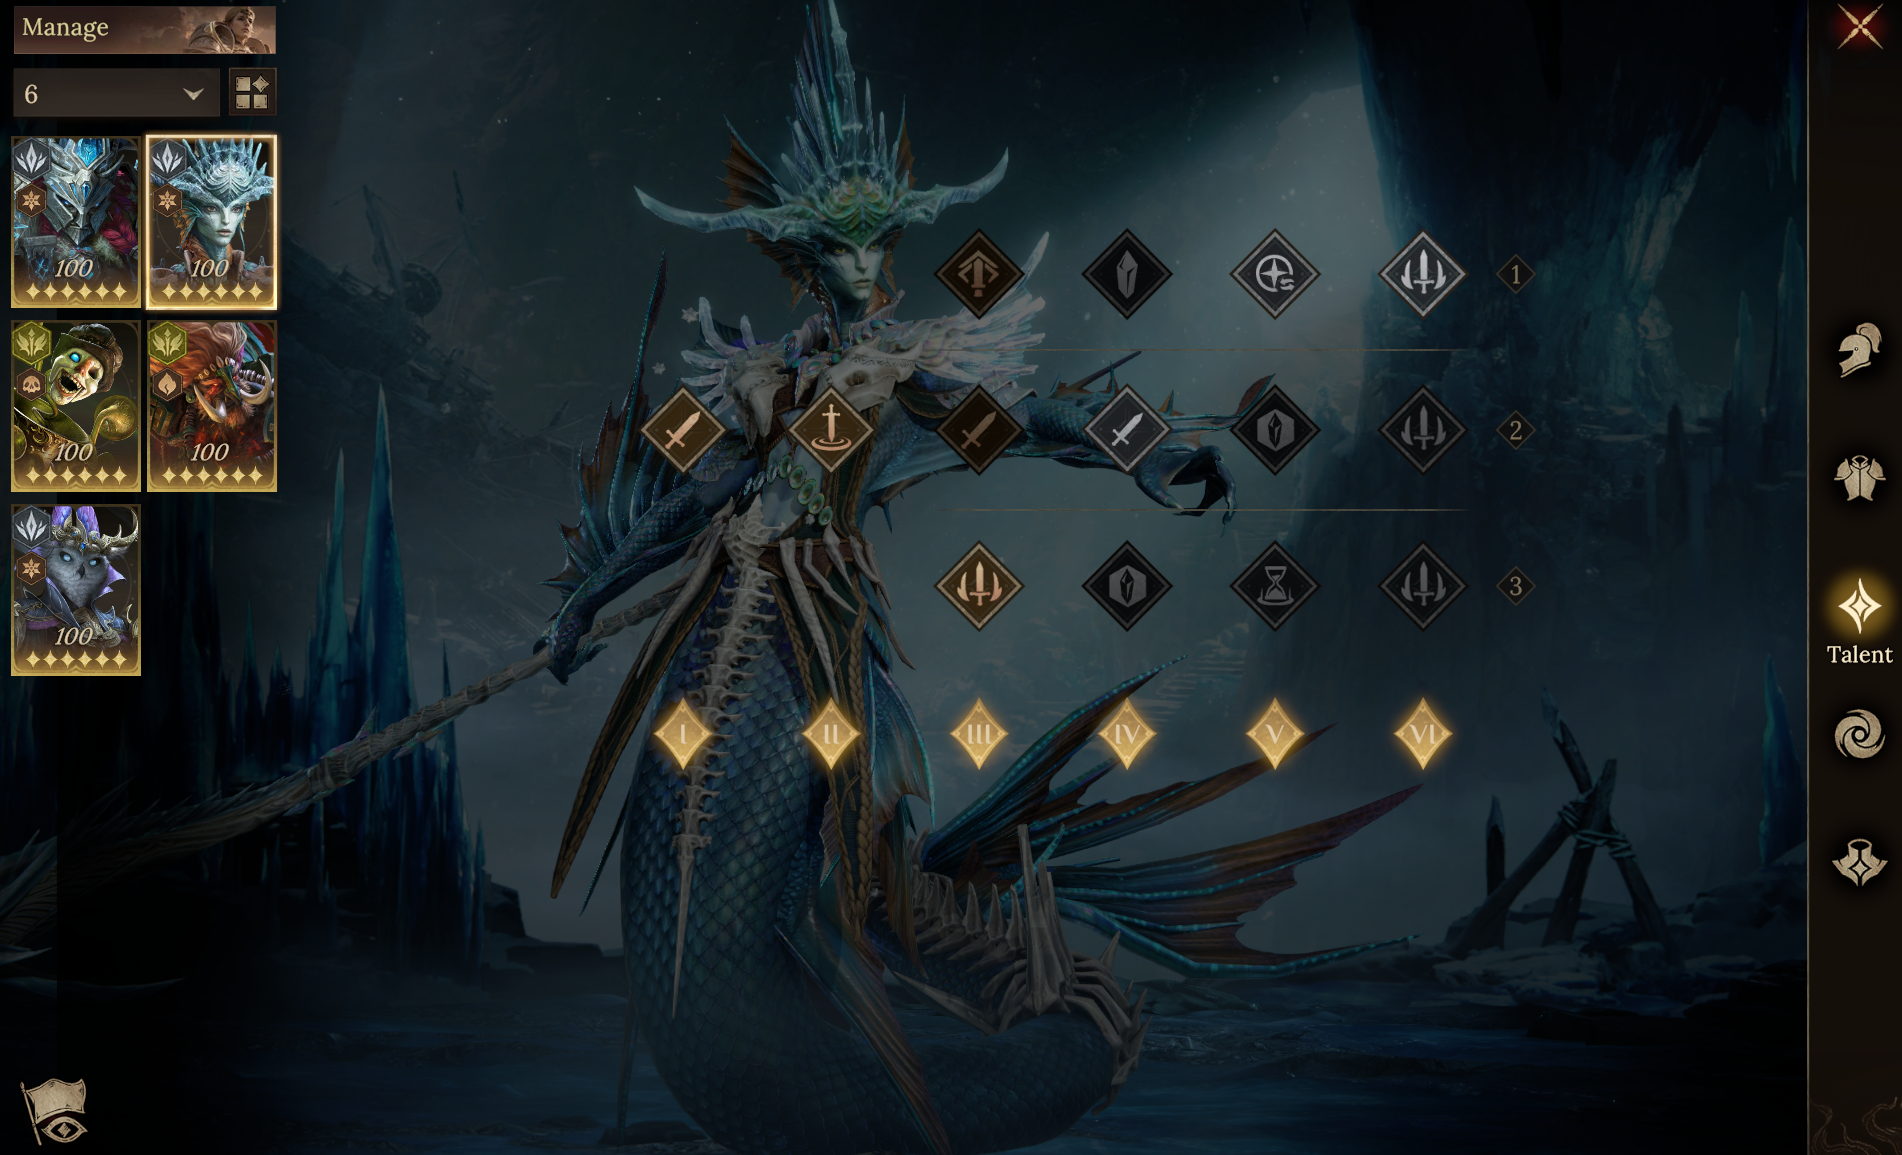
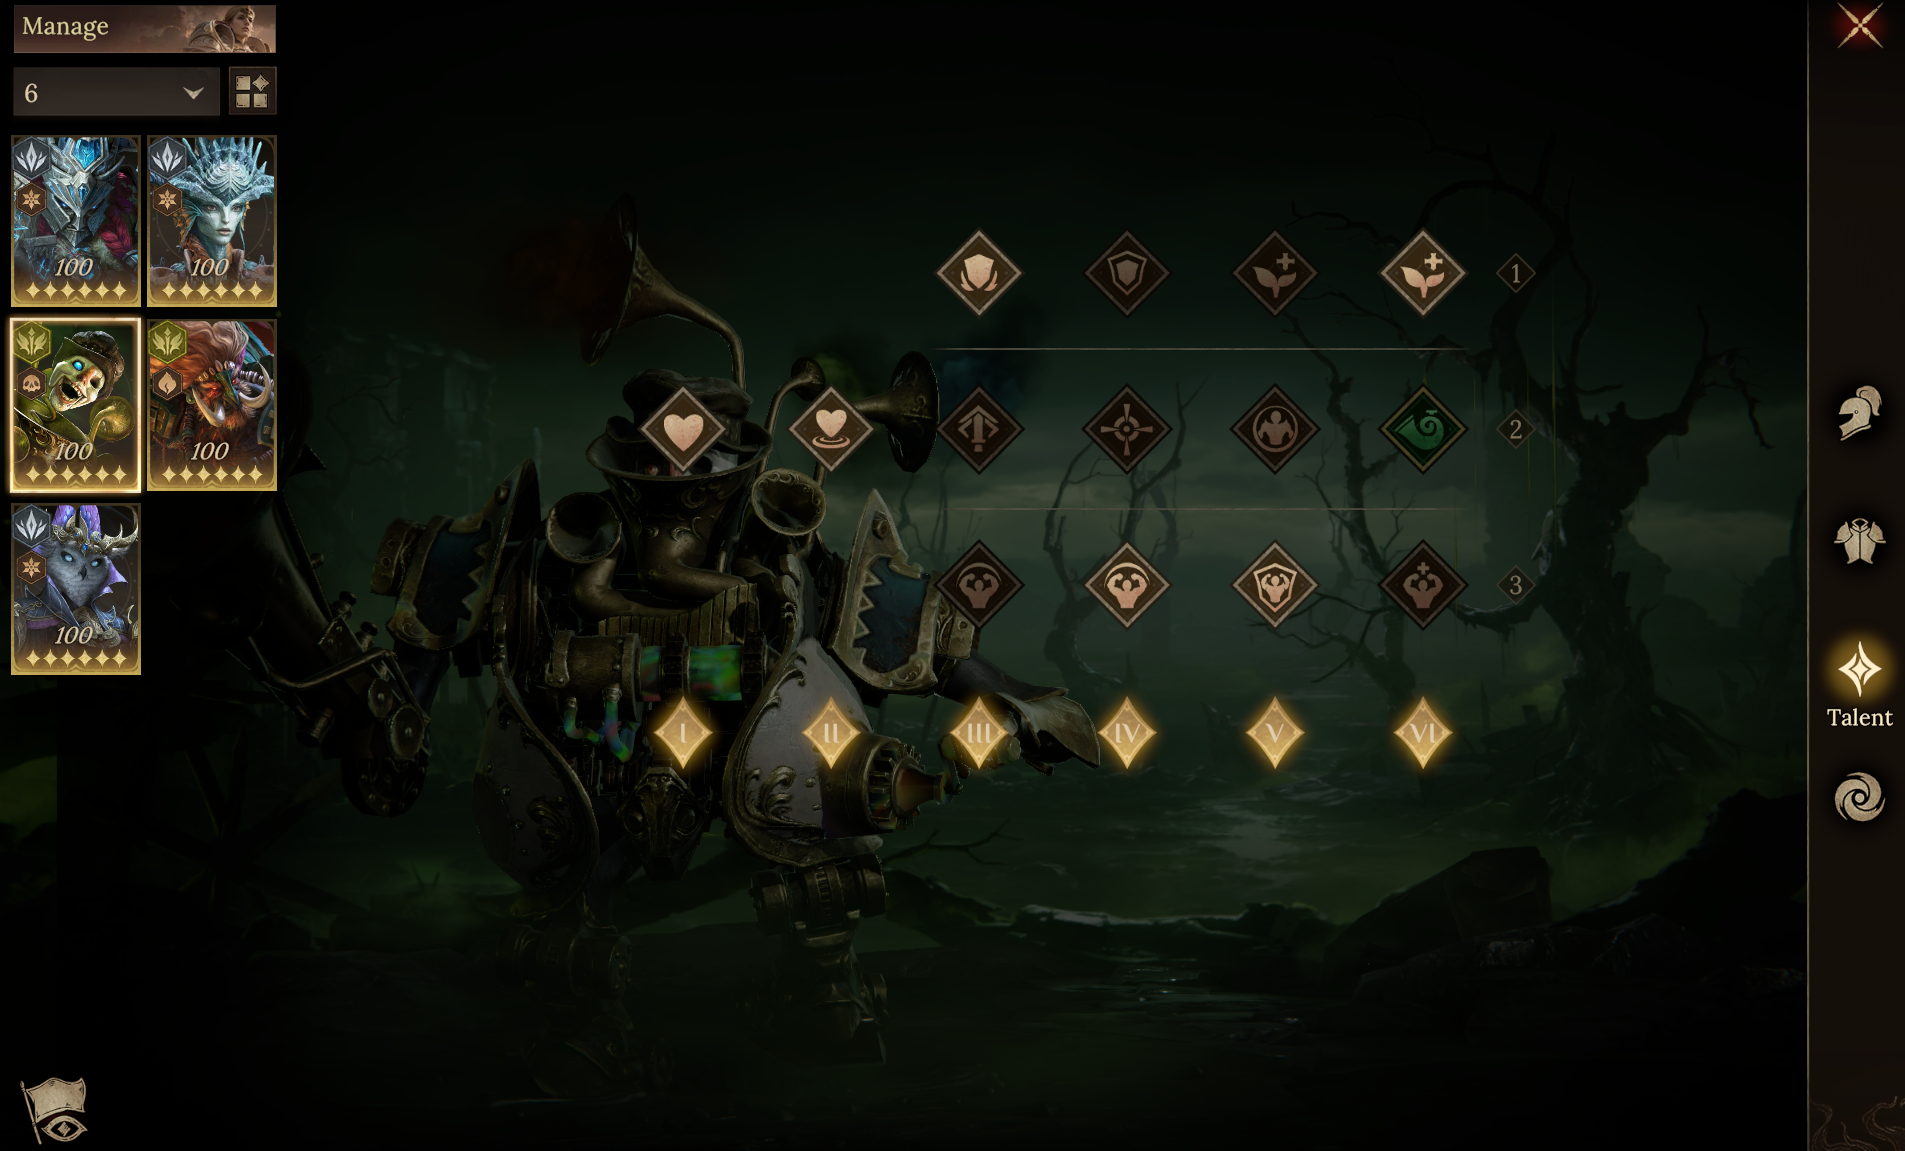
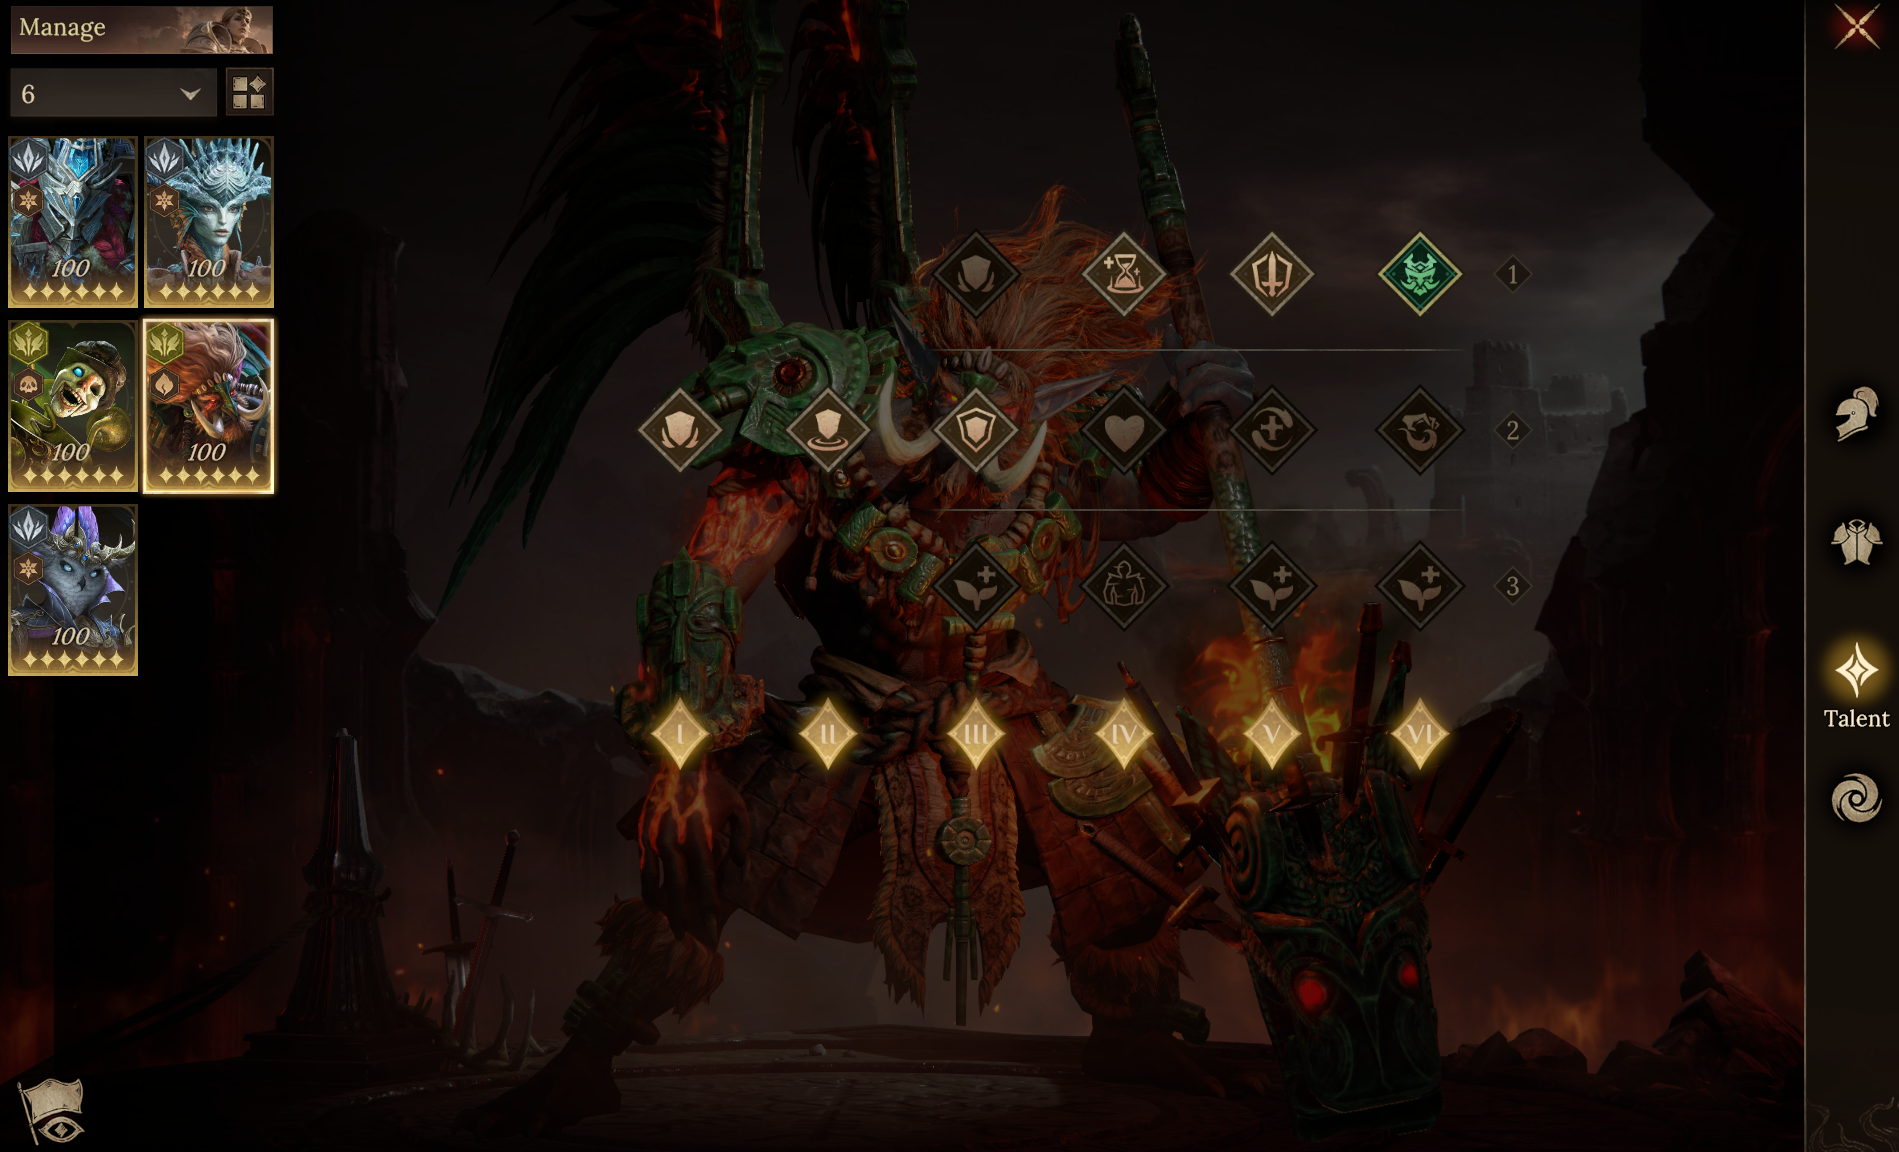
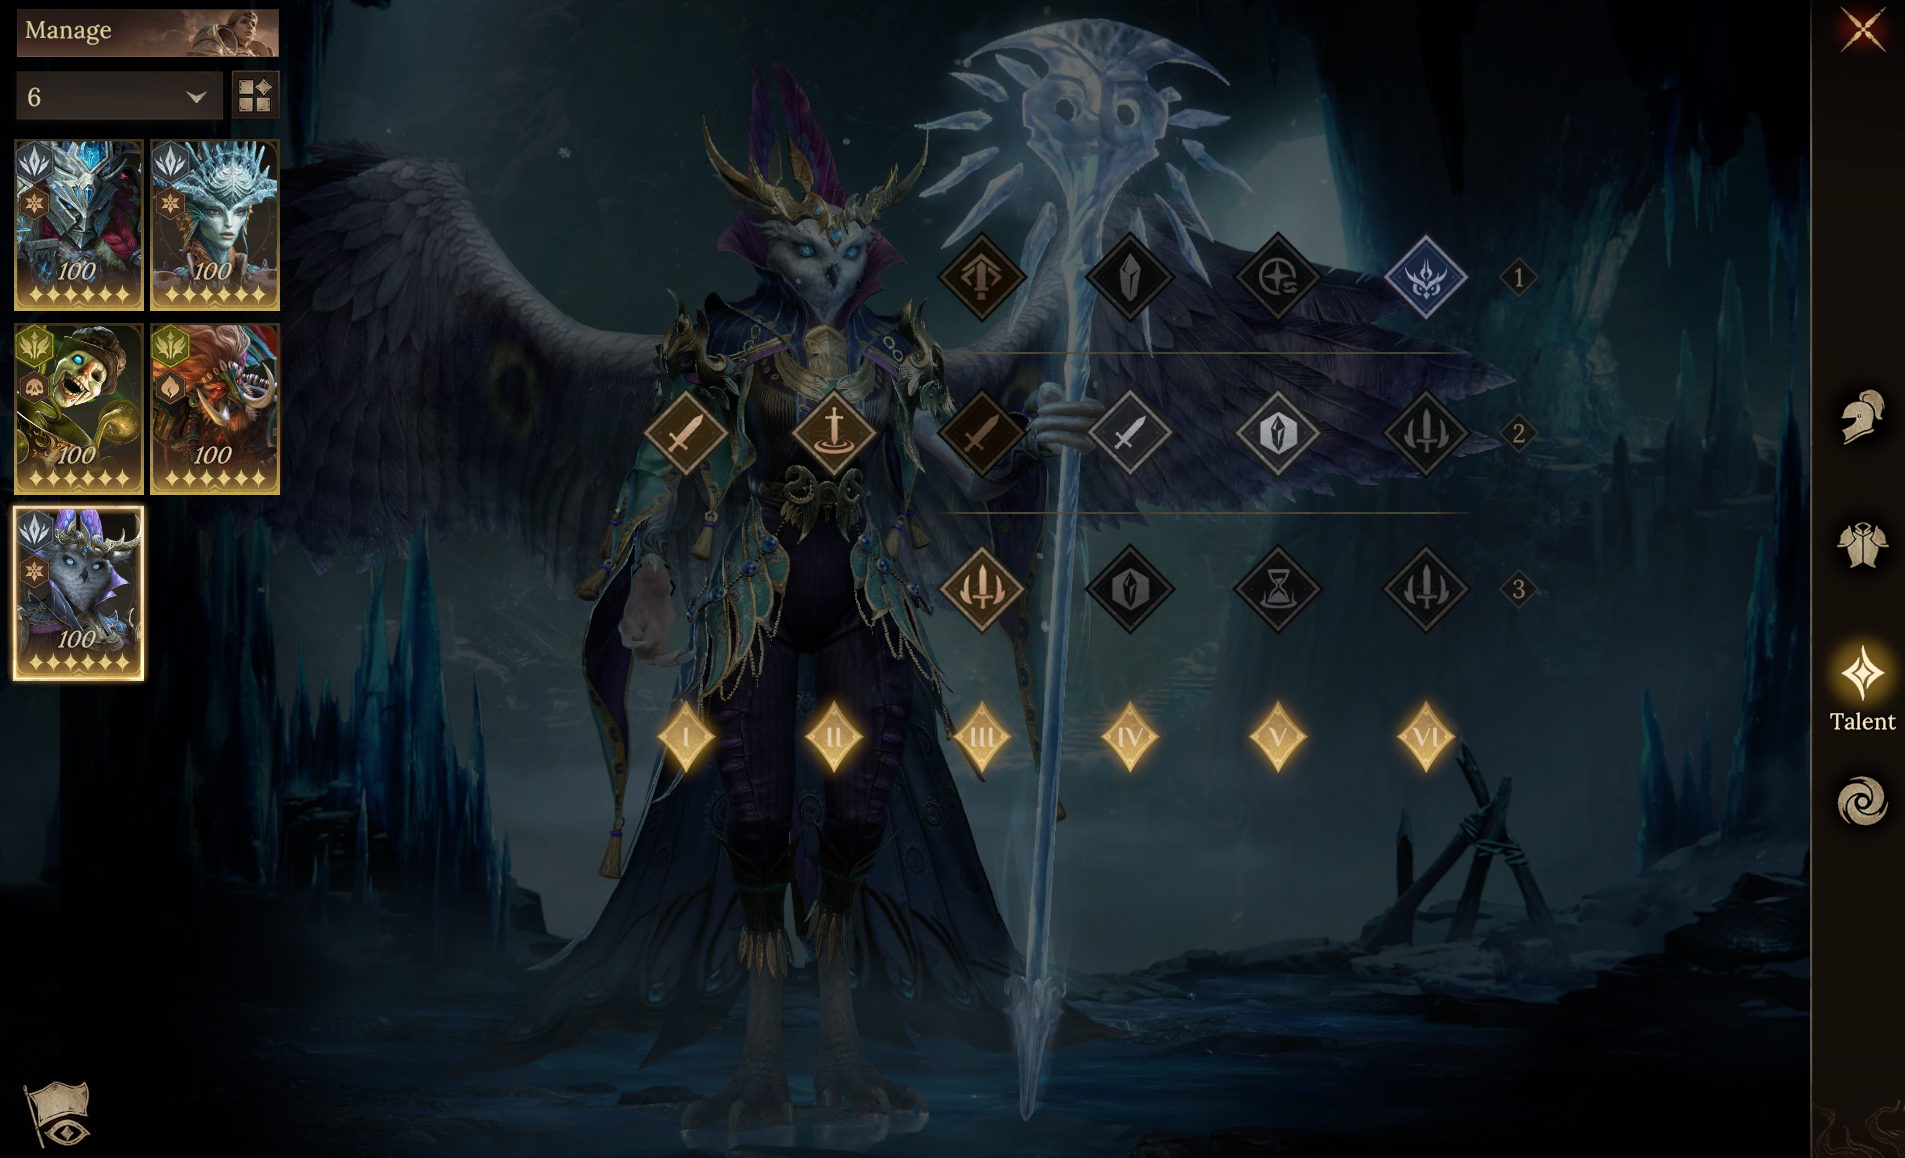
● Recommended Gear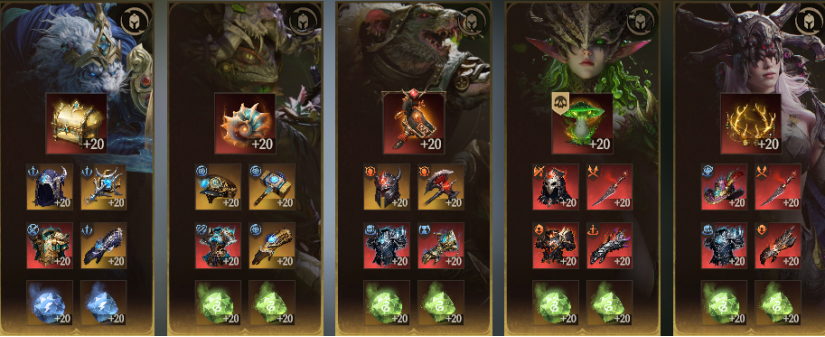 ● Recommended Talents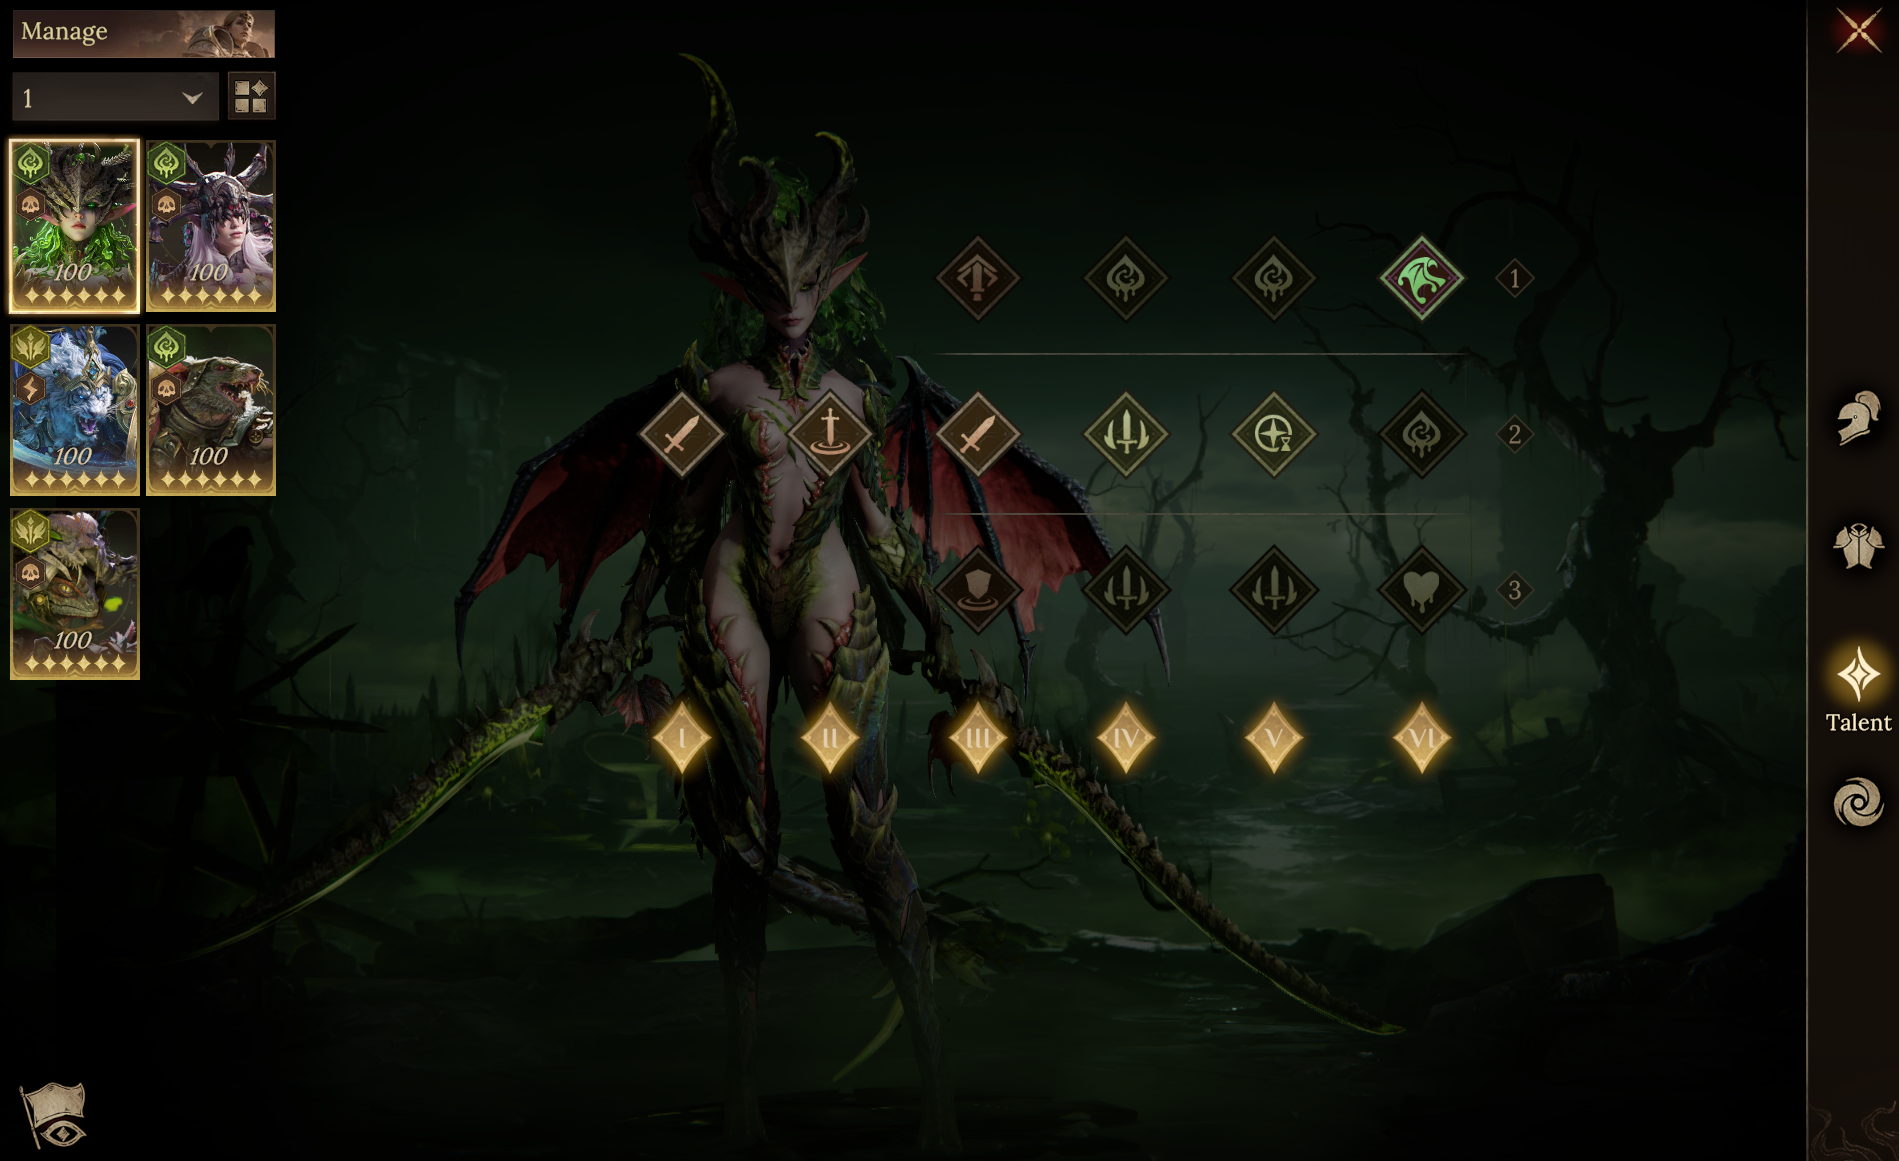
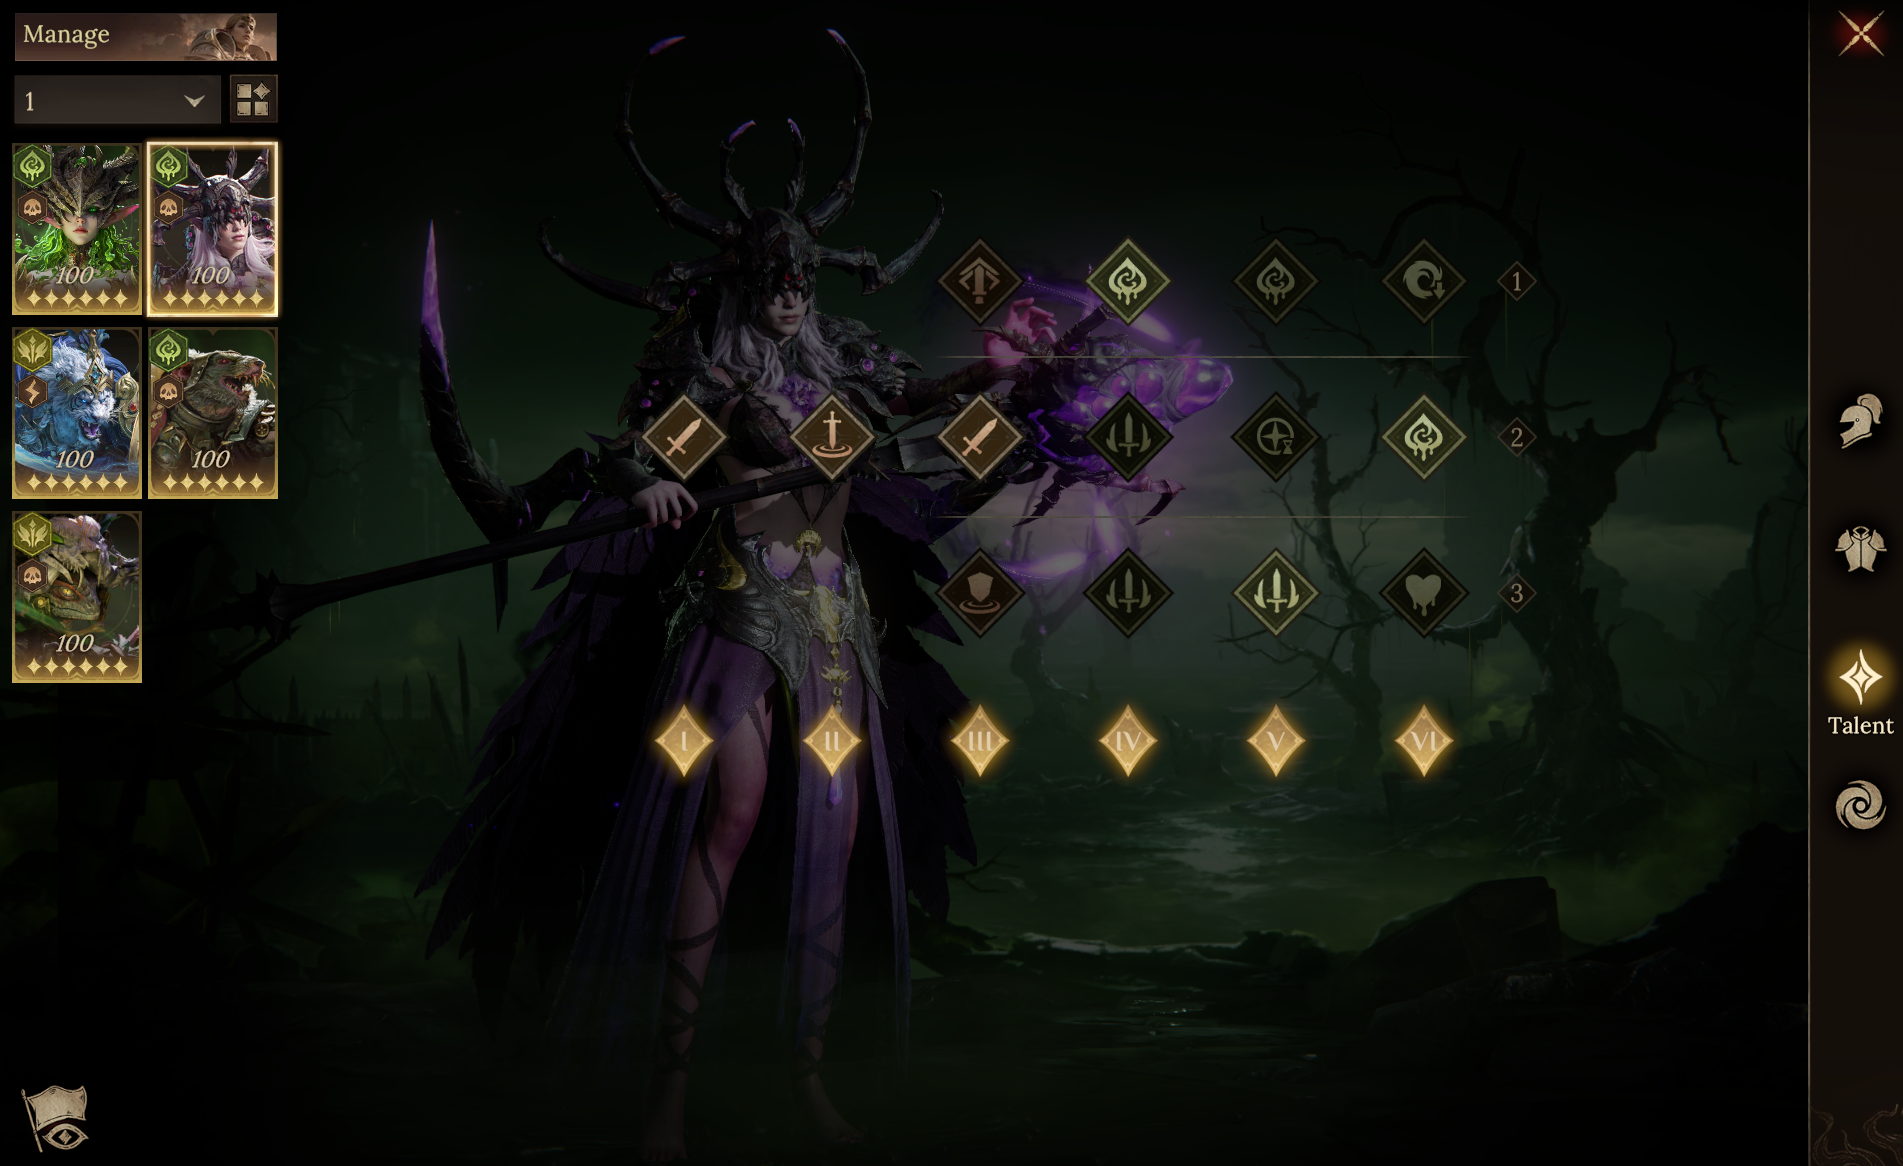
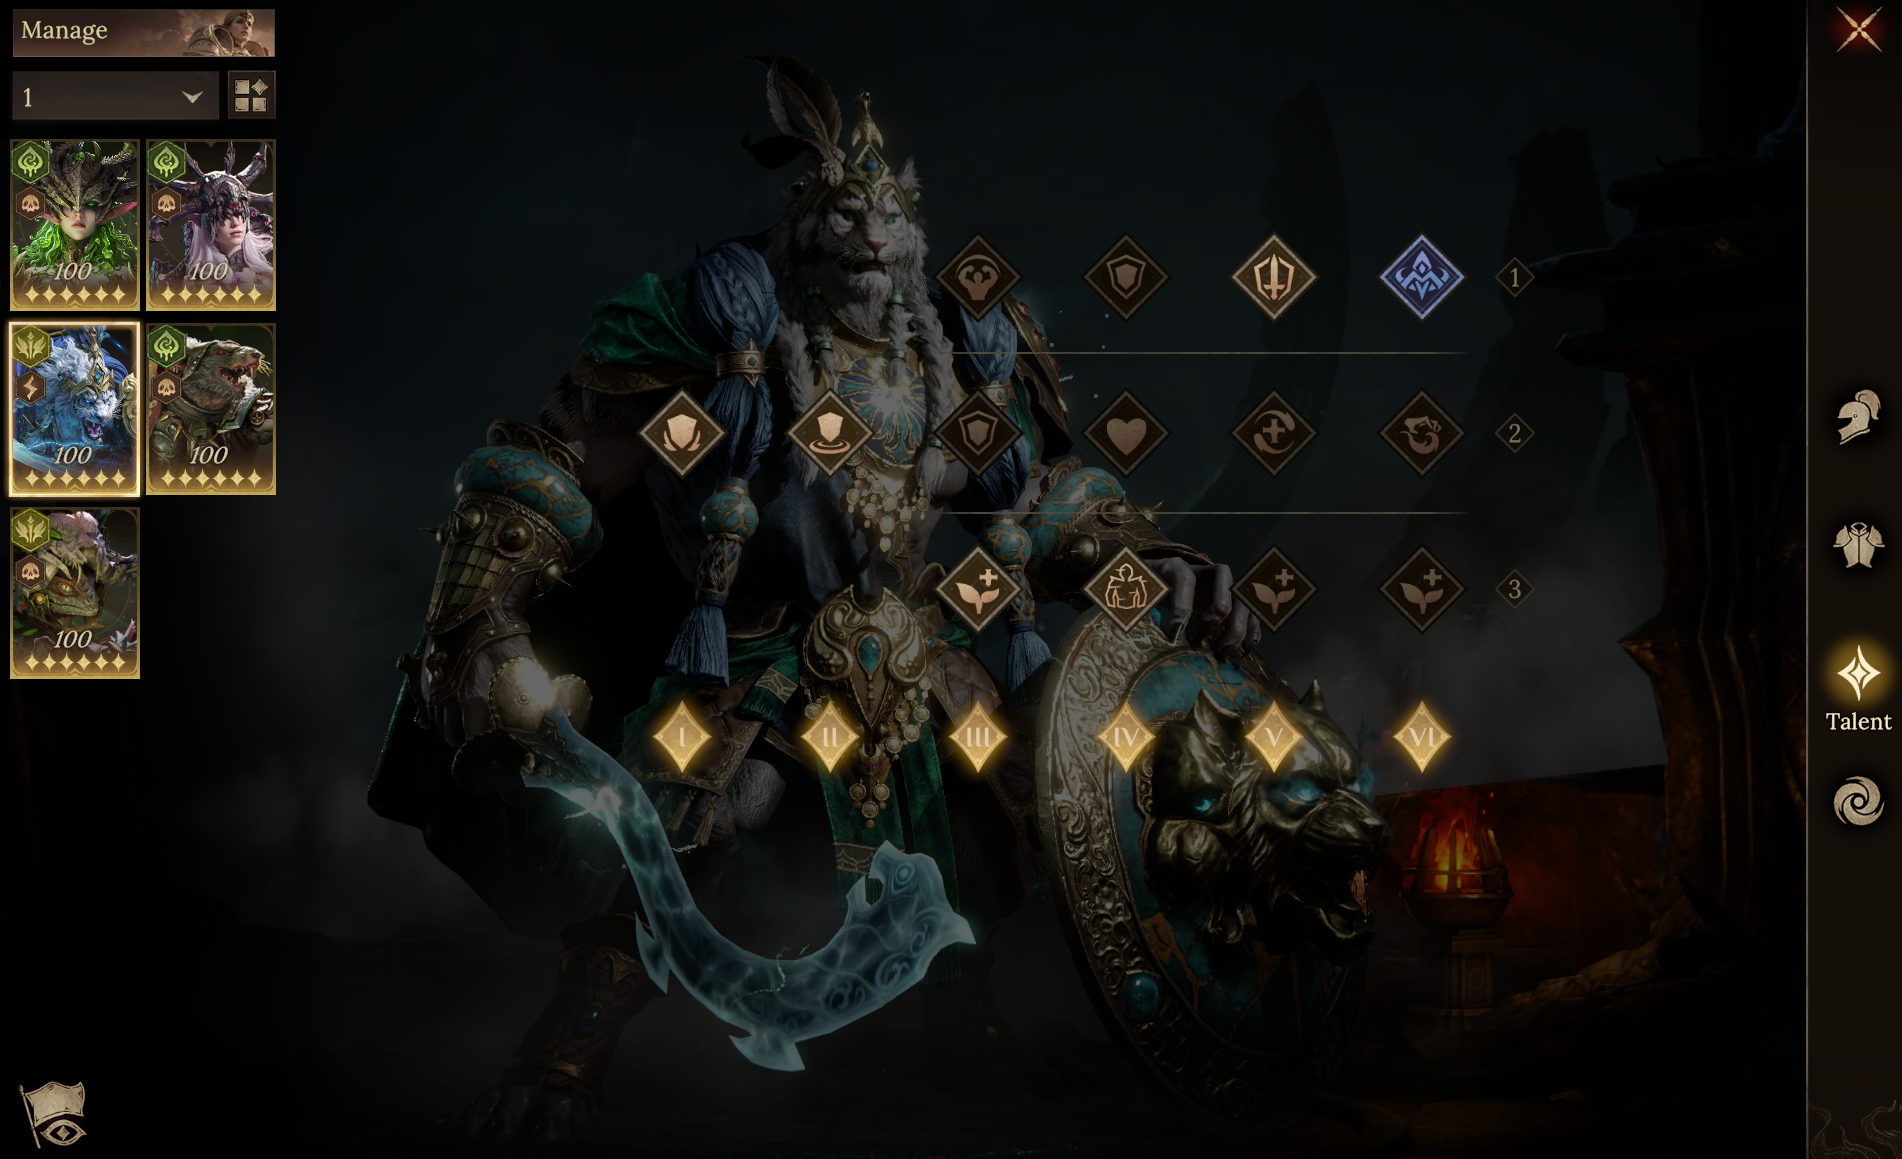
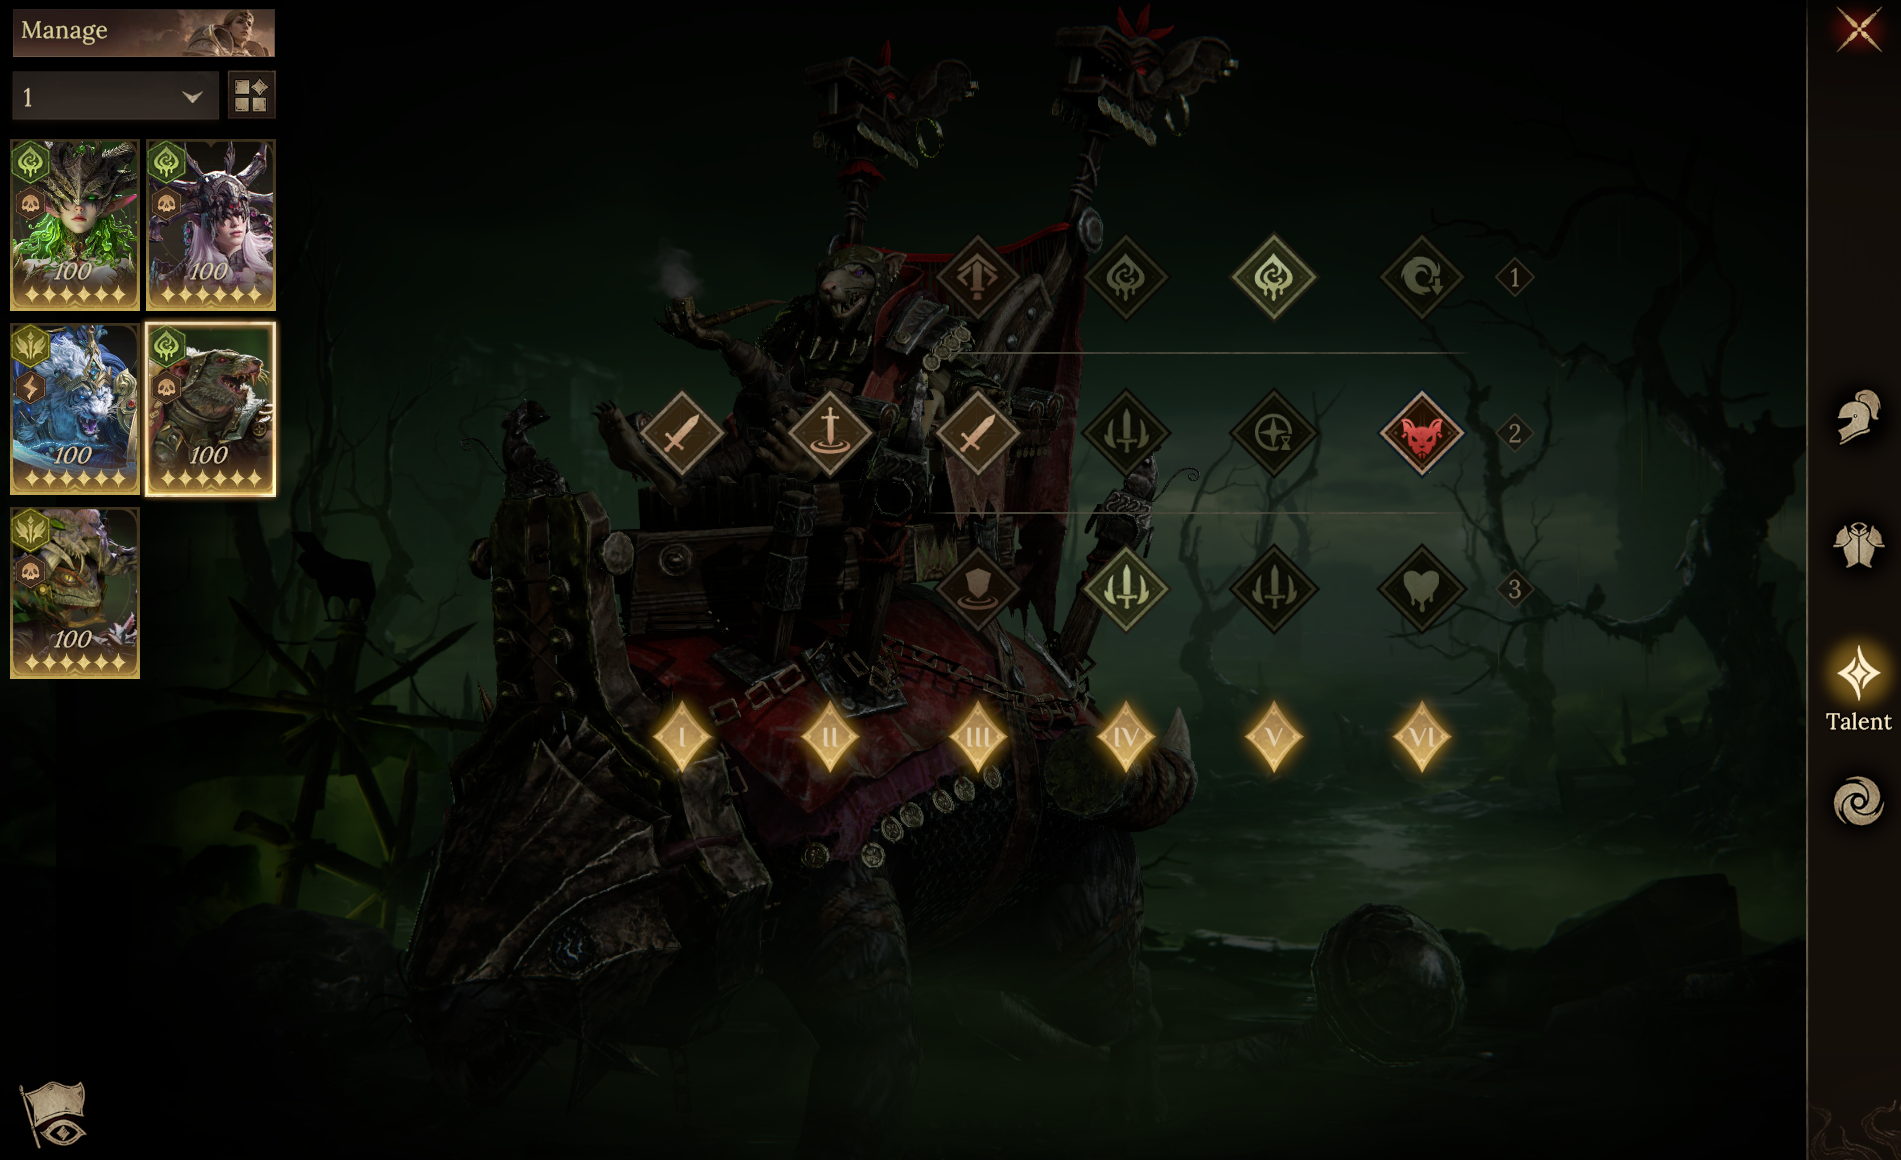
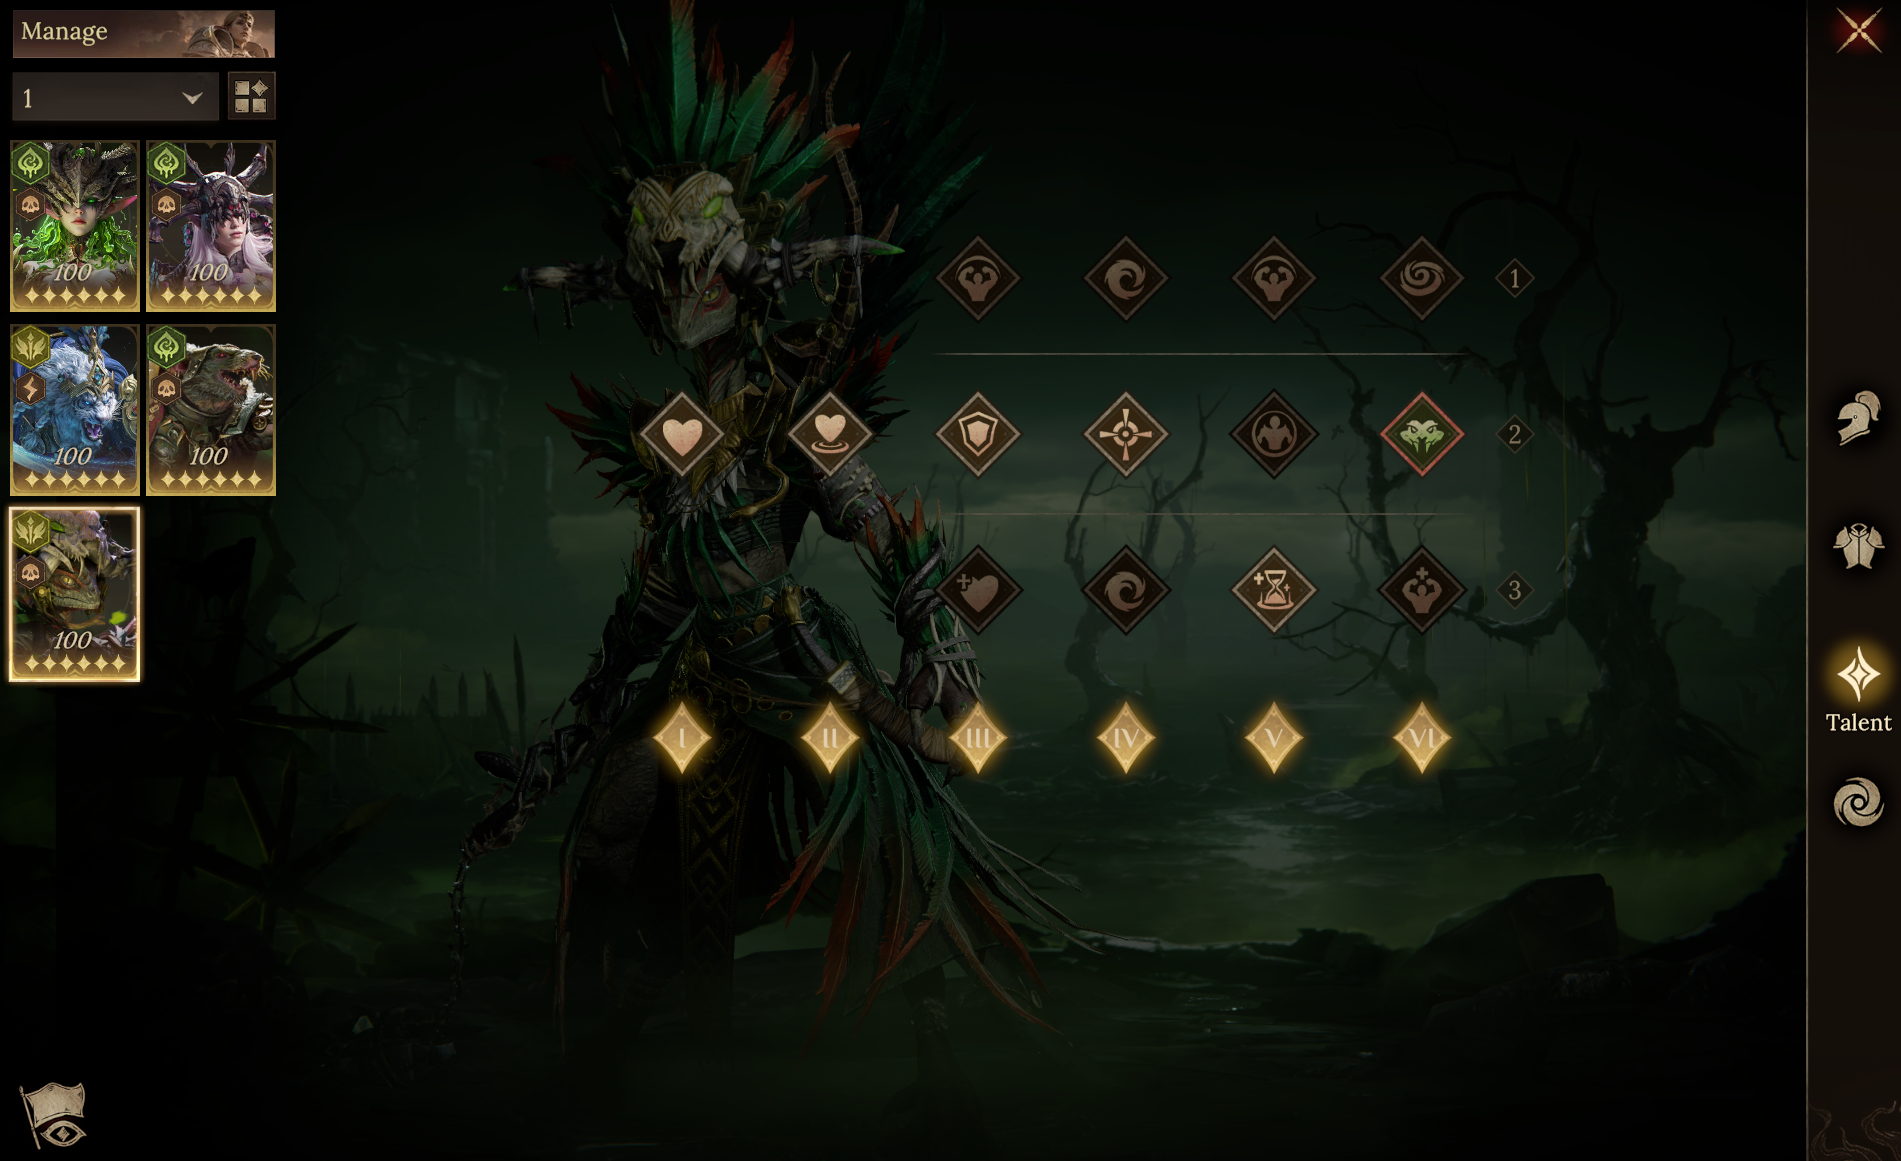
 ● Team Aura / Familiar
This team composition can only use Nathaniel's HP Aura. We recommend selecting the Batwing Familiar to maximize the team's damage output.
● Recommended Skill Timing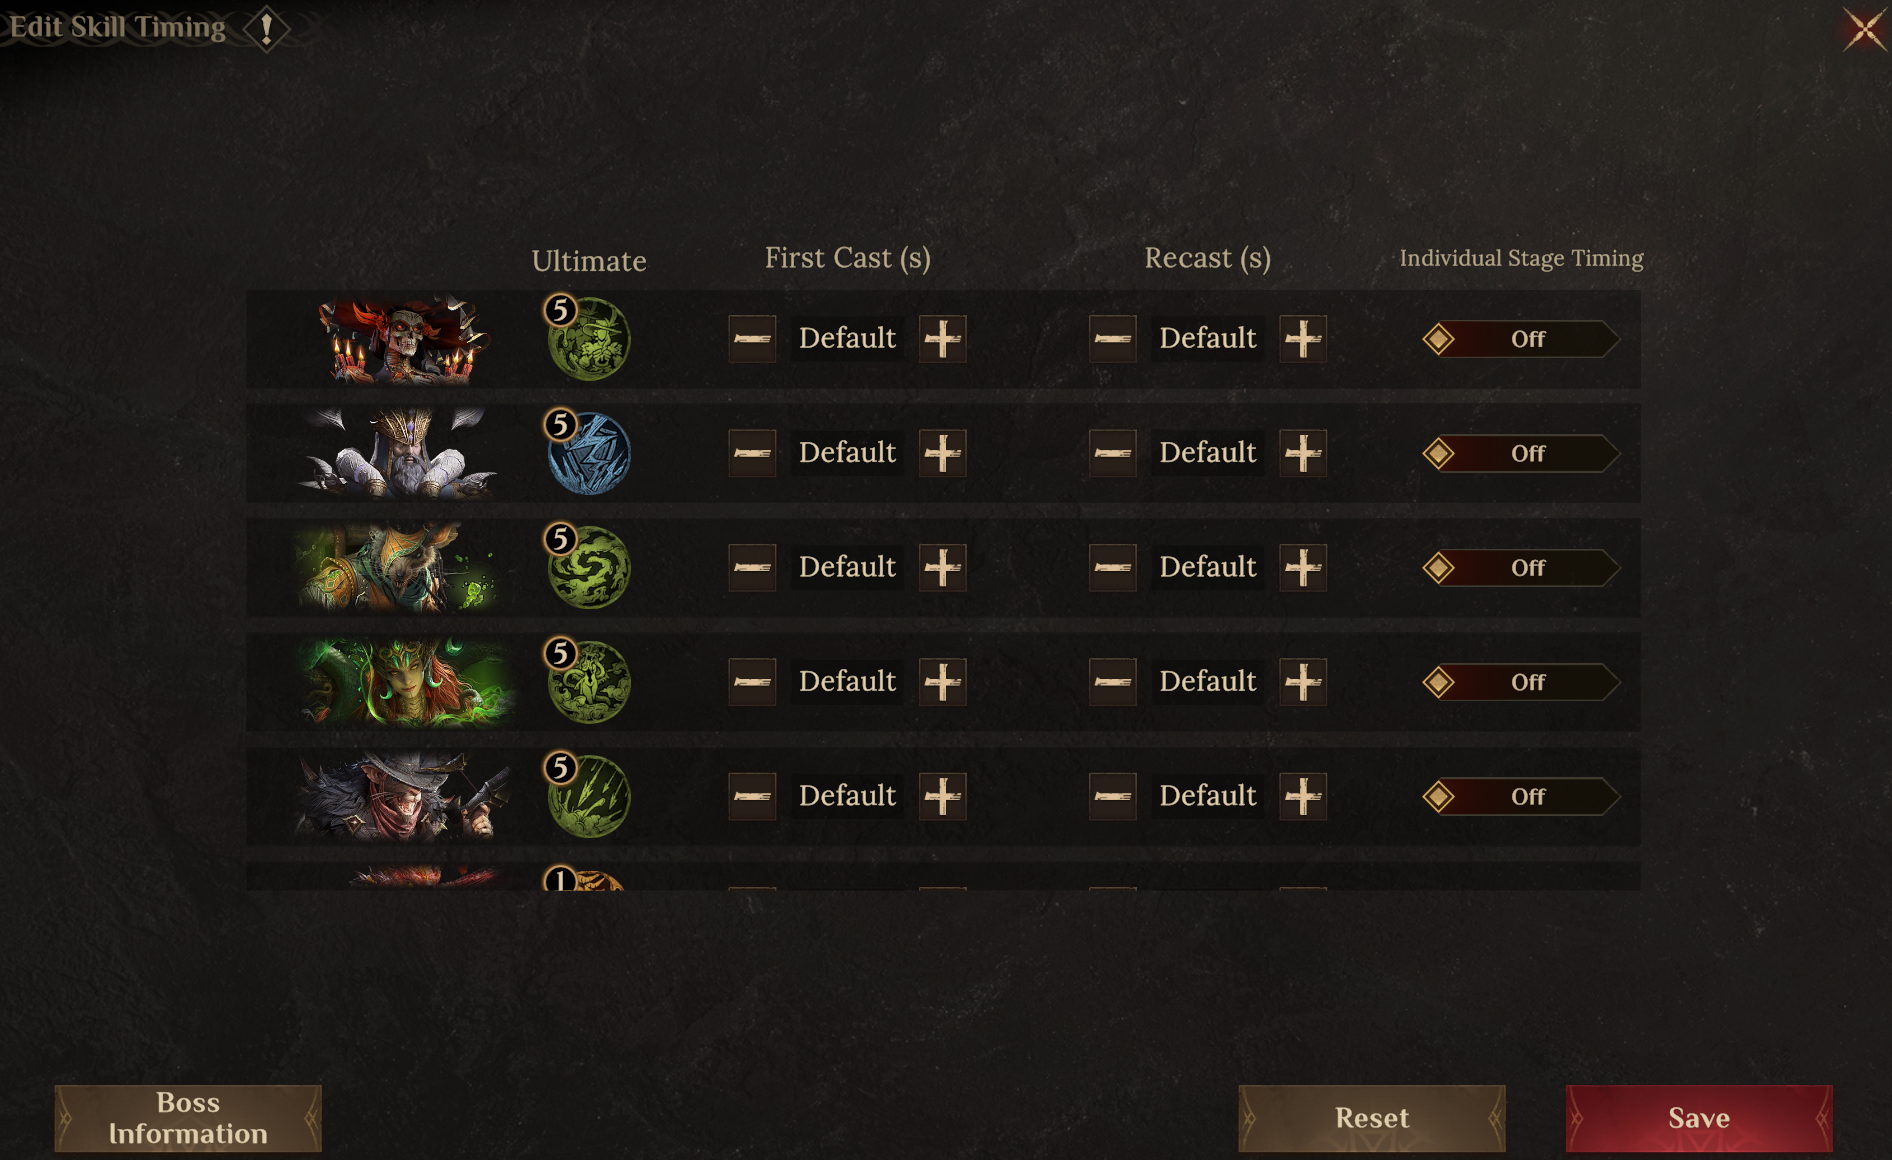 ● Important Notes
1. Position your team as shown in the image to make enemy summoned units spawn within your skill range, ensuring you can attack 4 targets at once.
2. Travelers without Sleight can replace him with Corrin or Durango. If you have a well-built Reytah, Blah Blah, Oggok, or Maashtur, you can also adopt a 1 Support + 4 DPS strategy by adding Vicana, Lothair, or Sacredeia to boost your damage output.
● Hero Substitution Options
Nathaniel: Skill Haste > 60. For all other stats, prioritize stacking HP.
Calavera: Skill Haste > 40. For all other stats, prioritize stacking Accuracy and Defense.
It’s recommended to equip her with Bone Resonance and stack >450 Accuracy.
In this case, other Toxin heroes only need >130 Accuracy.
Stack as much Skill Haste as possible for Twitch and Sleight through Rune Secondary Attributes.
● Recommended Gear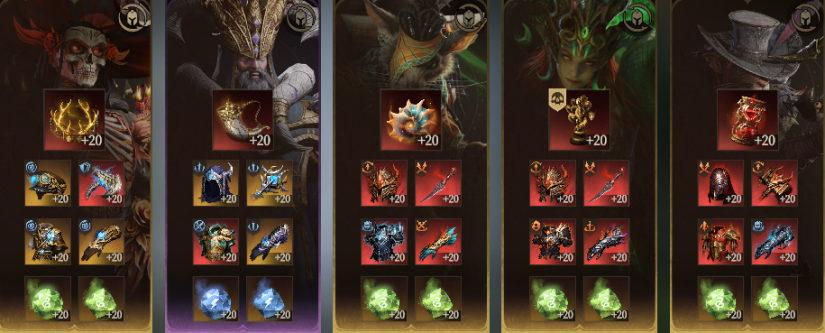 ● Recommended Talents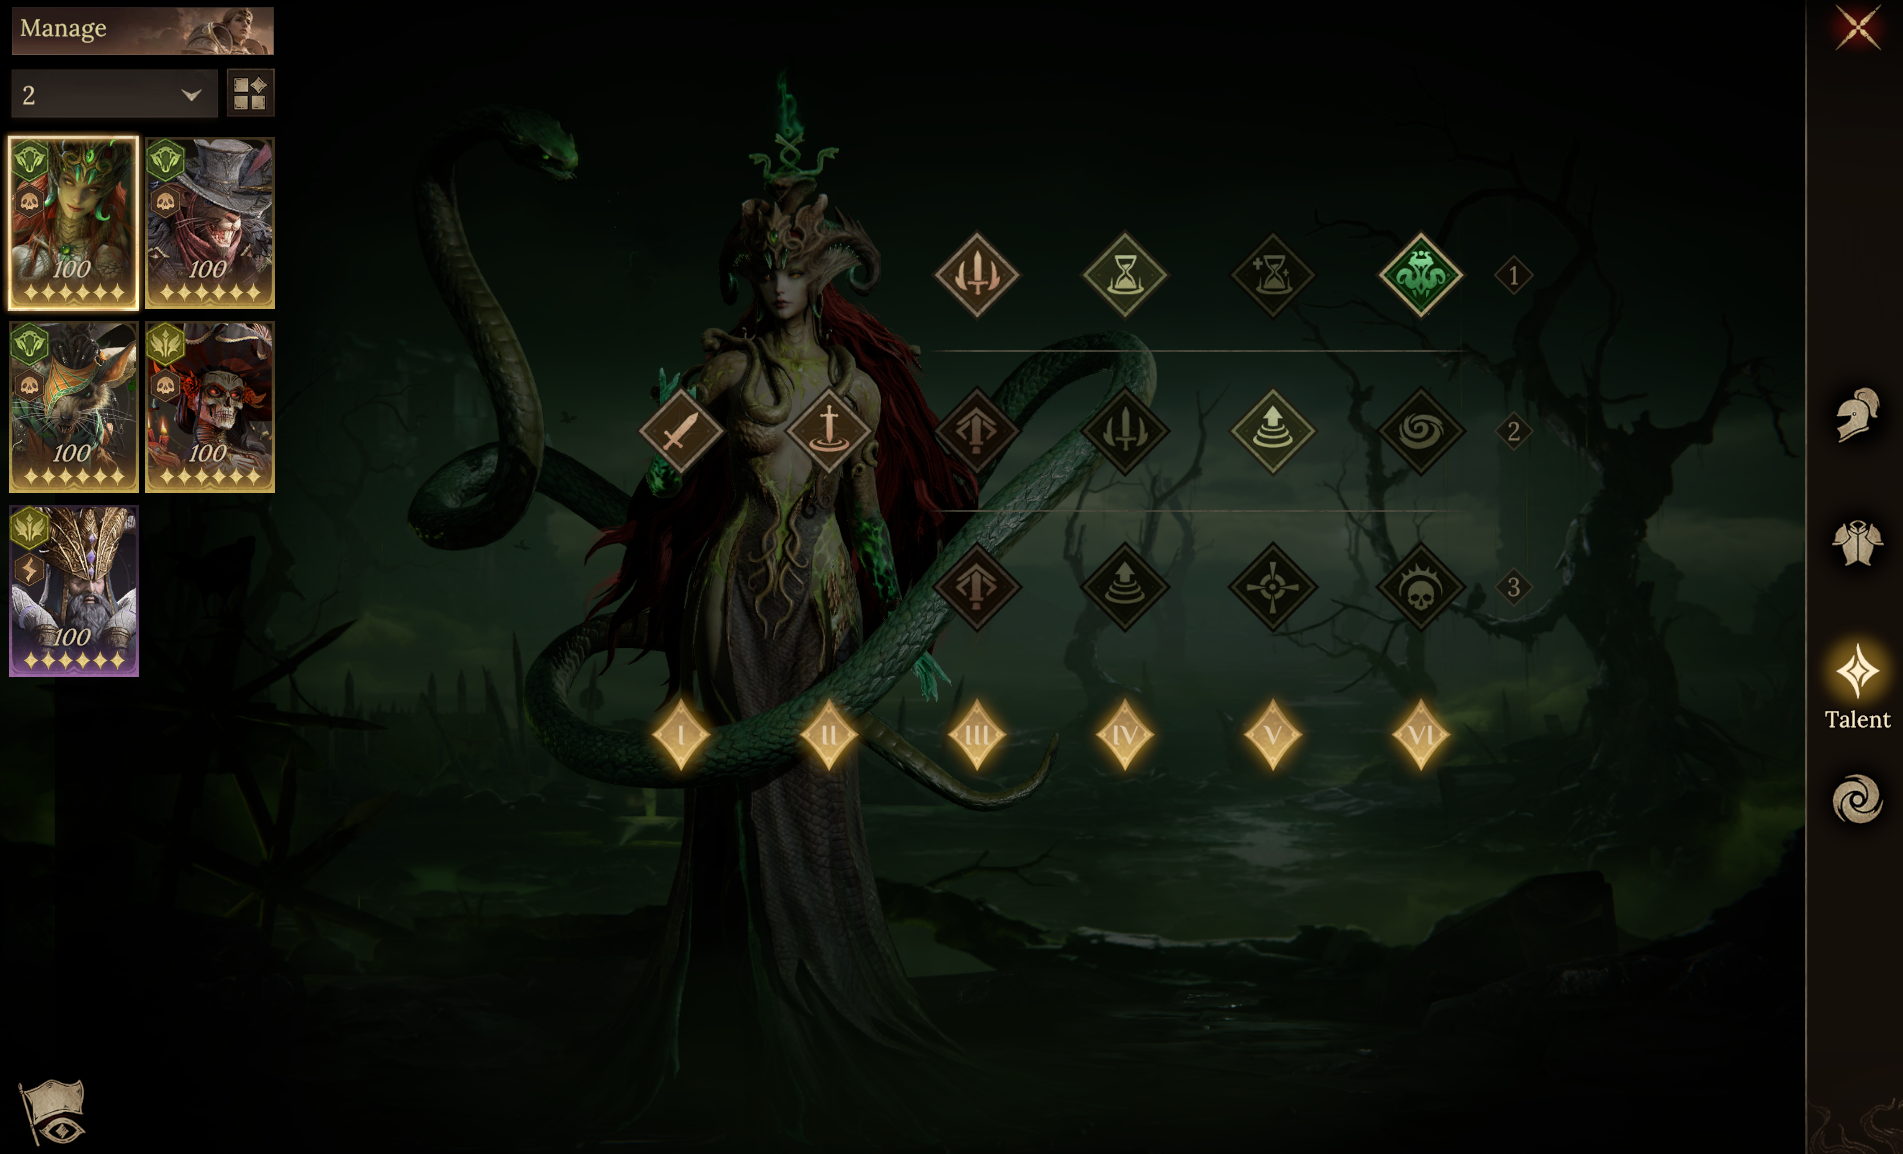
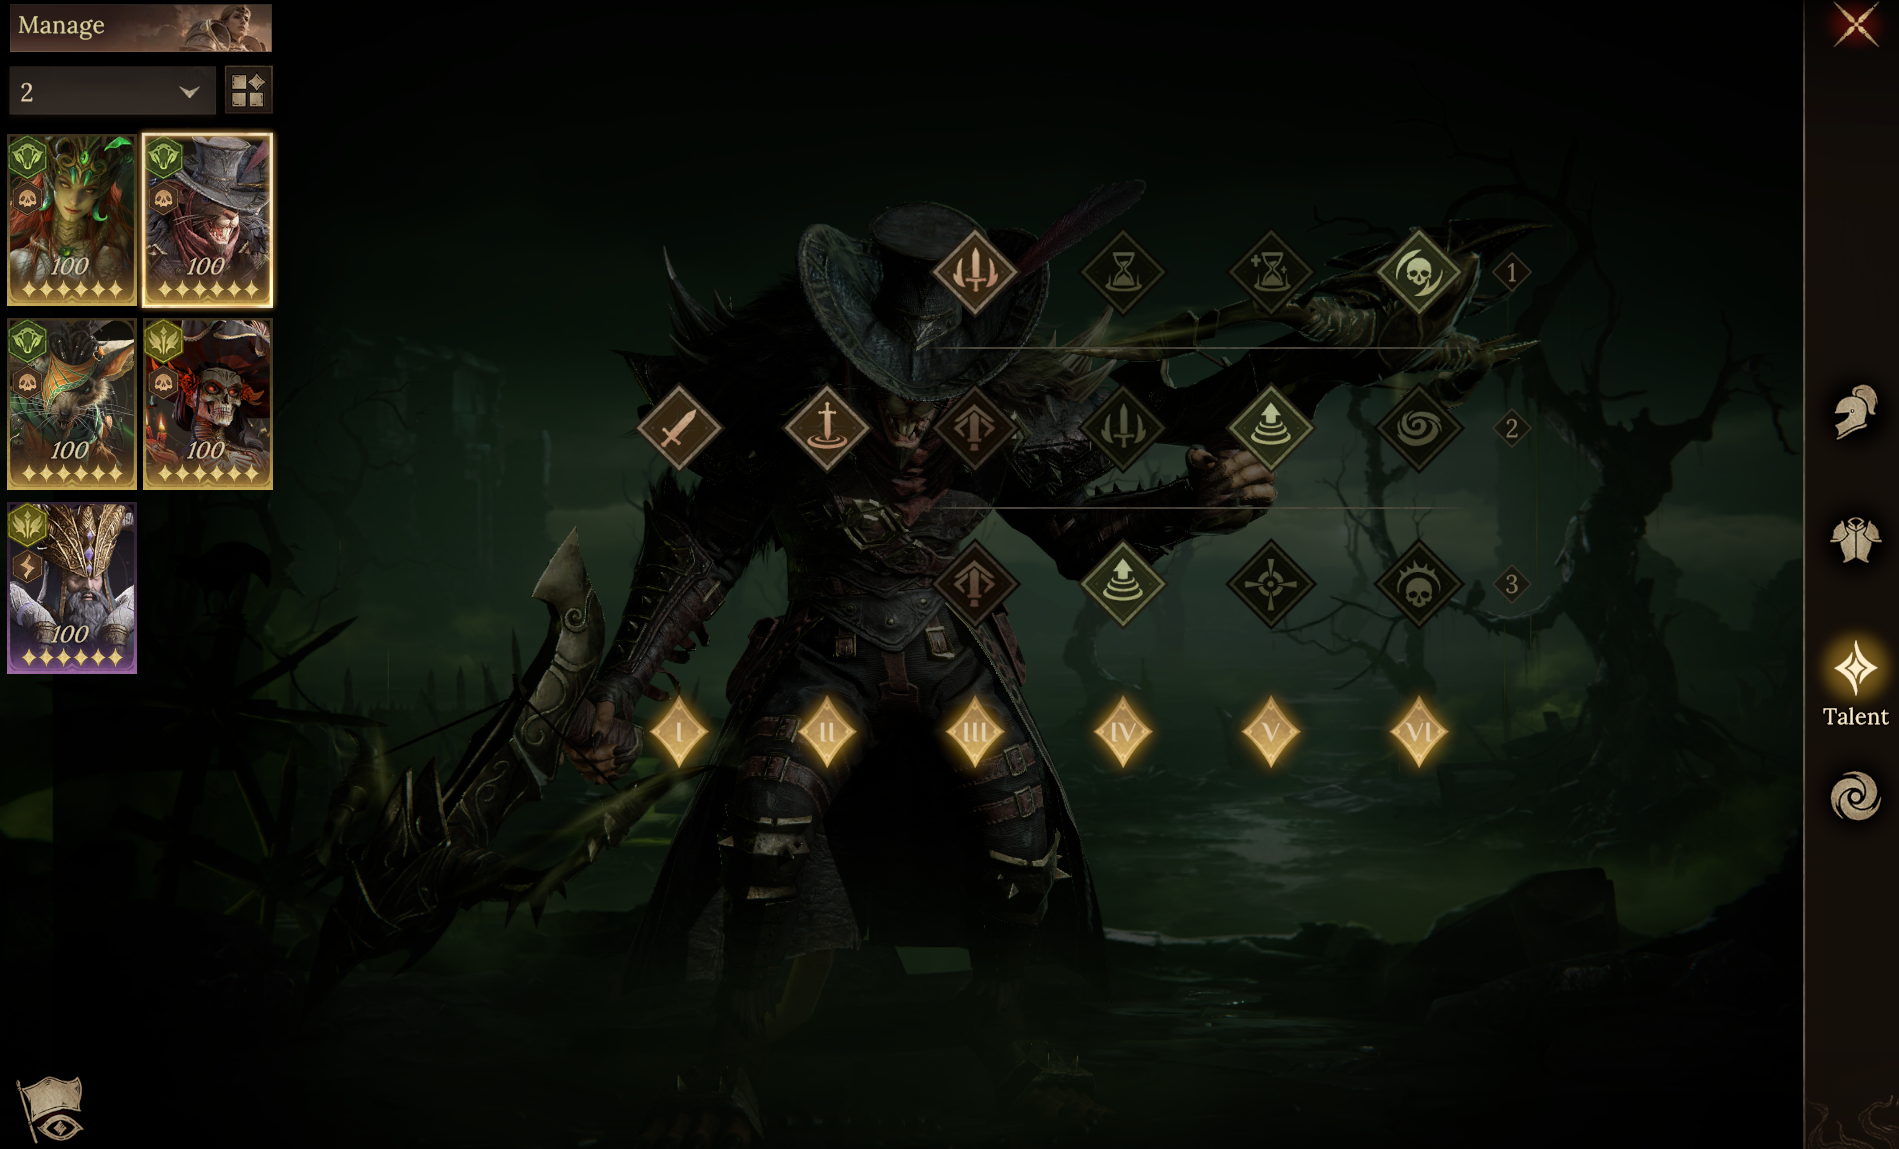
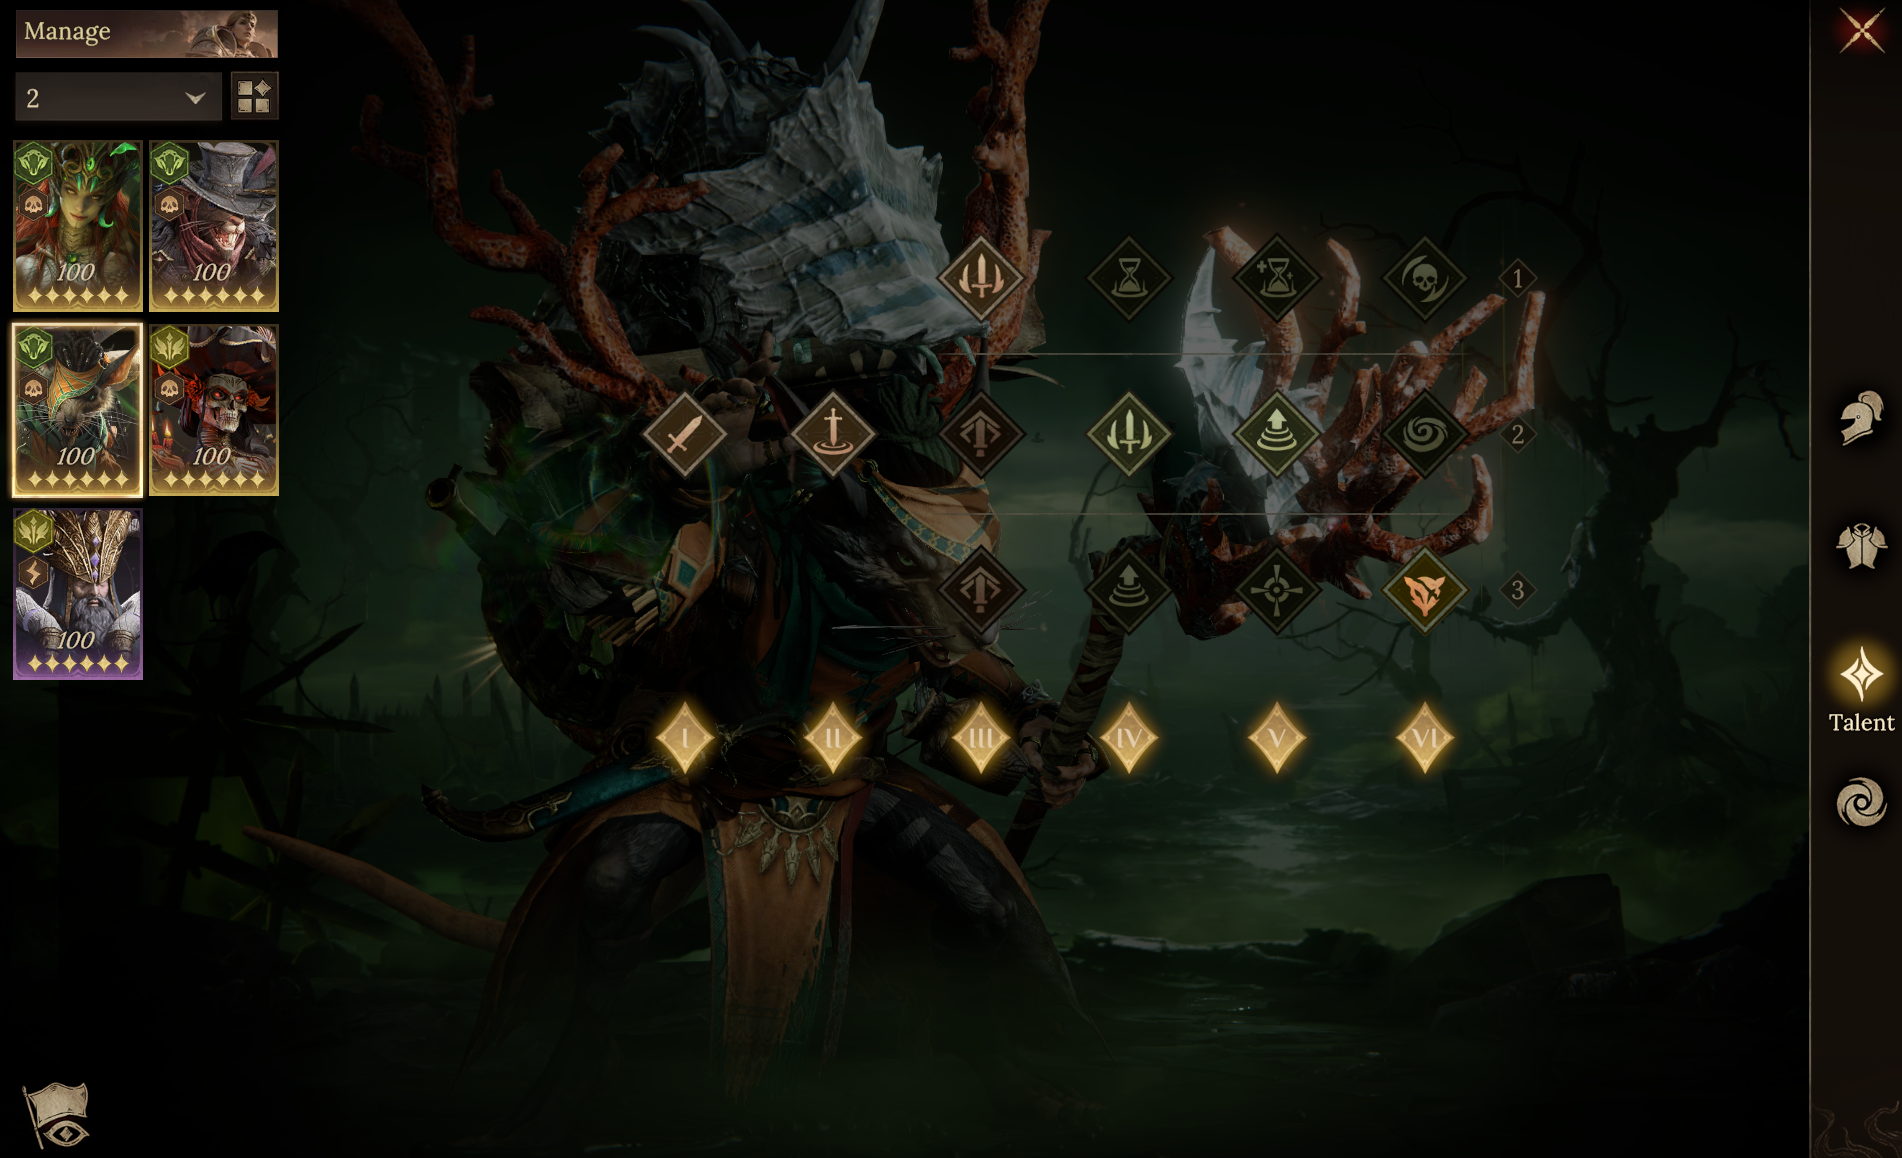
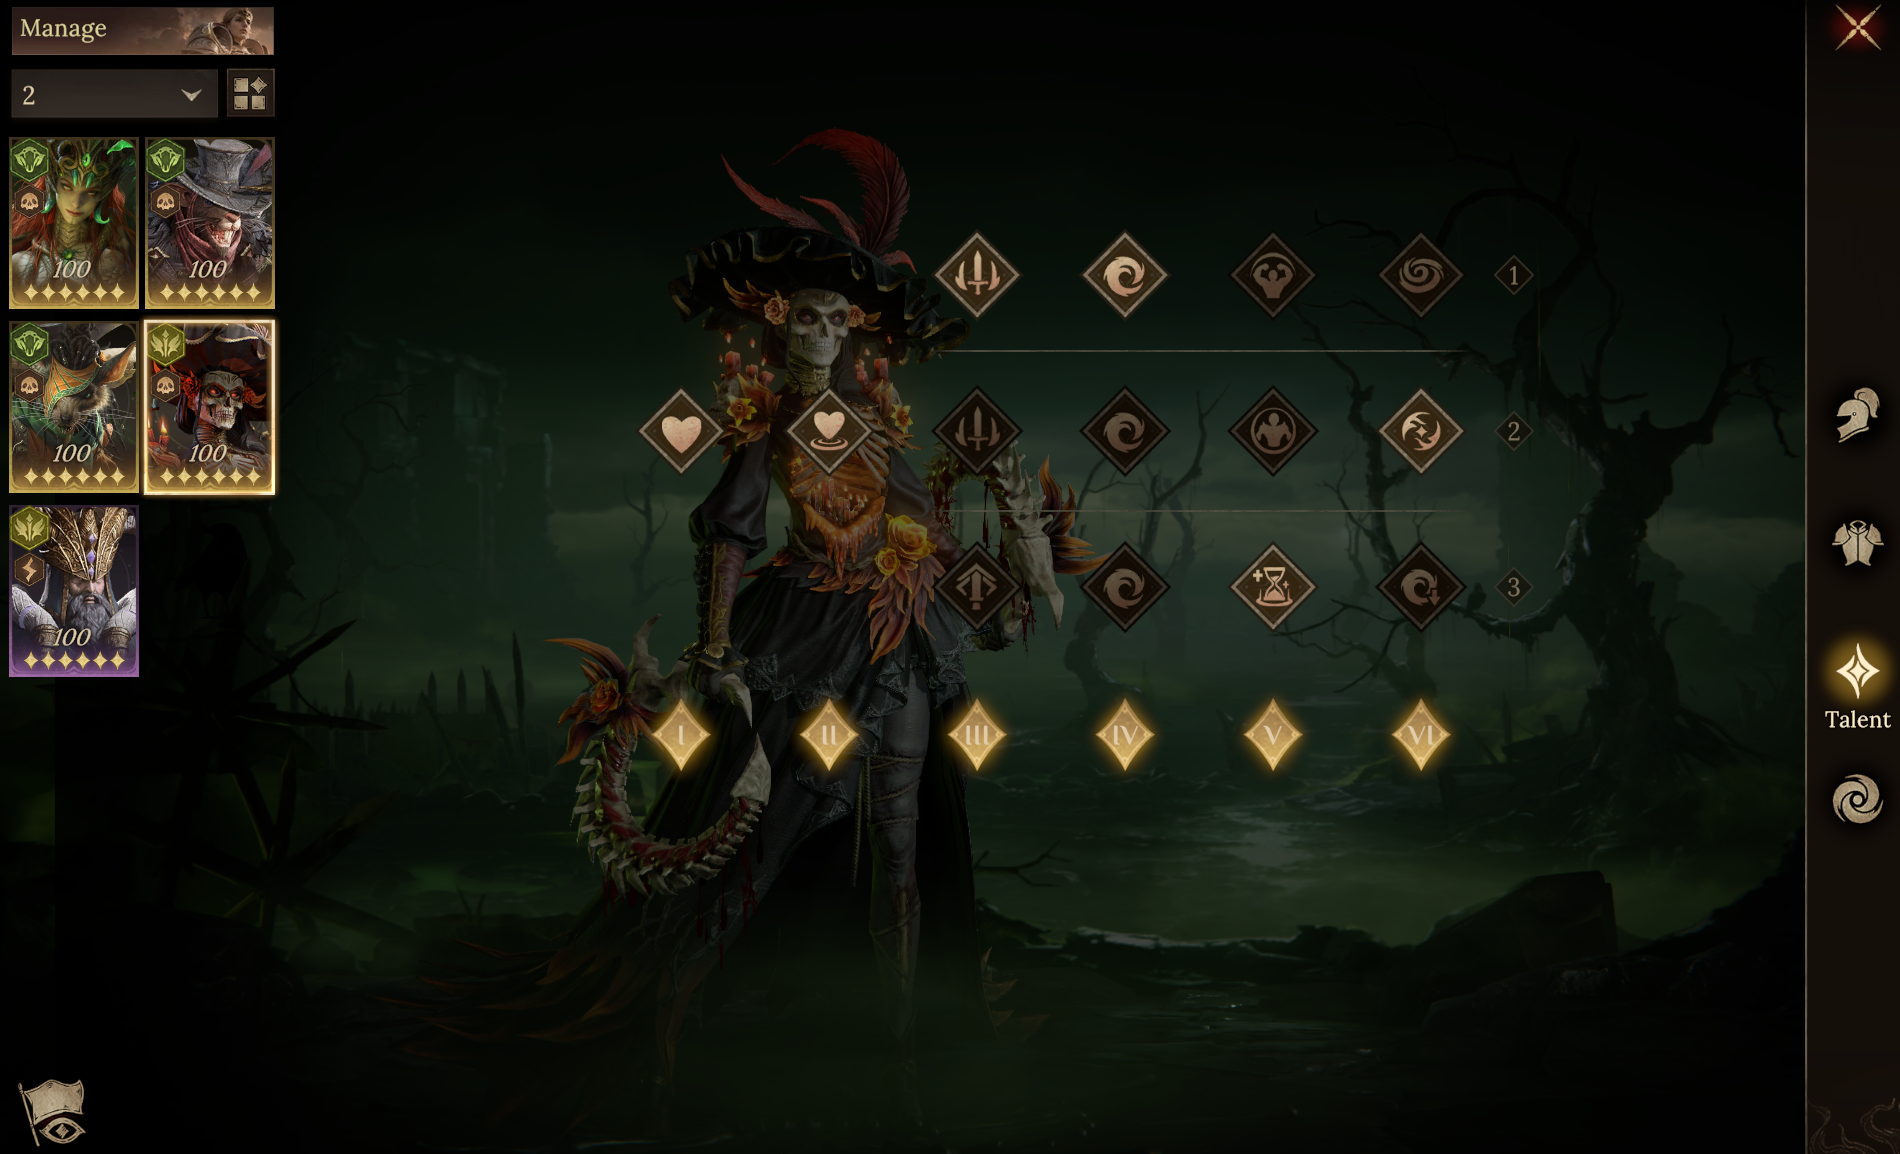
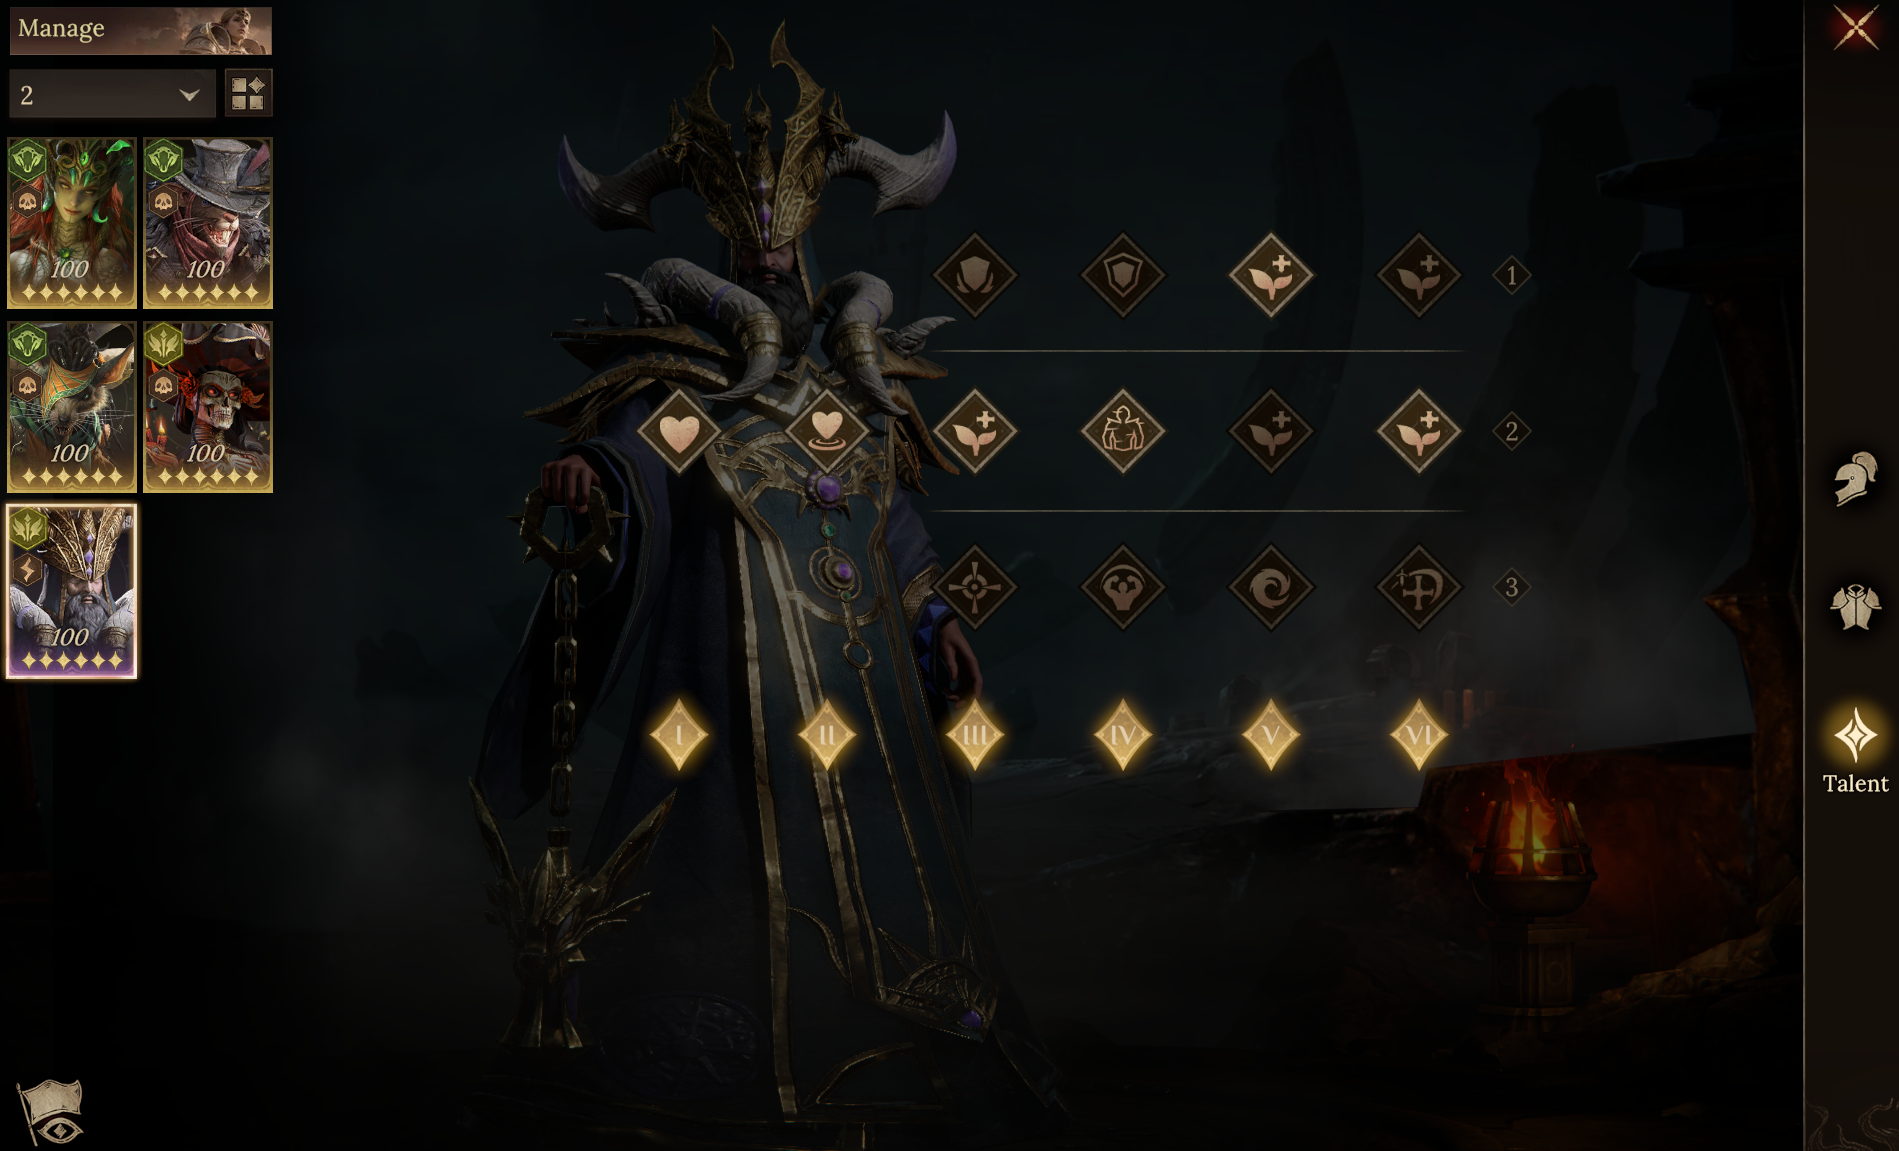
 ● Team Aura / Familiar
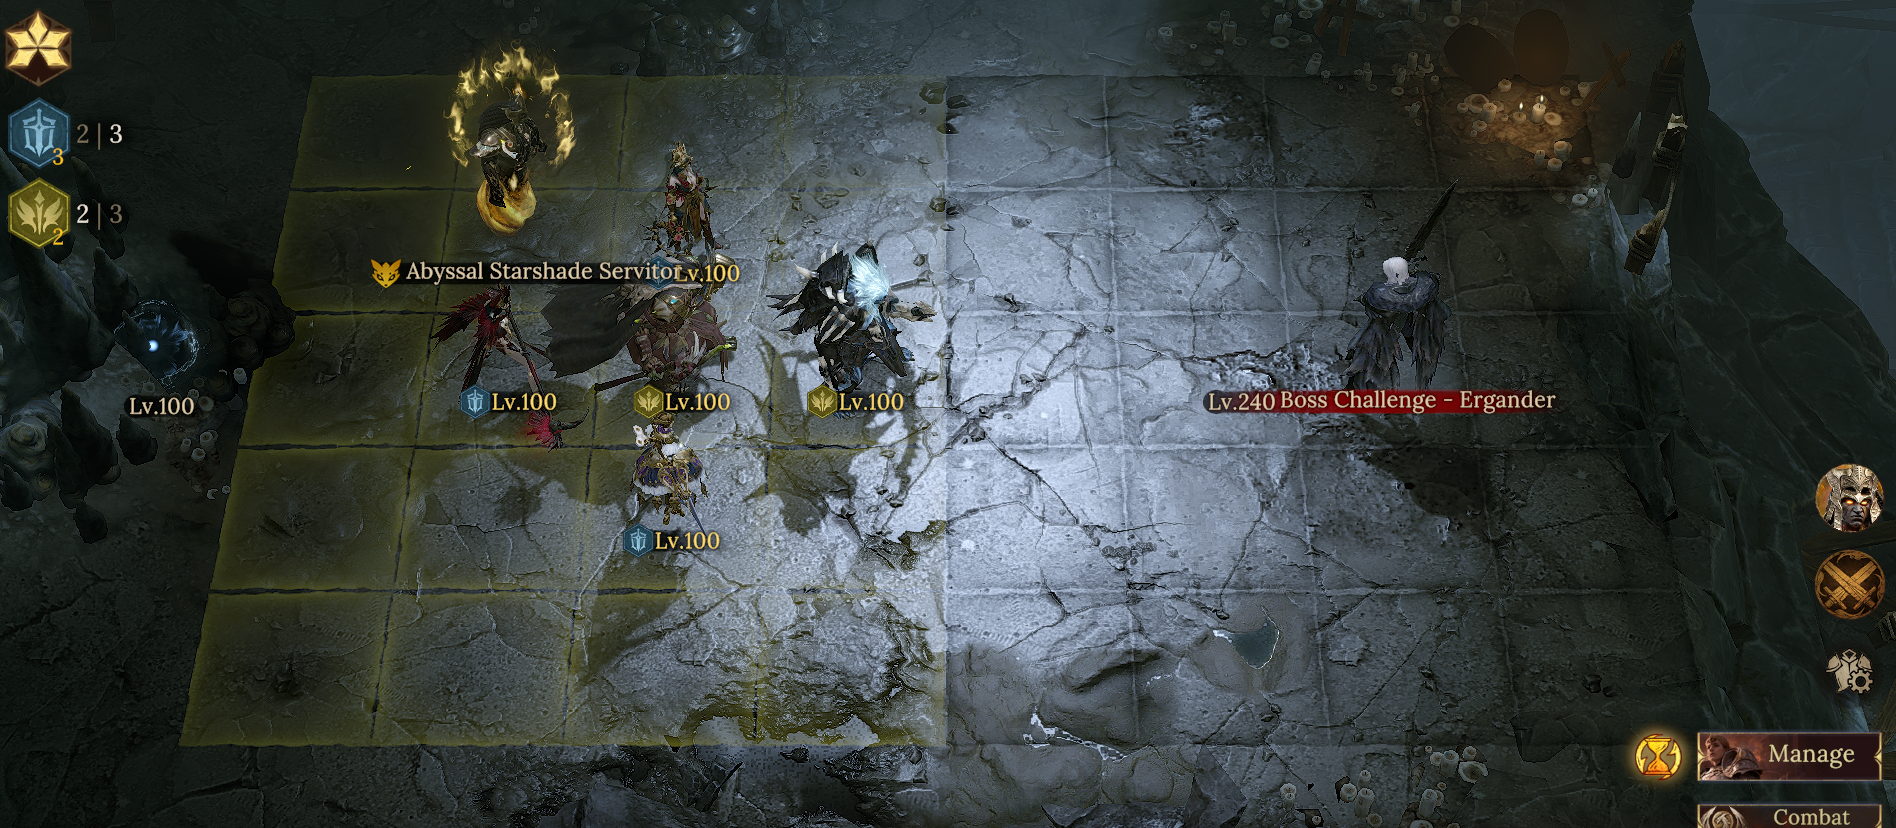
We recommend using Nastjenka's Attack Aura with the Starshade Servitor/Djinn Familiar to maximize the team's damage output.
● Recommended Skill Timing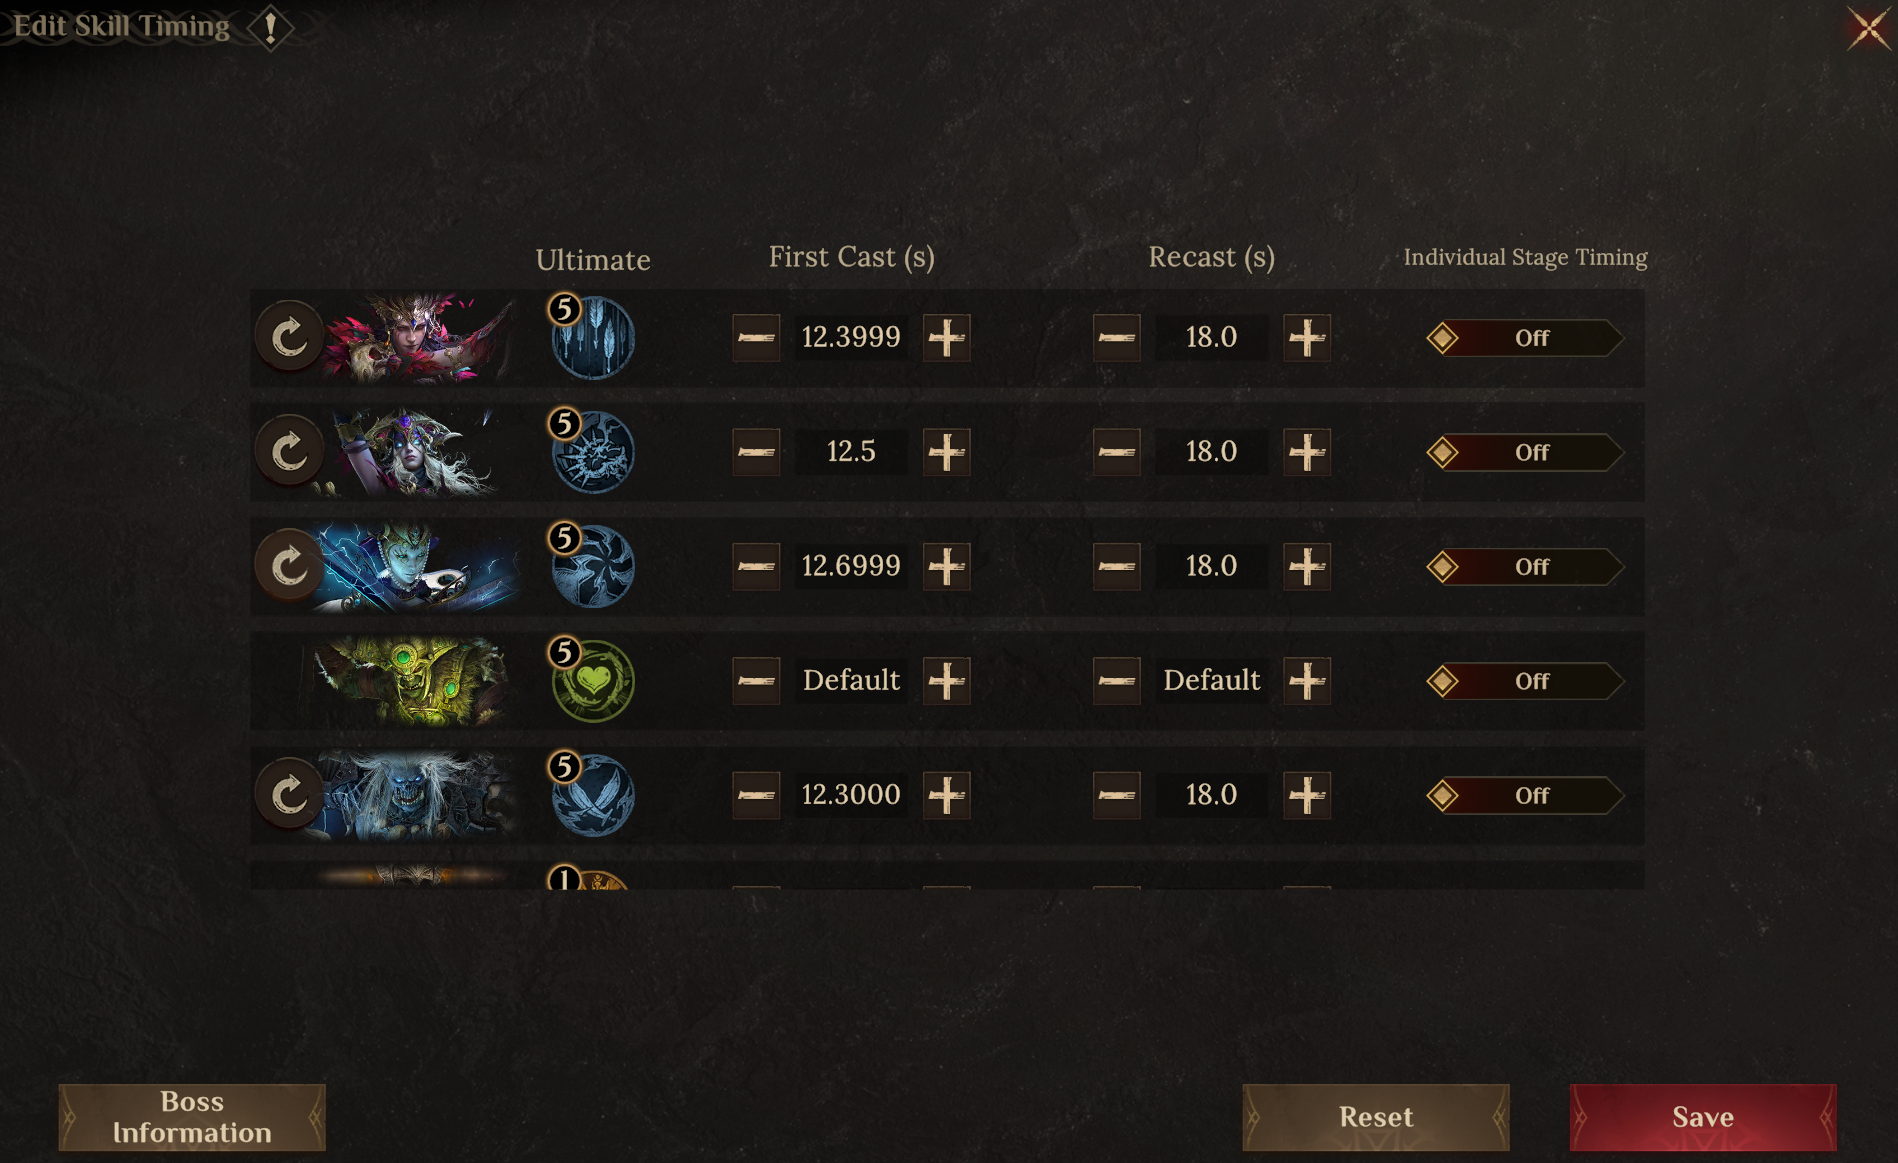 ● Important Notes
1. Position your team as shown to give all allies the shared Resistance from Oggok's Talent, Stand United. This also allows Nastjenka to provide Guinavivre and Kurvida with the Damage Bonus from Whirling Edge after the battle starts.
2. Oggok can be replaced with Blah Blah, Stegamoffyn, or Nathaniel, and Irmoush can be replaced with Reytah, Maashtur, or Calavera. If you have a Fathomdown with a high inspiration level, you can use a 1 Support + 4 DPS strategy. In this case, no one except Fathomdown needs to stack Resistance, and you can also add Tharivol to increase damage output.
● Hero Substitution Options
Irmoush, Kurvida: Accuracy > 290;
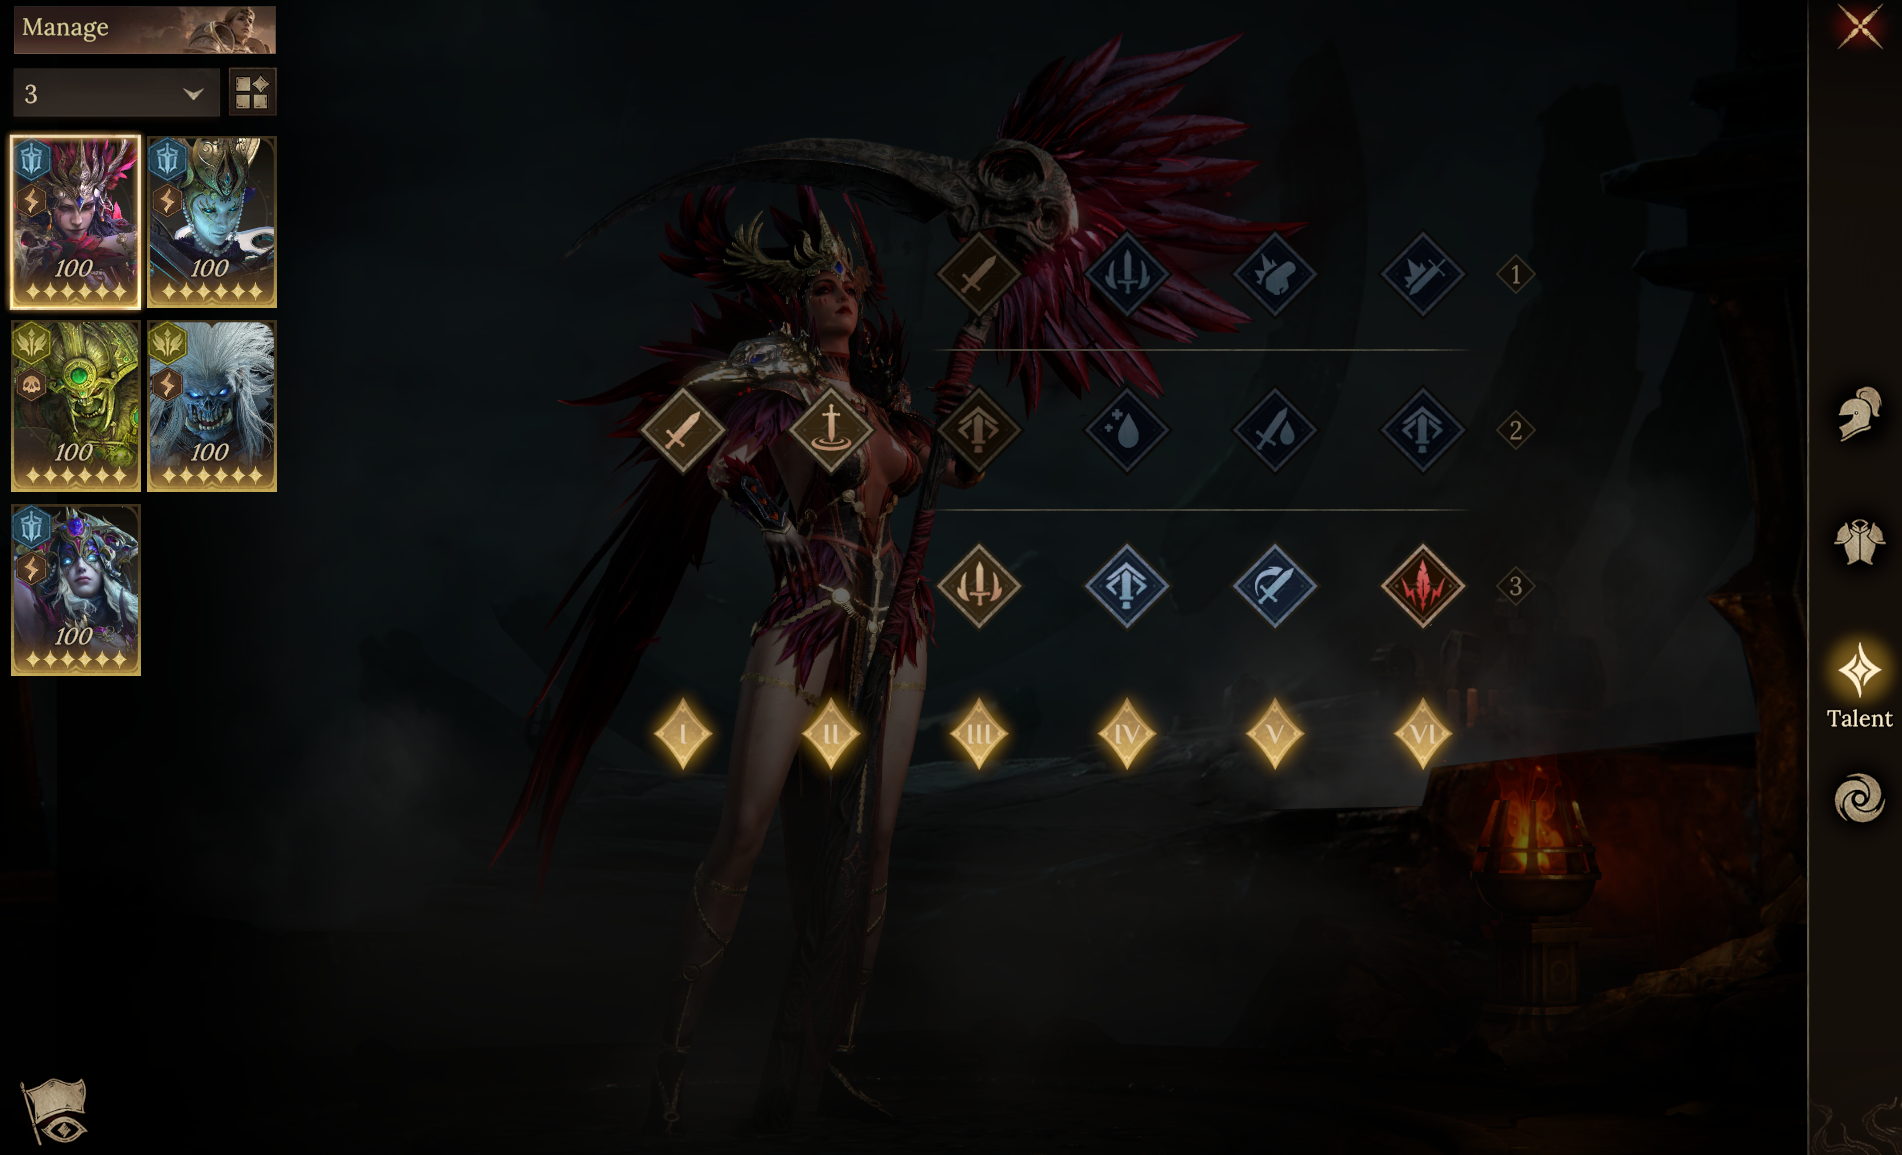
Oggok: Resistance > 450; for other stats, prioritize Attack.
Other heroes only need around 200 Resistance.
If stacking Resistance is difficult, you can also use Oggok's Resistance Aura.
● Recommended Gear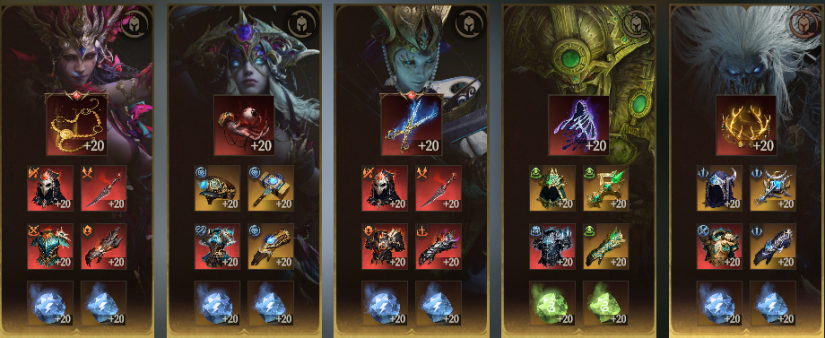
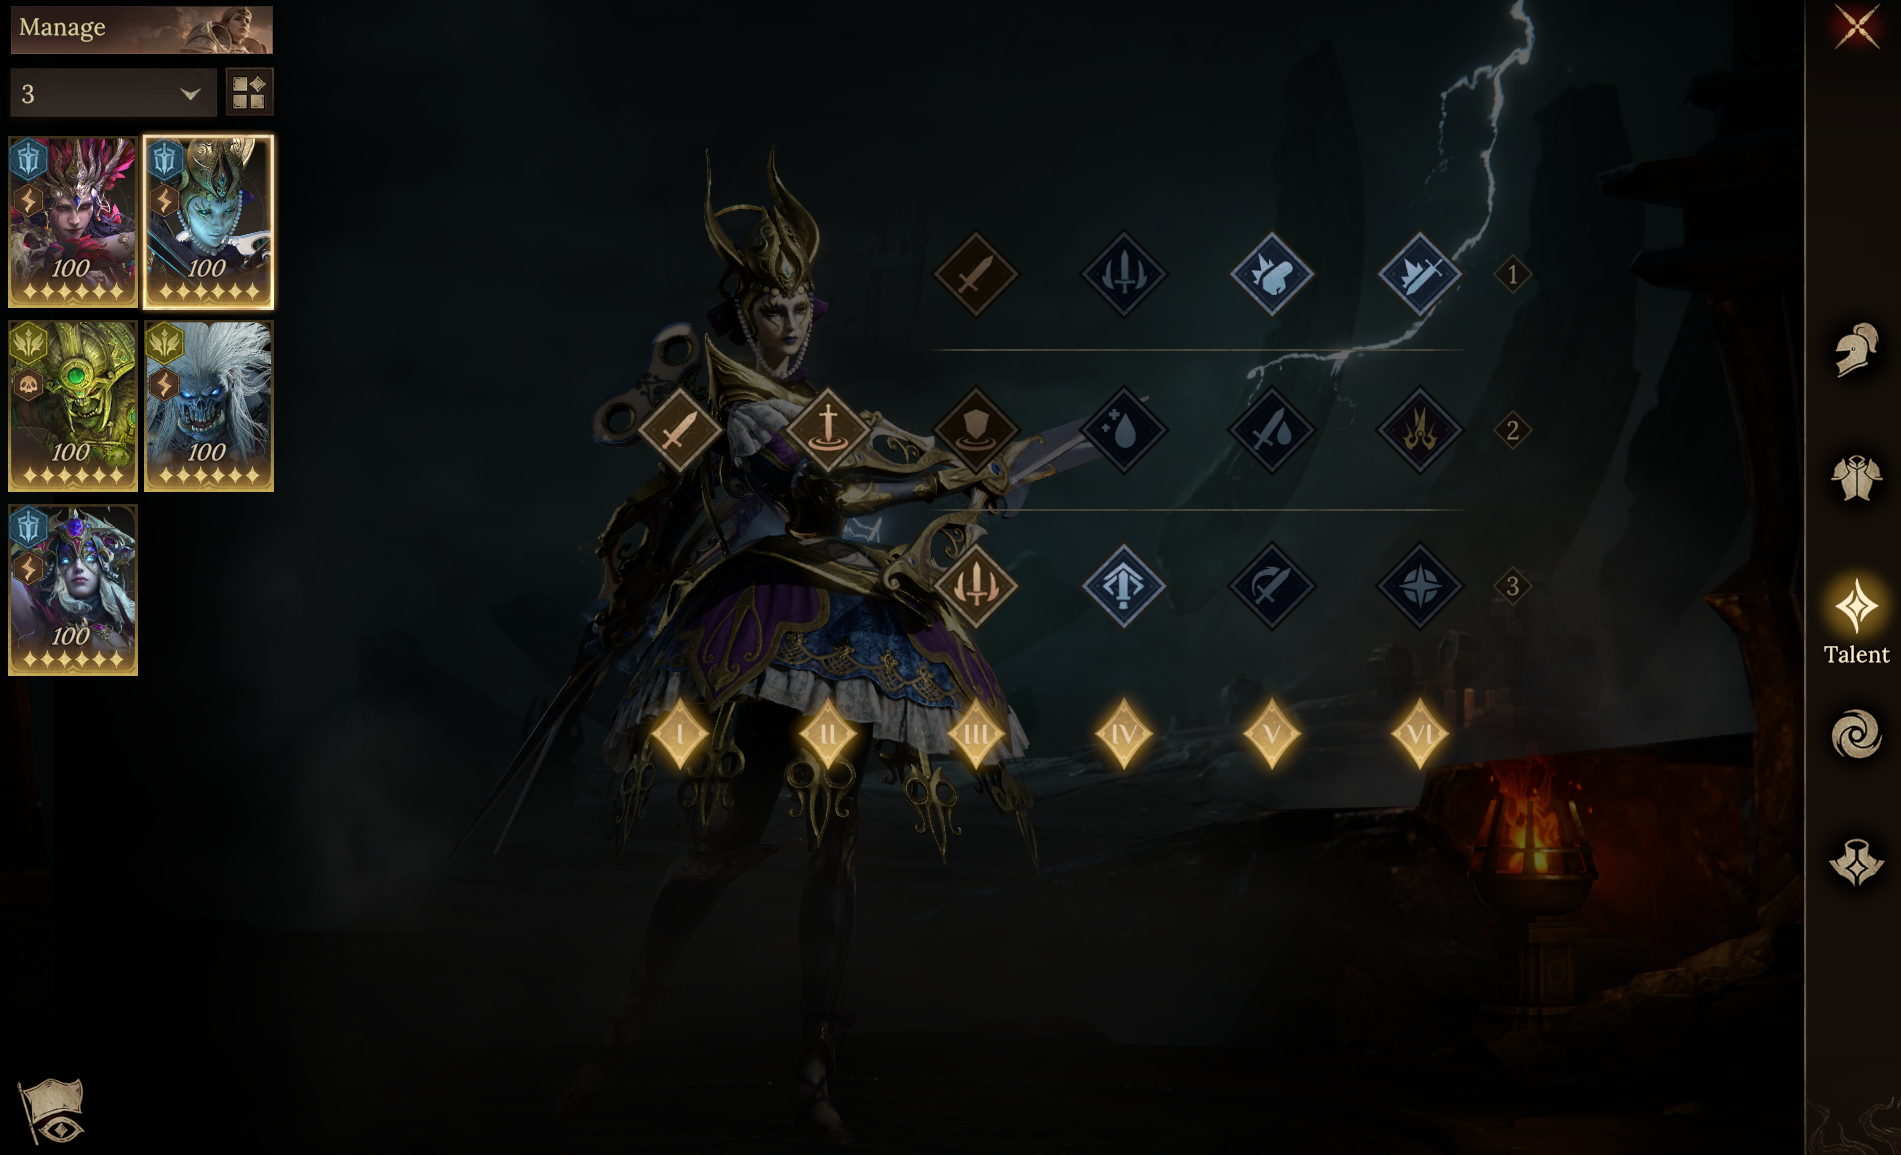
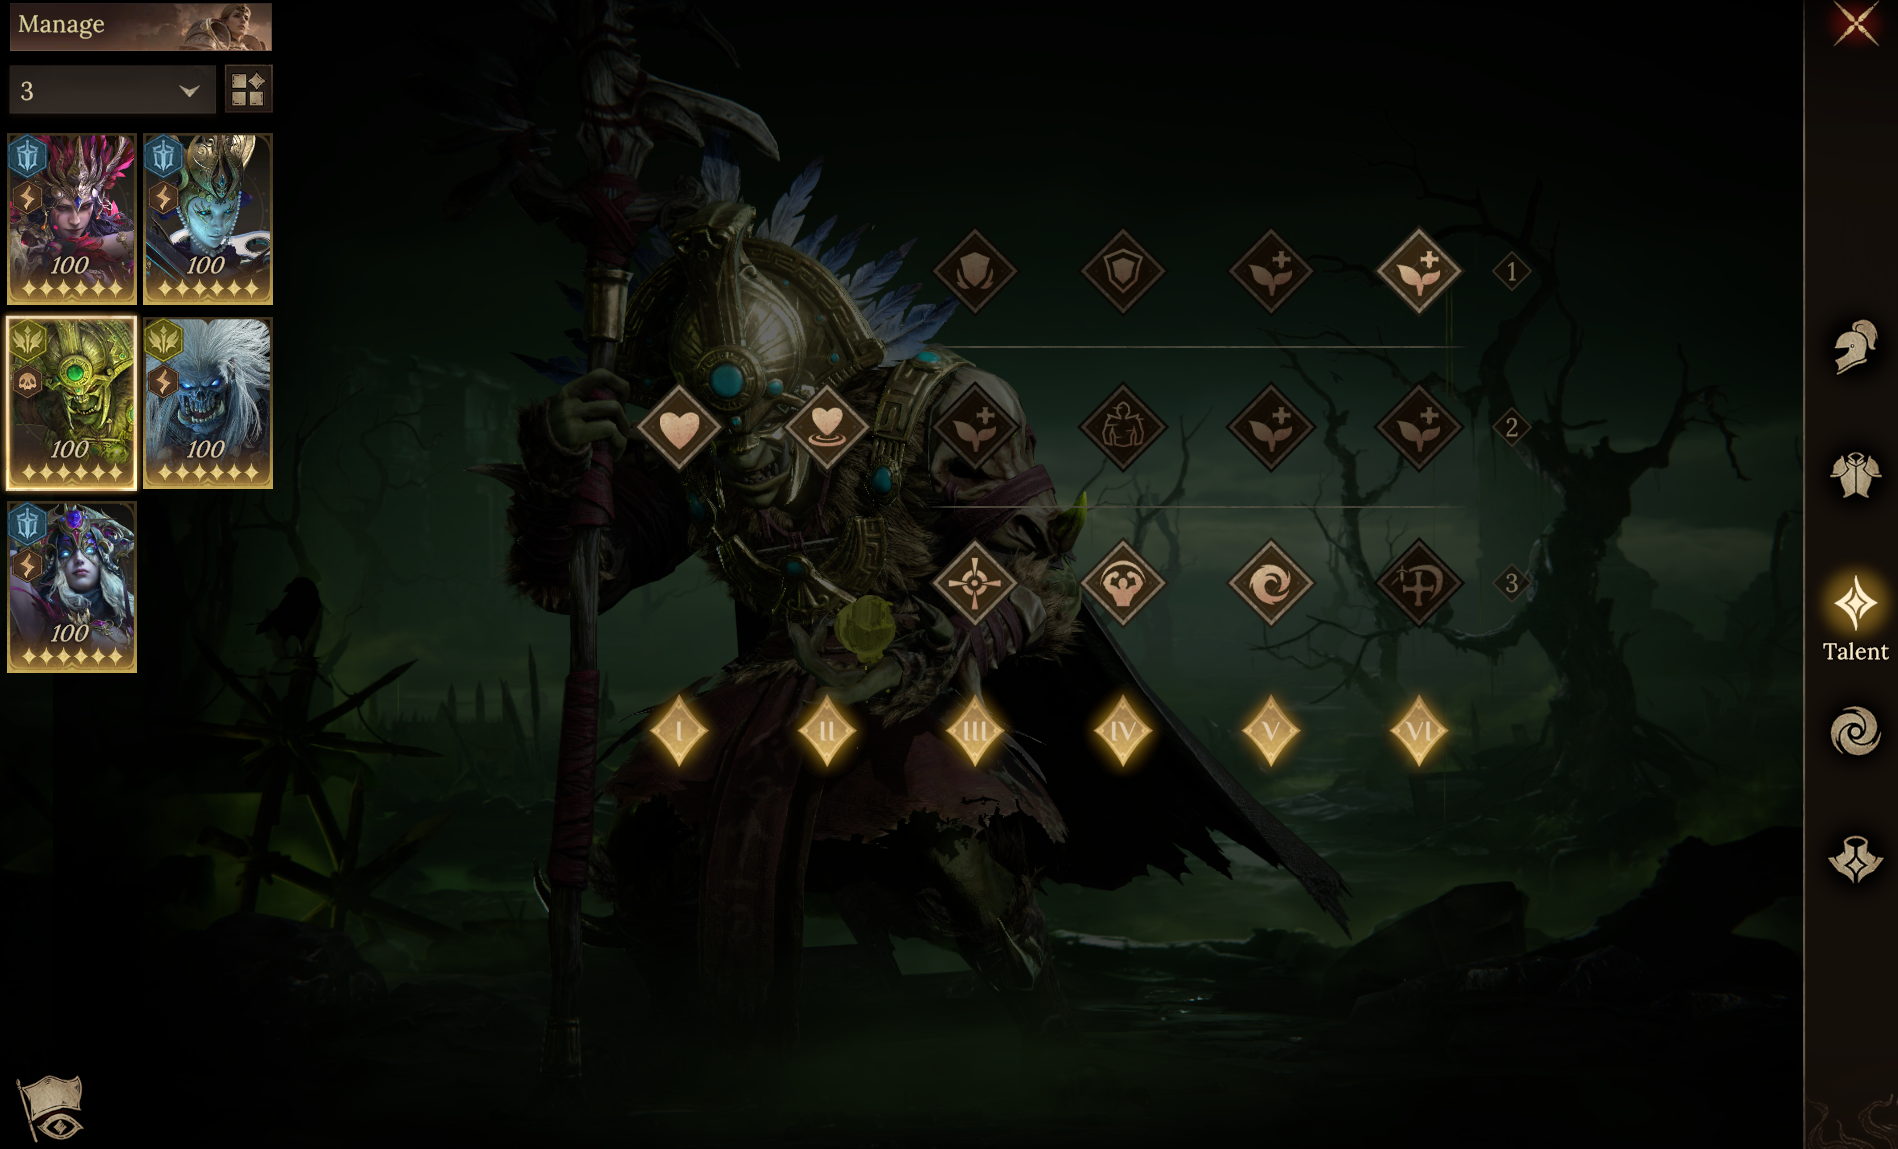
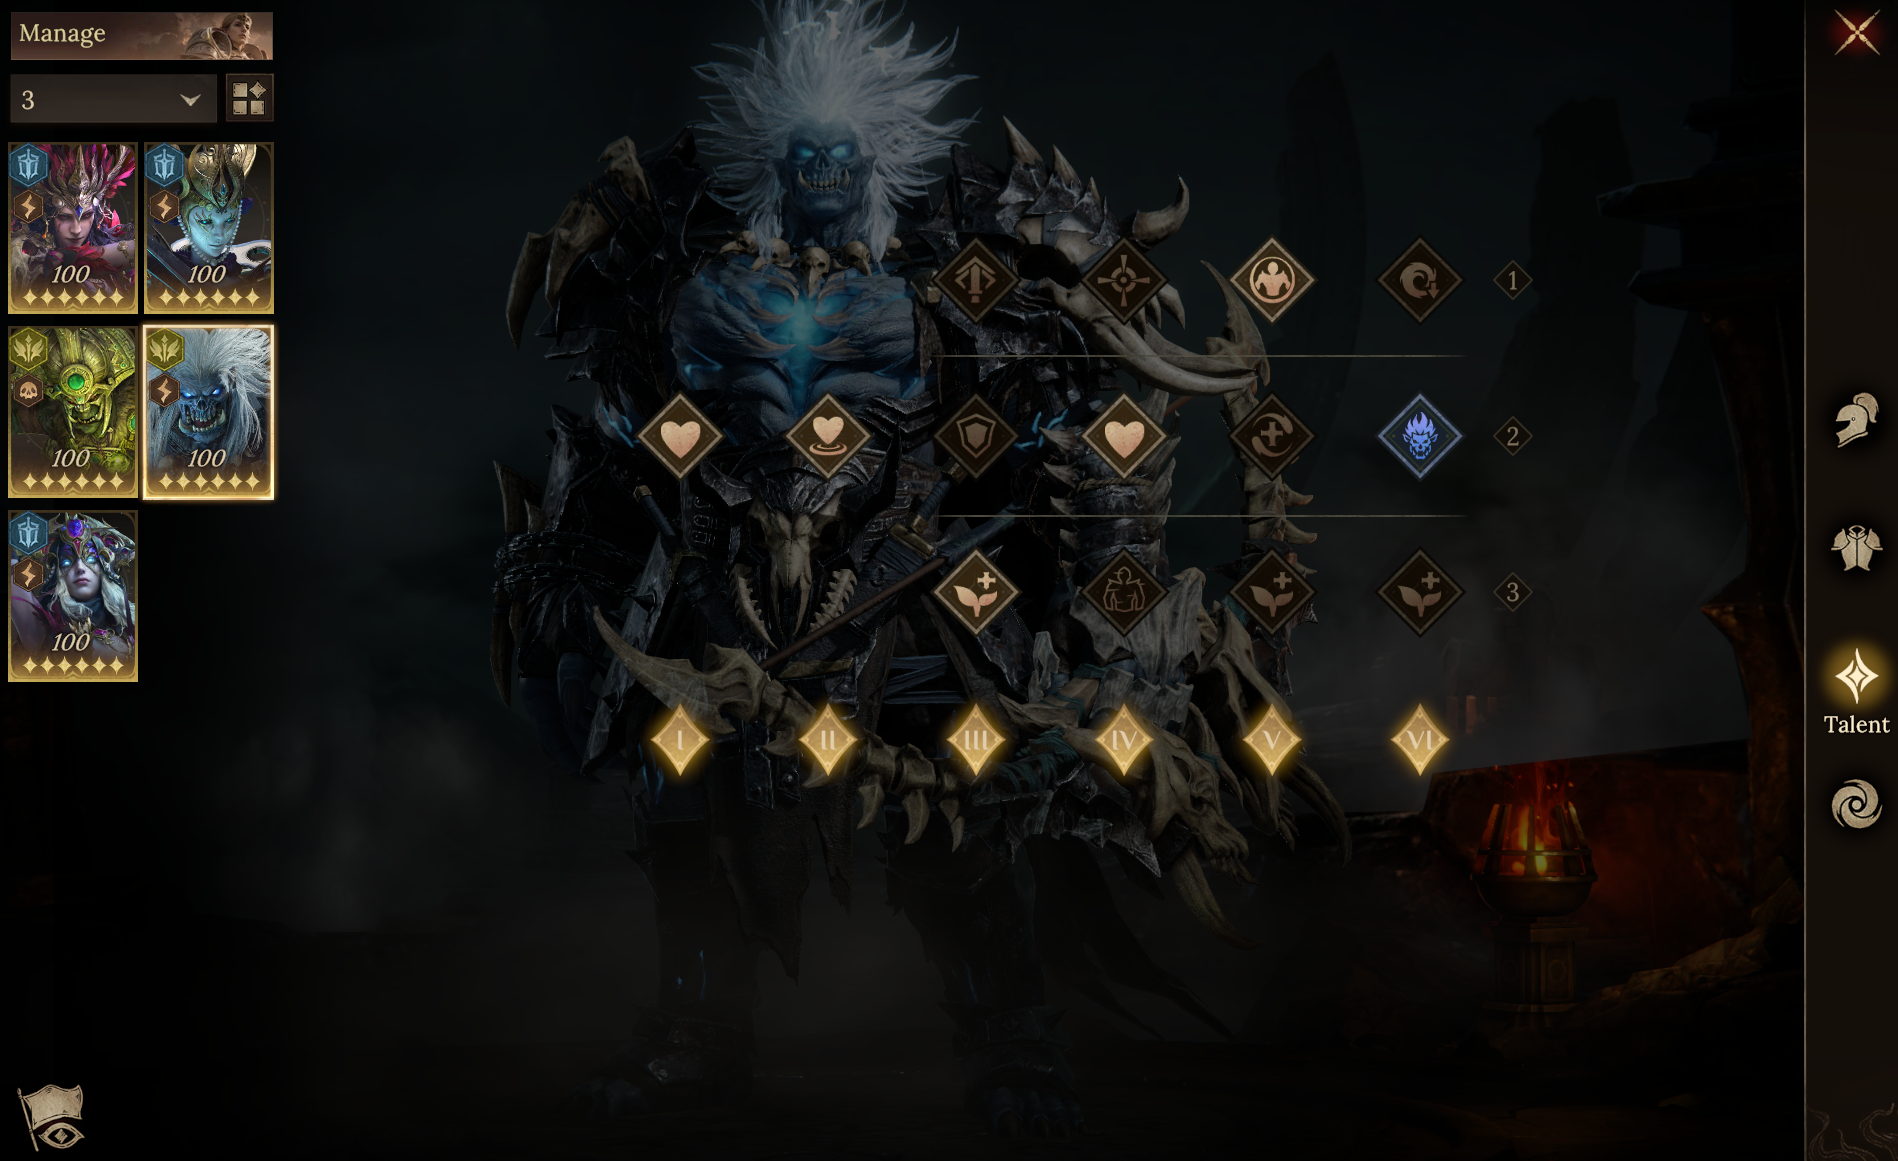
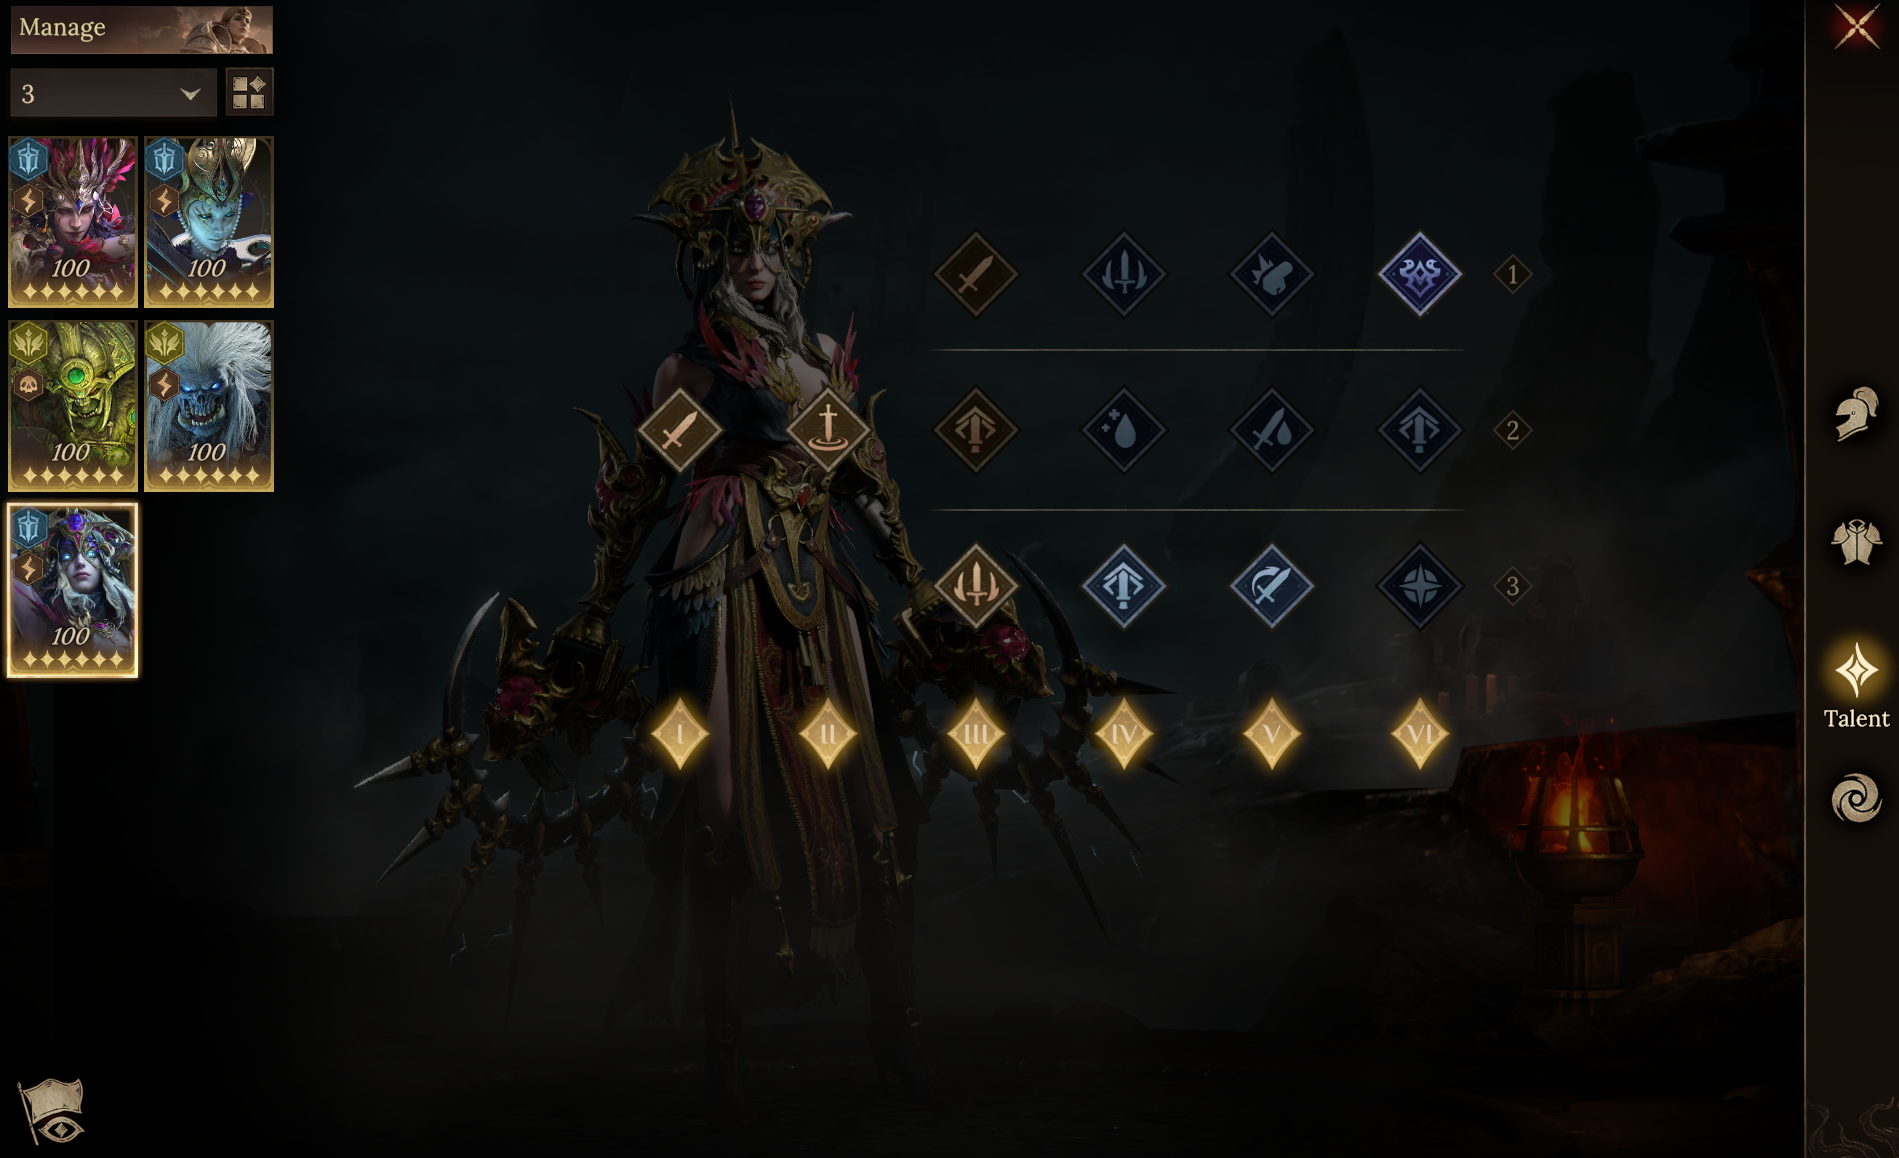
 ● Team Aura / Familiar
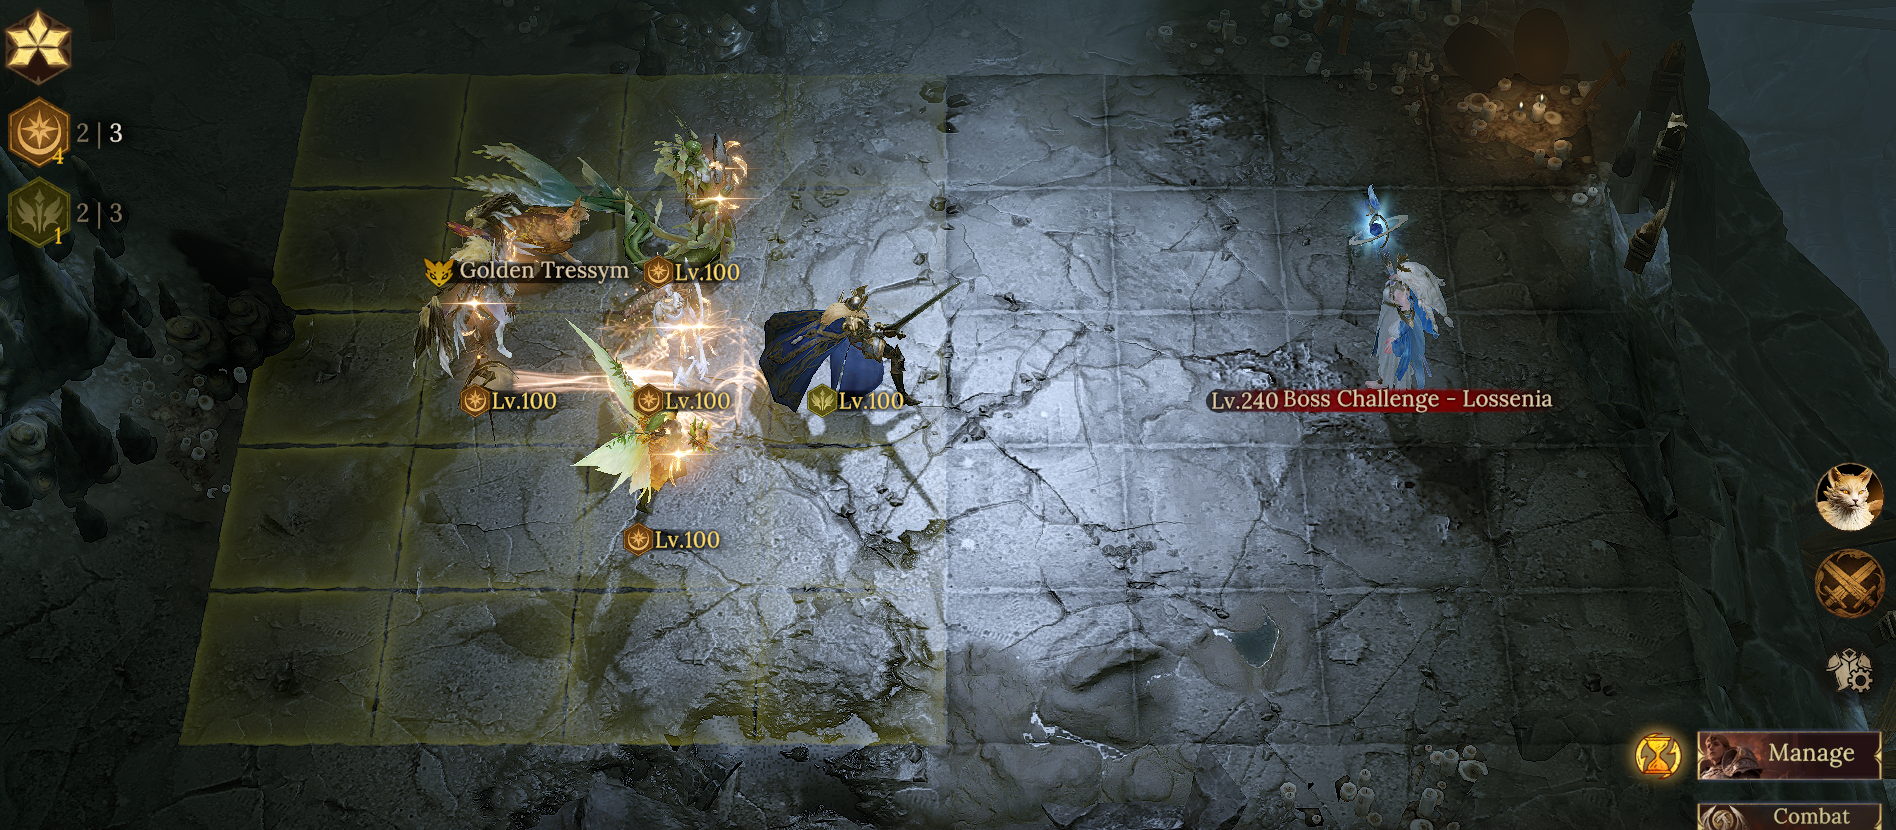
We recommend pairing Diantha's Attack Aura with the Tressym Familiar to maximize the team's damage output.
● Recommended Skill Timing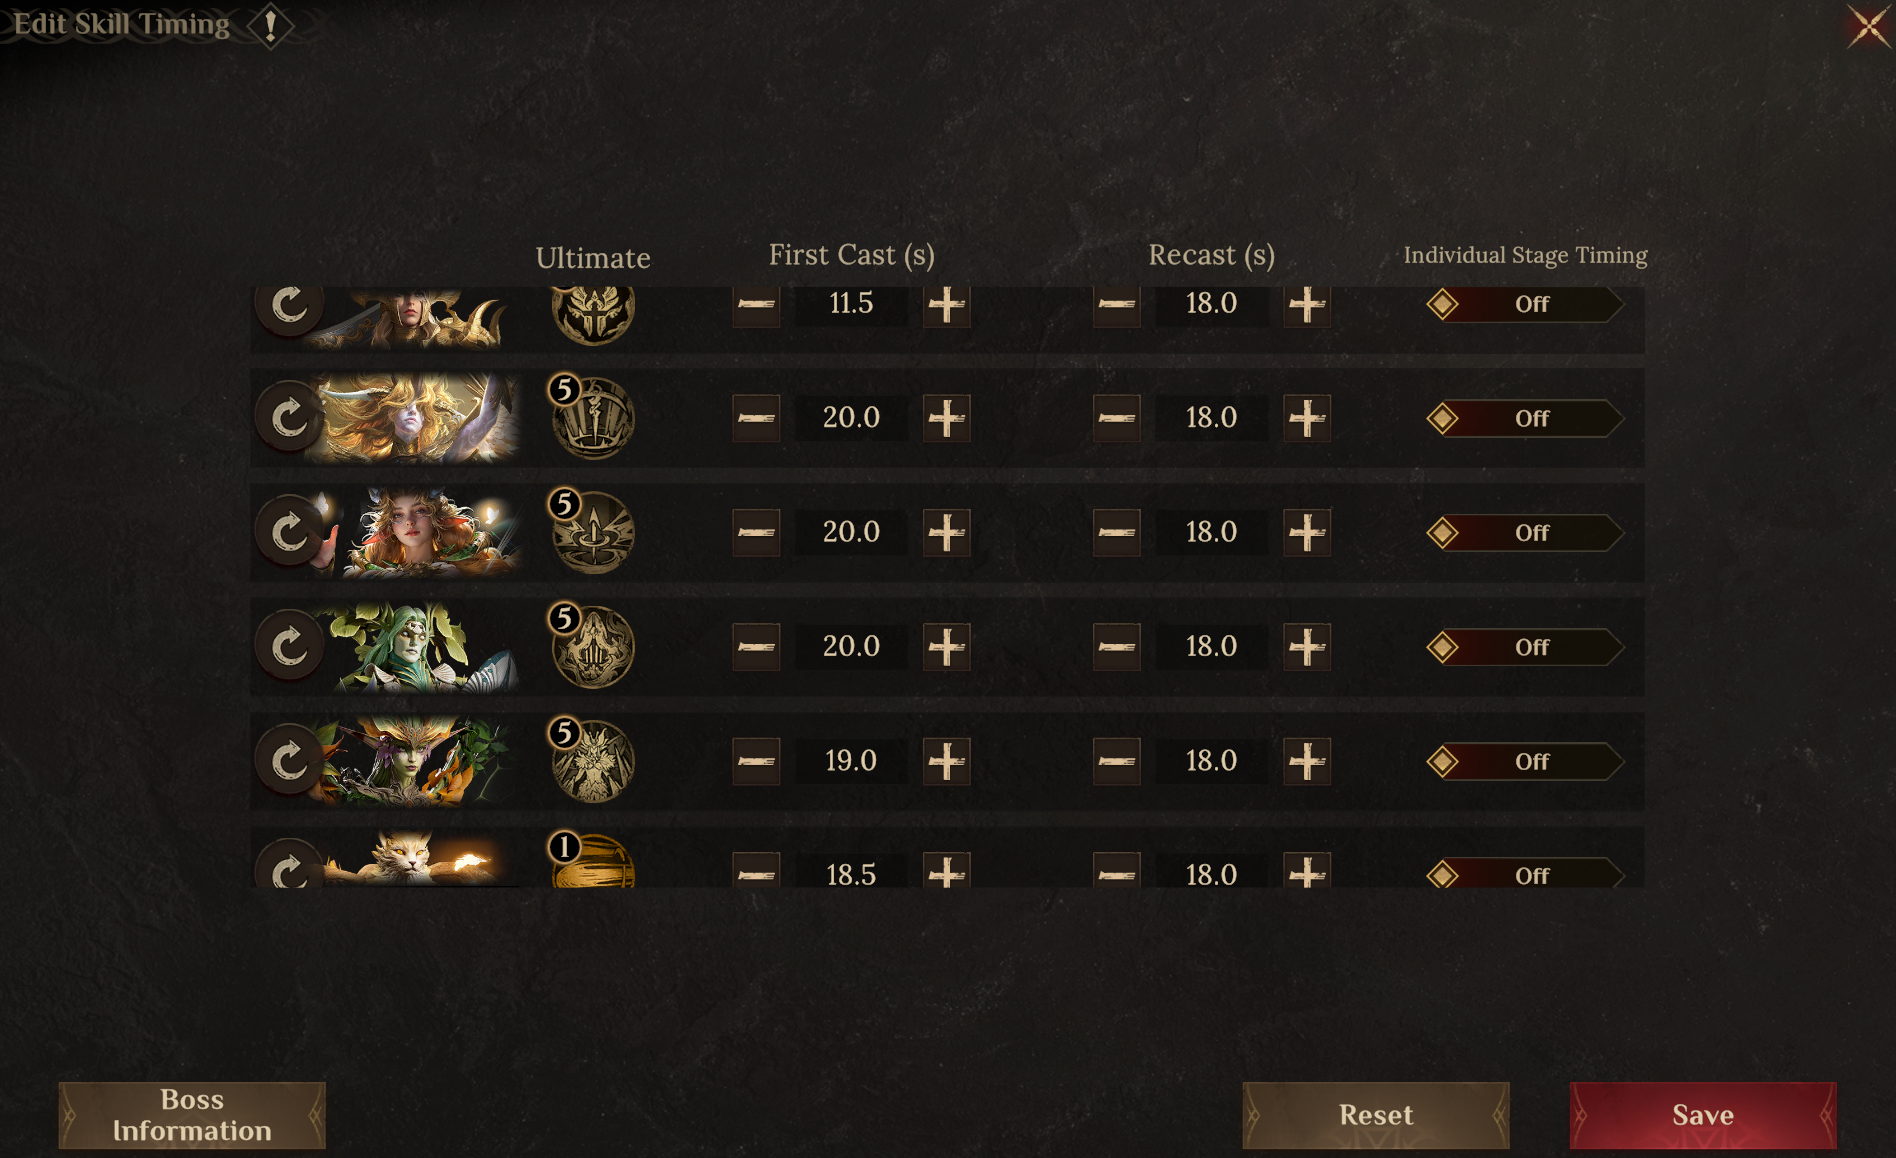 ● Important Notes
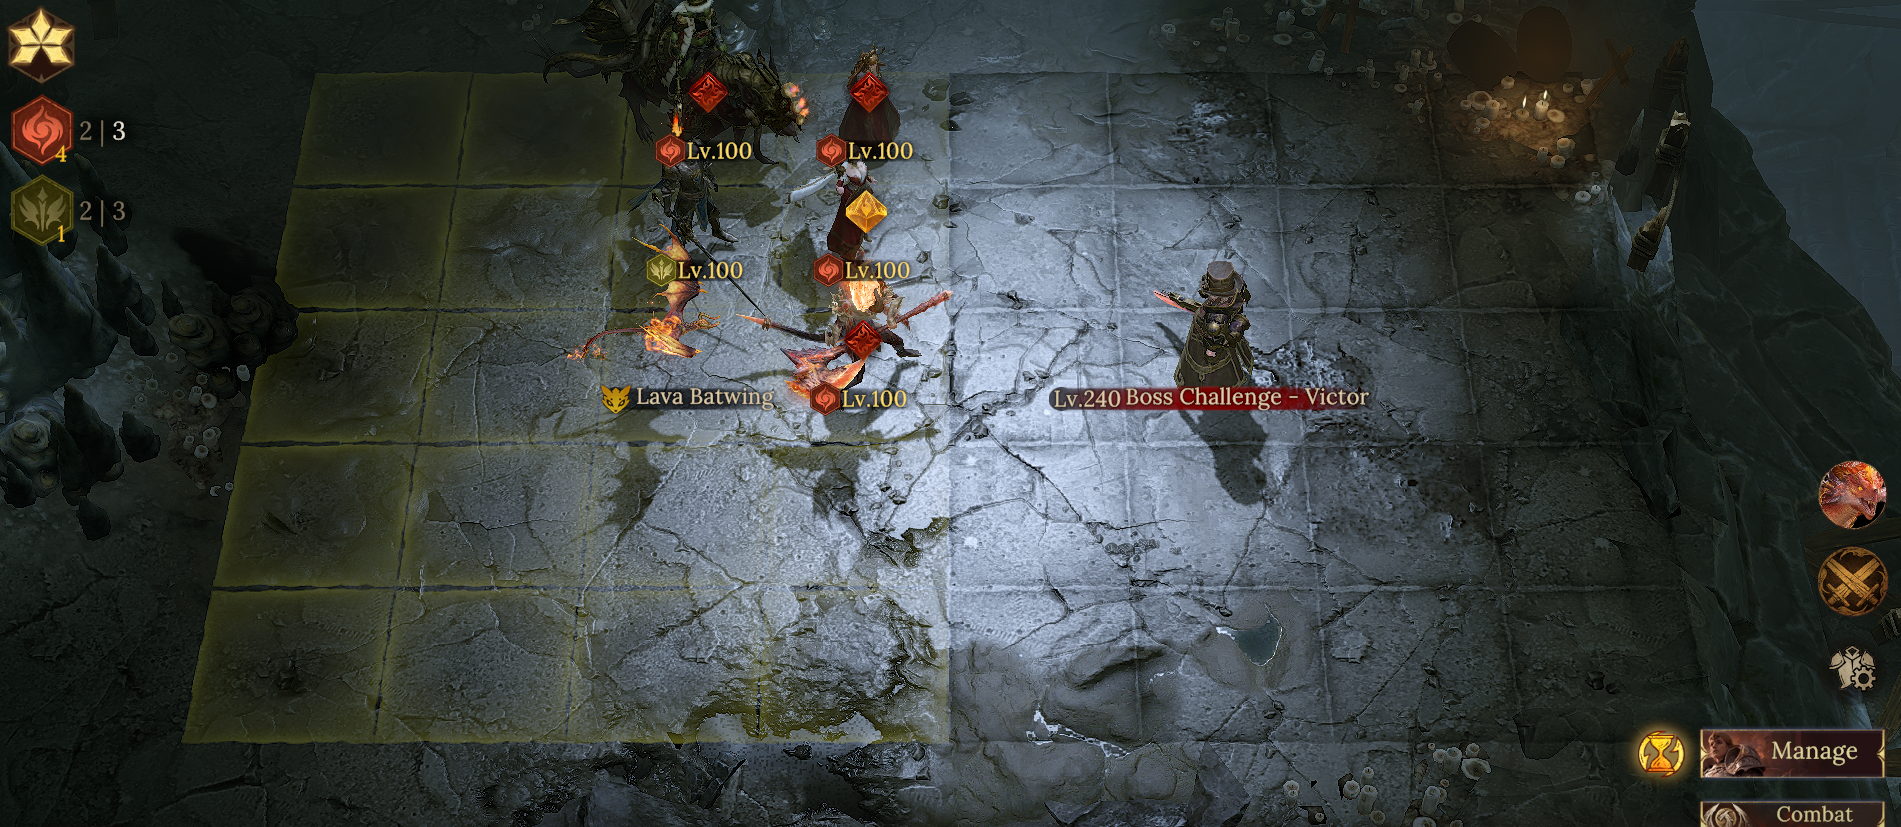
1. Stack as much Attack on Lincos as possible, ensuring Talethia's Attack remains lower than his in battle. This makes her the target for buffs from Lincos's passive skill and ultimate skill.
2. If you have a Rena with Inspiration Lv. 1 or higher, we recommend using her to replace Acilia.
3. The boss summons two enemies in sequence during the battle. This team composition will achieve a higher total damage output when the boss summons Hochadir first, followed by Lucien.
● Hero Substitution Options
Diantha: Accuracy > 290, and stack Attack Speed via Rune Secondary Attributes.
Anneliesis: Prioritize stacking HP and Defense, and stack Skill Haste via Rune Secondary Attributes.
Acilia: Prioritize stacking Enlightenment; for other stats, stack as much HP and Defense as possible.
● Recommended Gear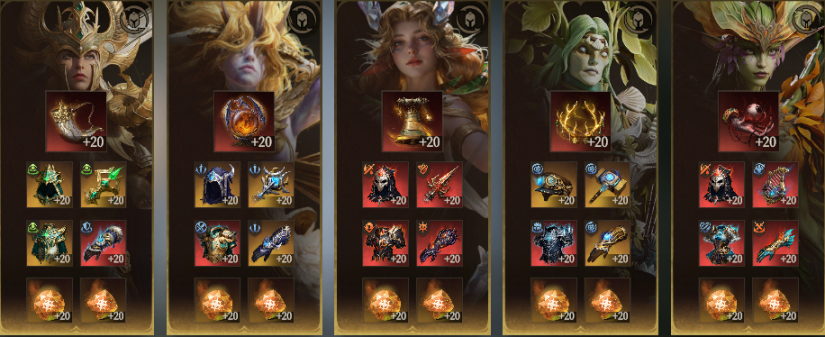
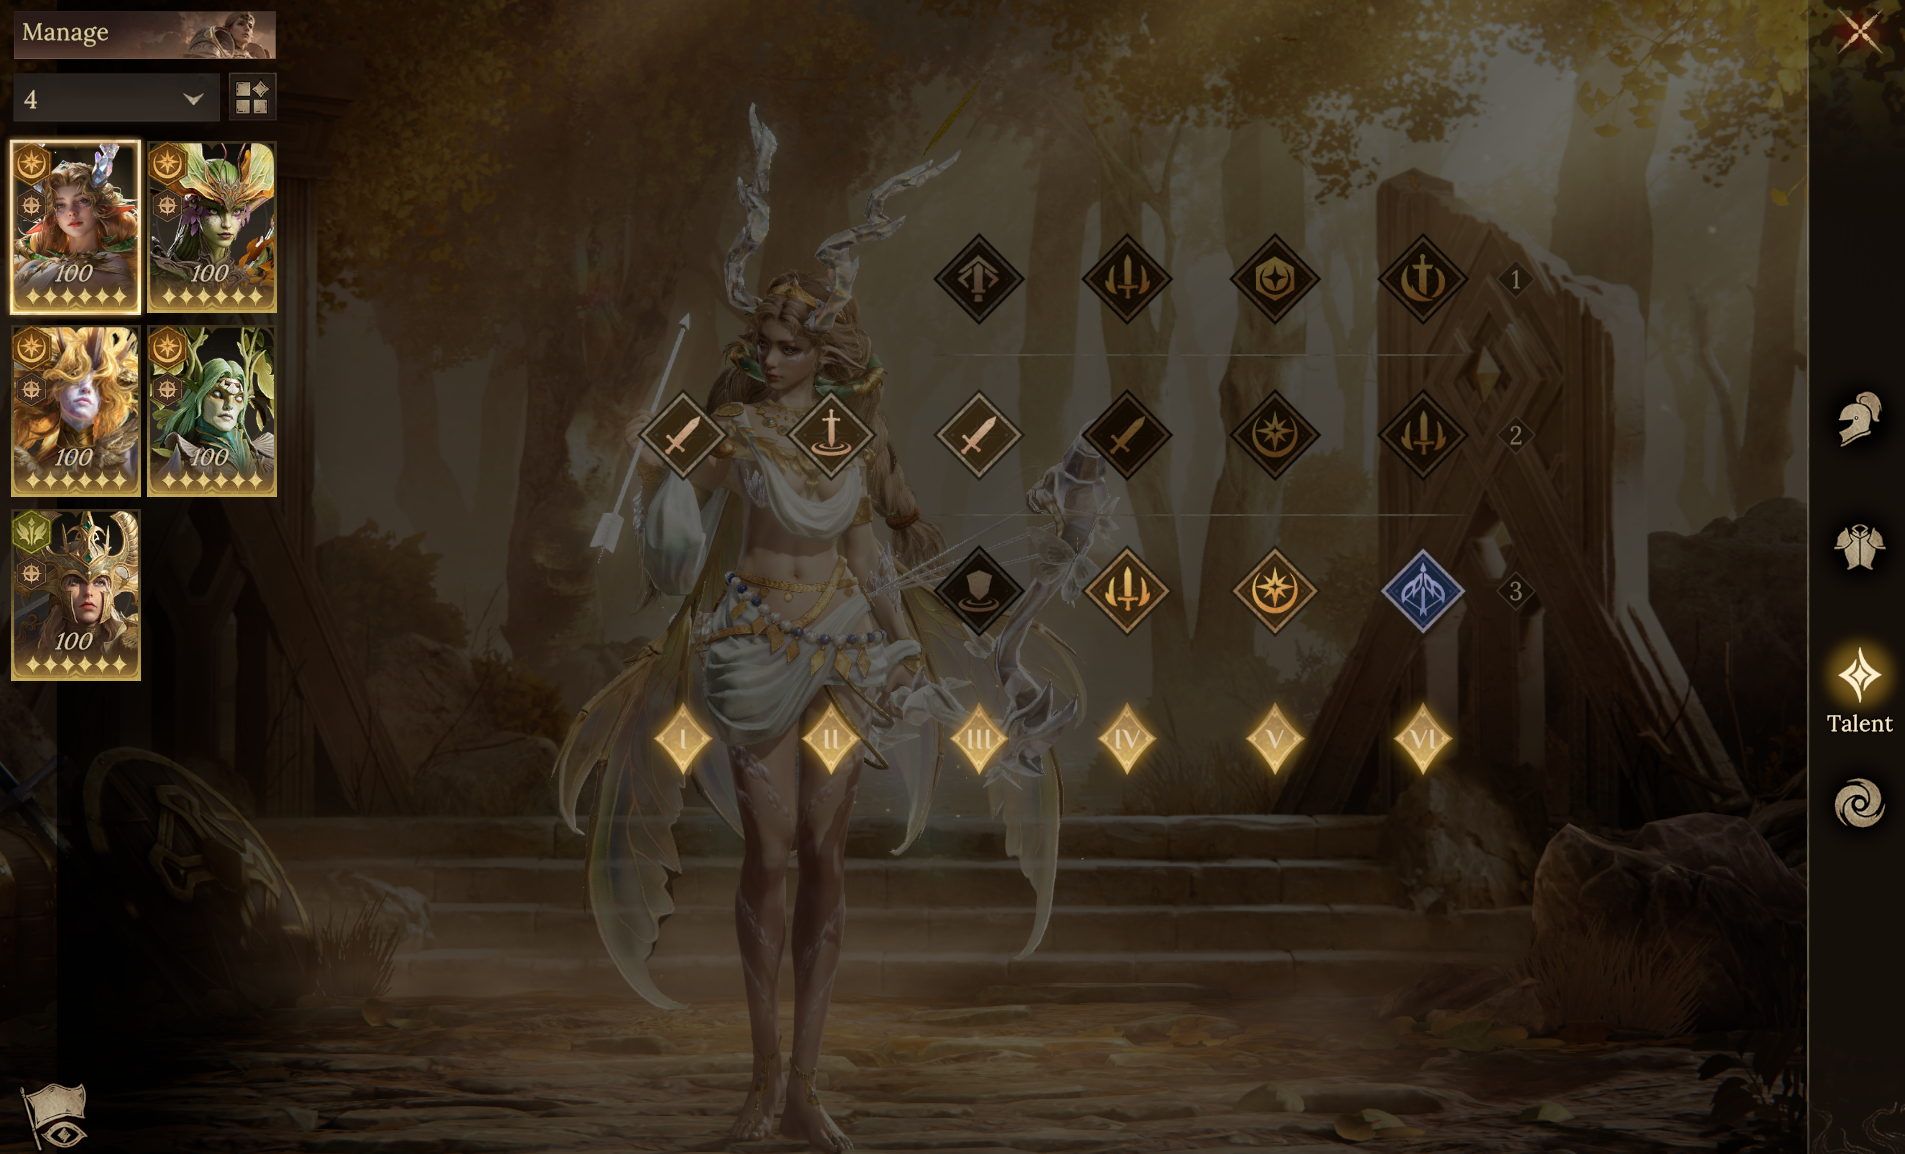
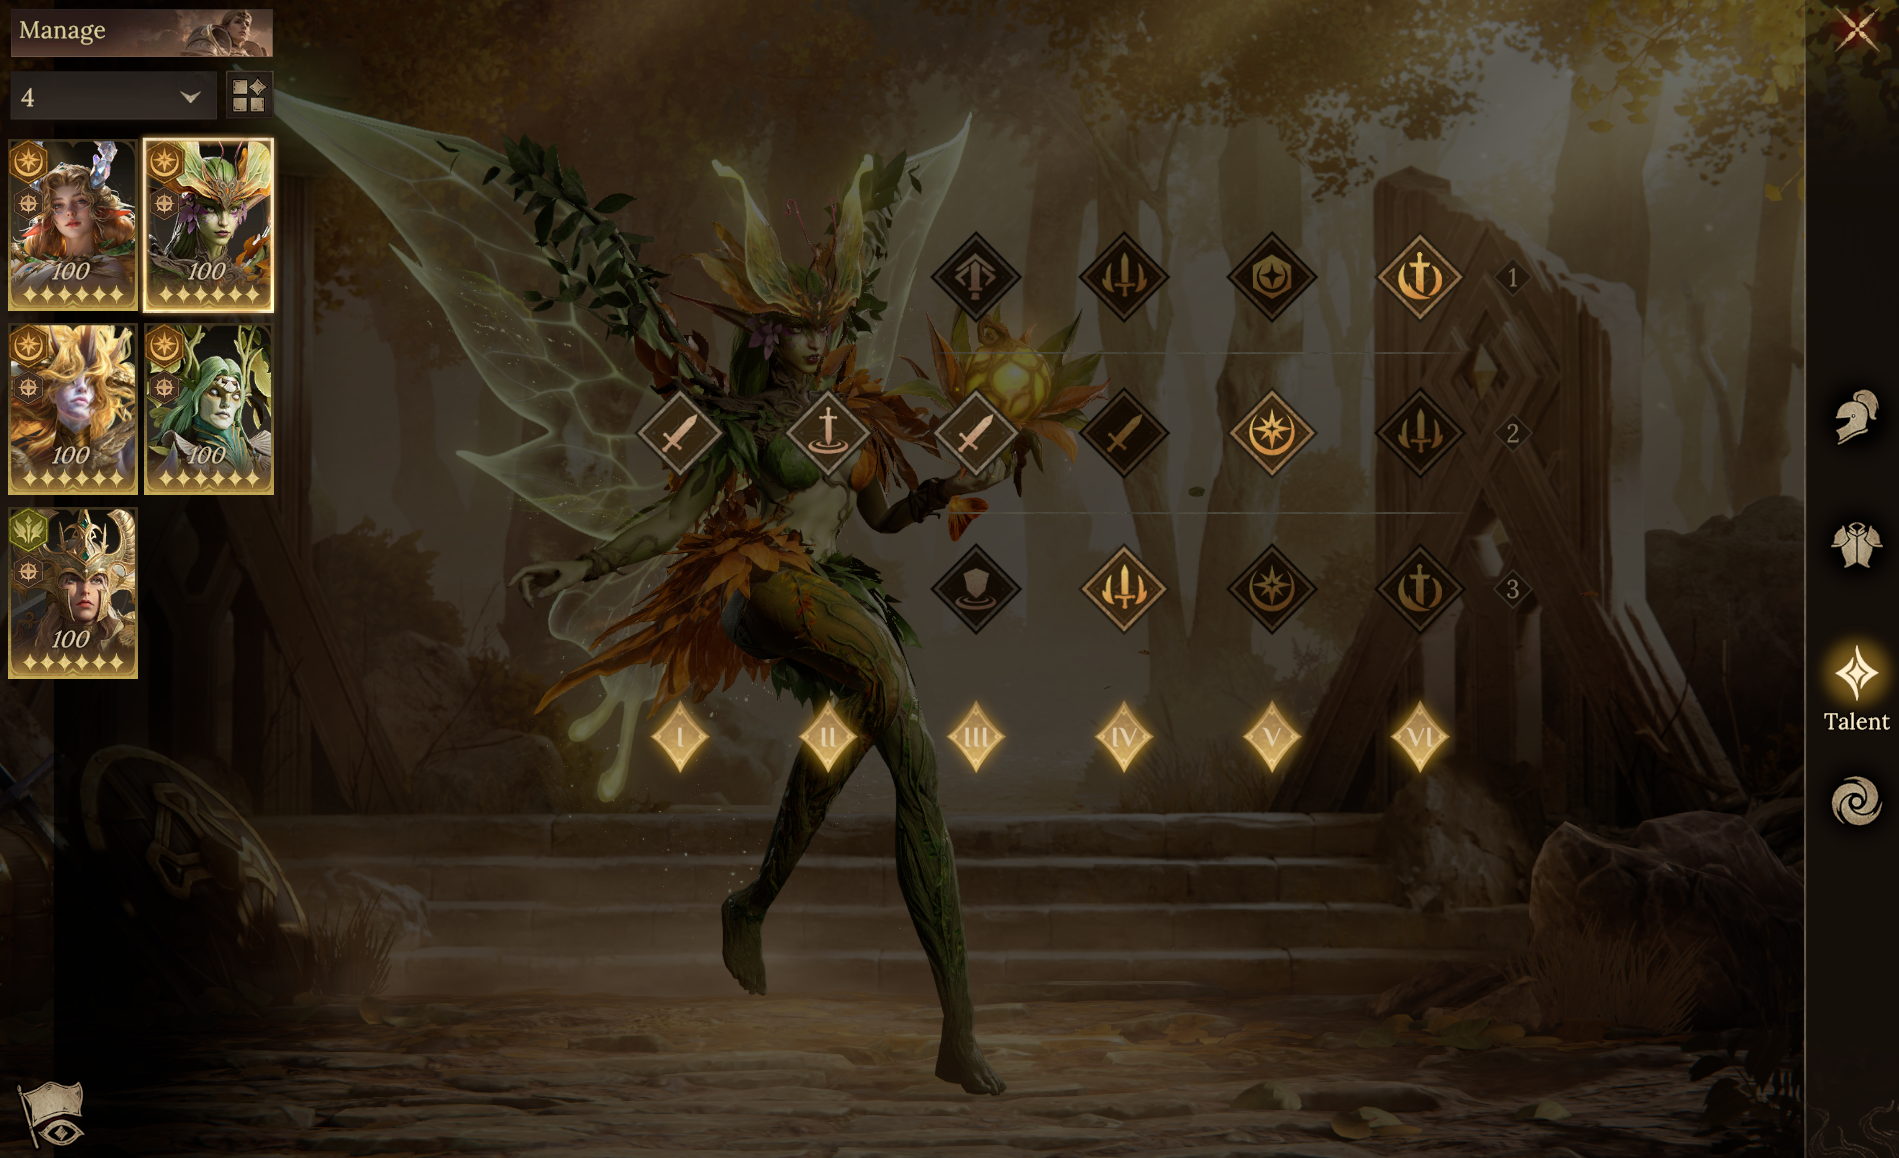
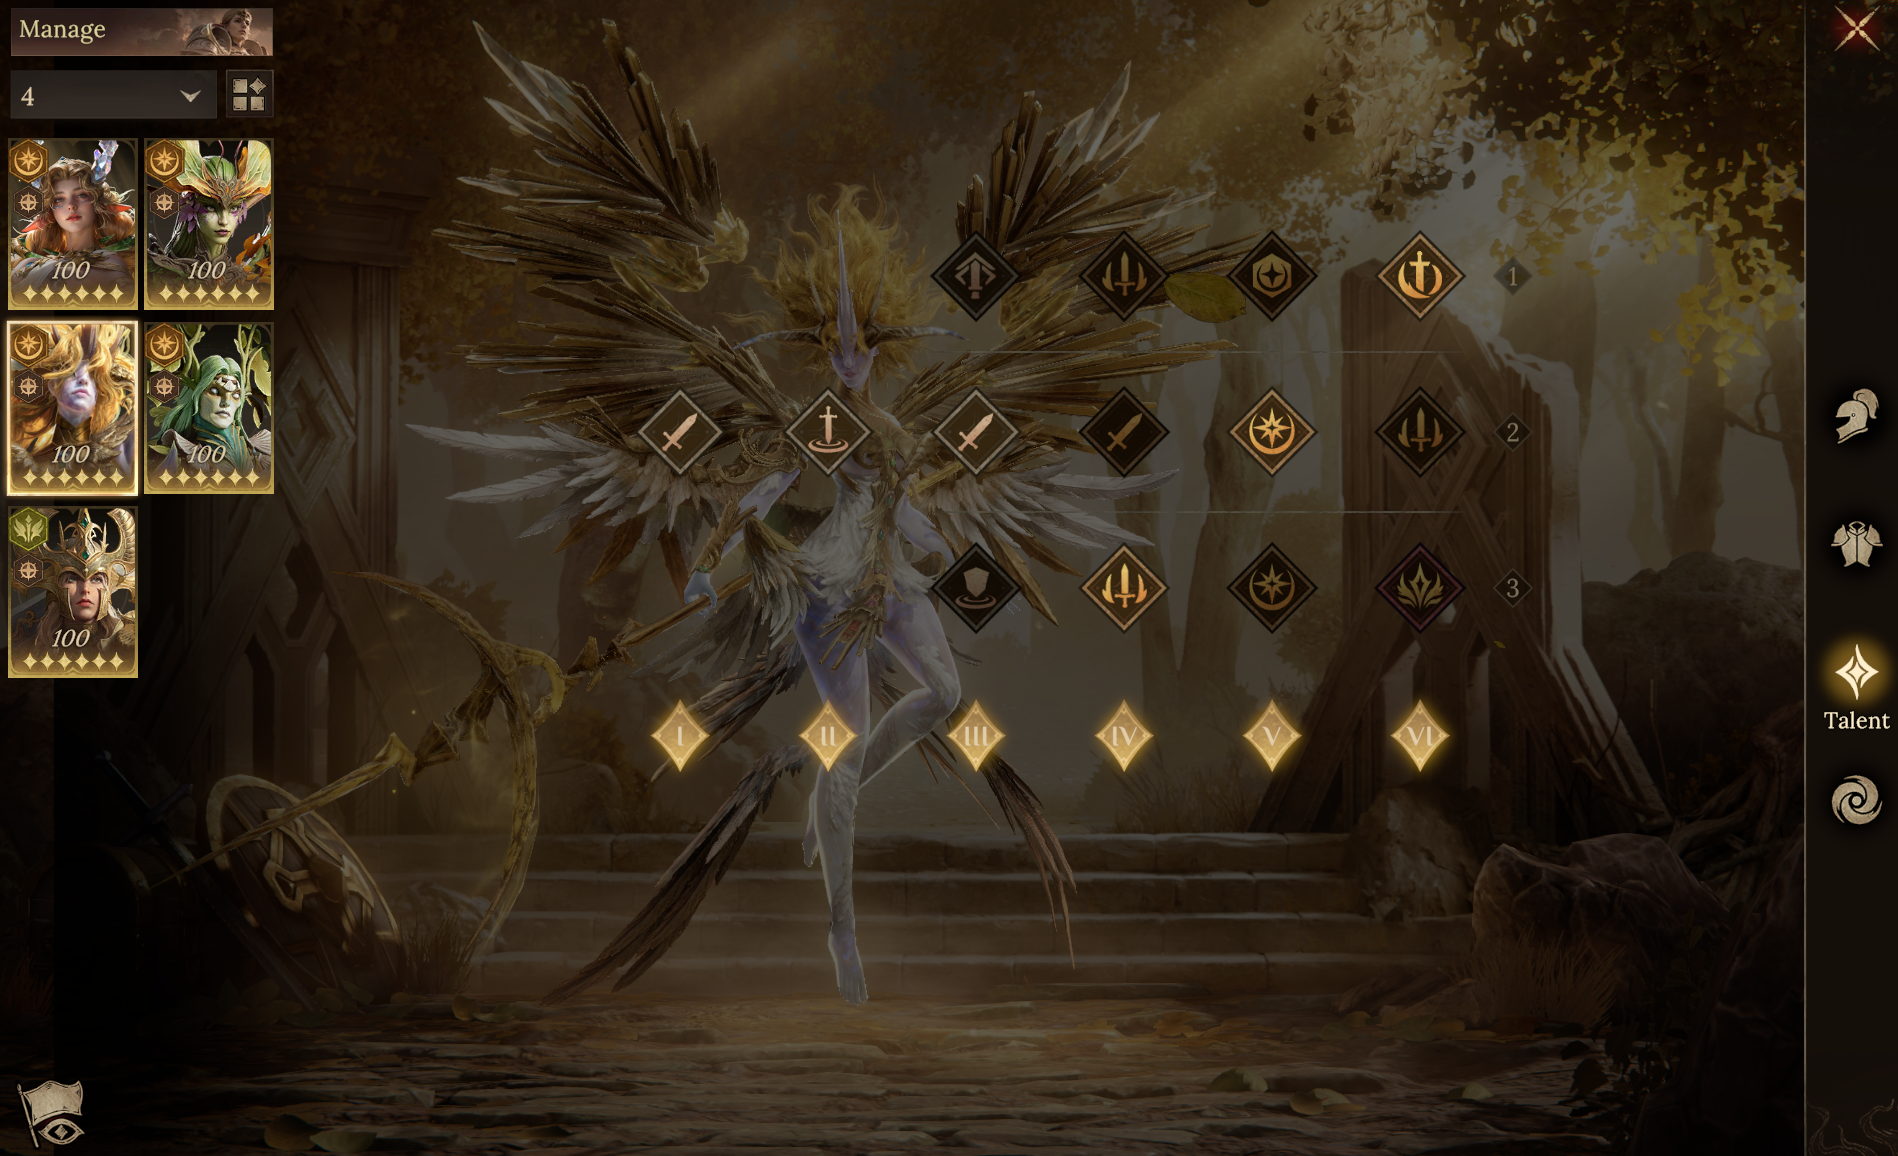
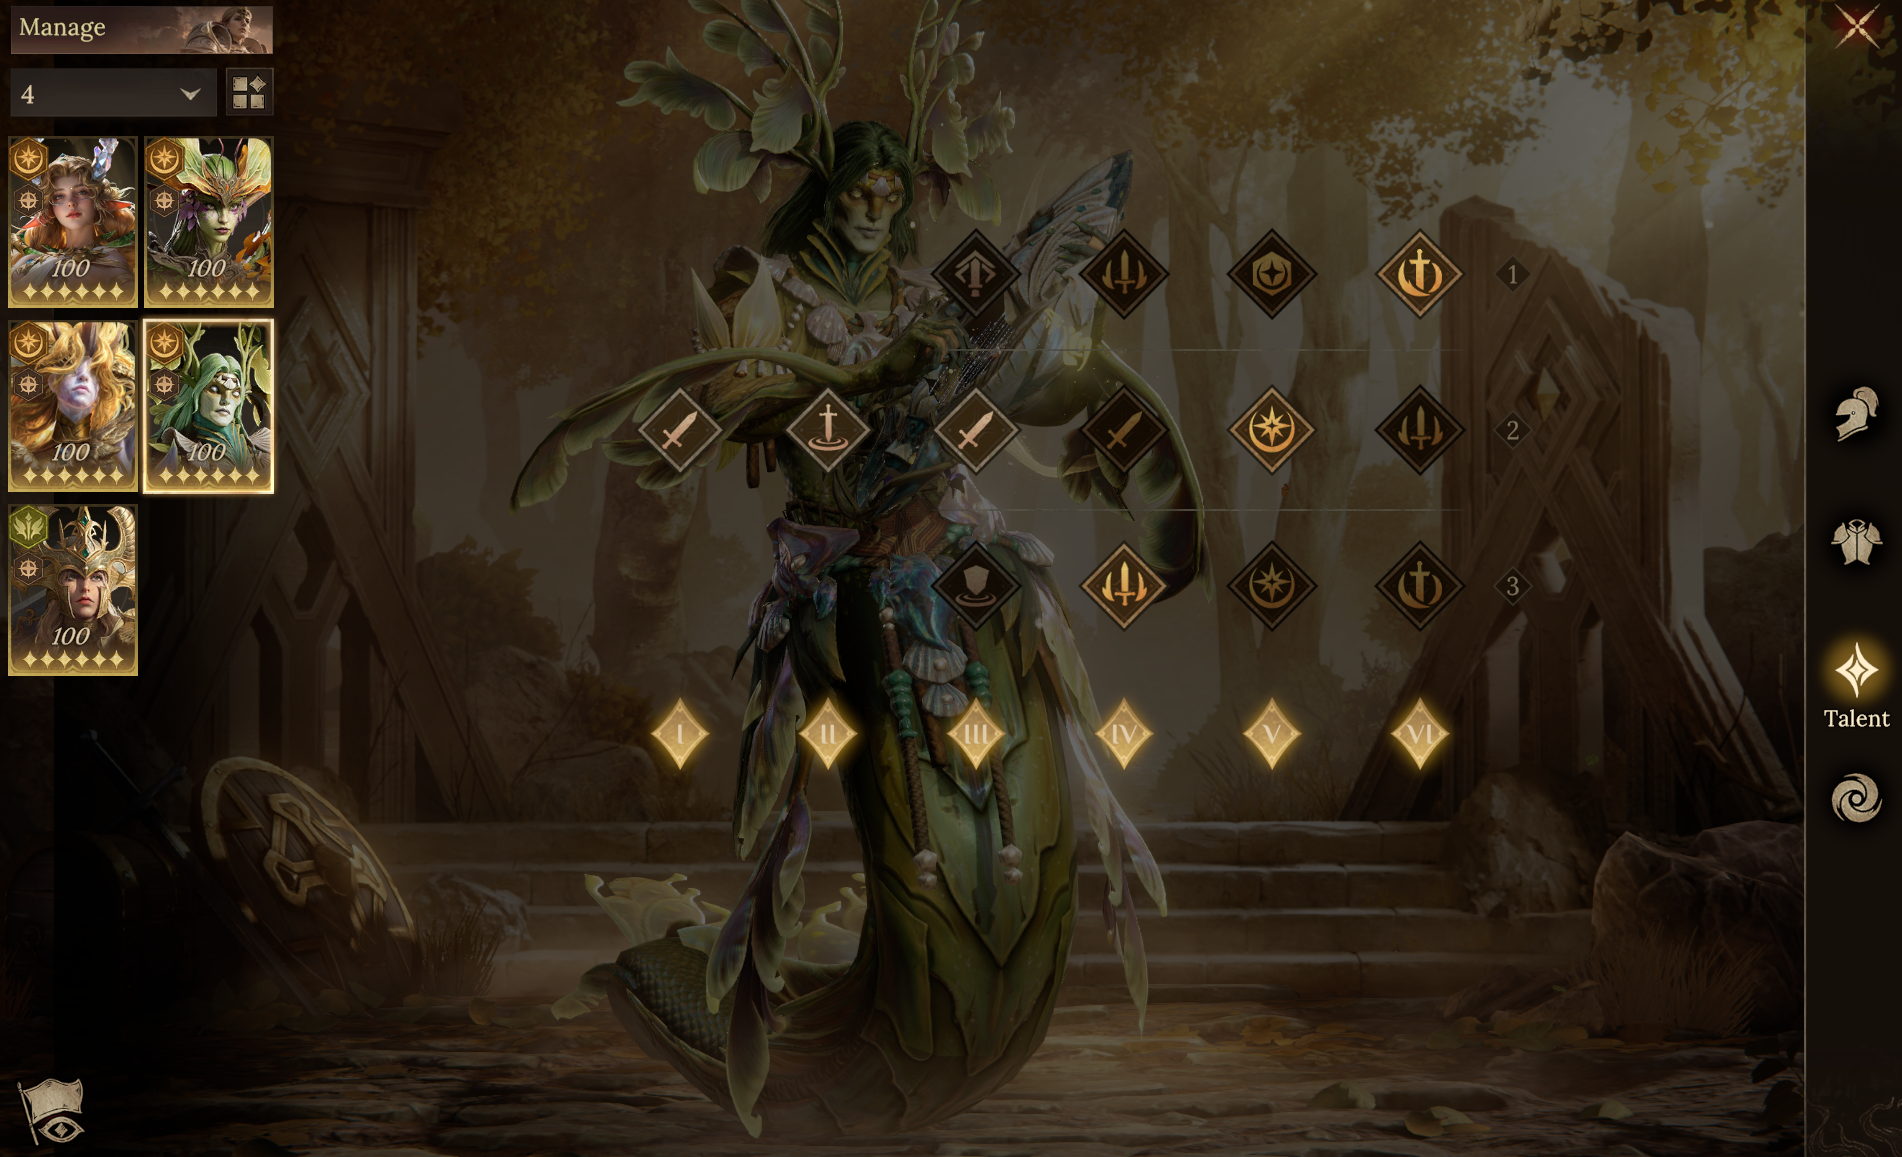
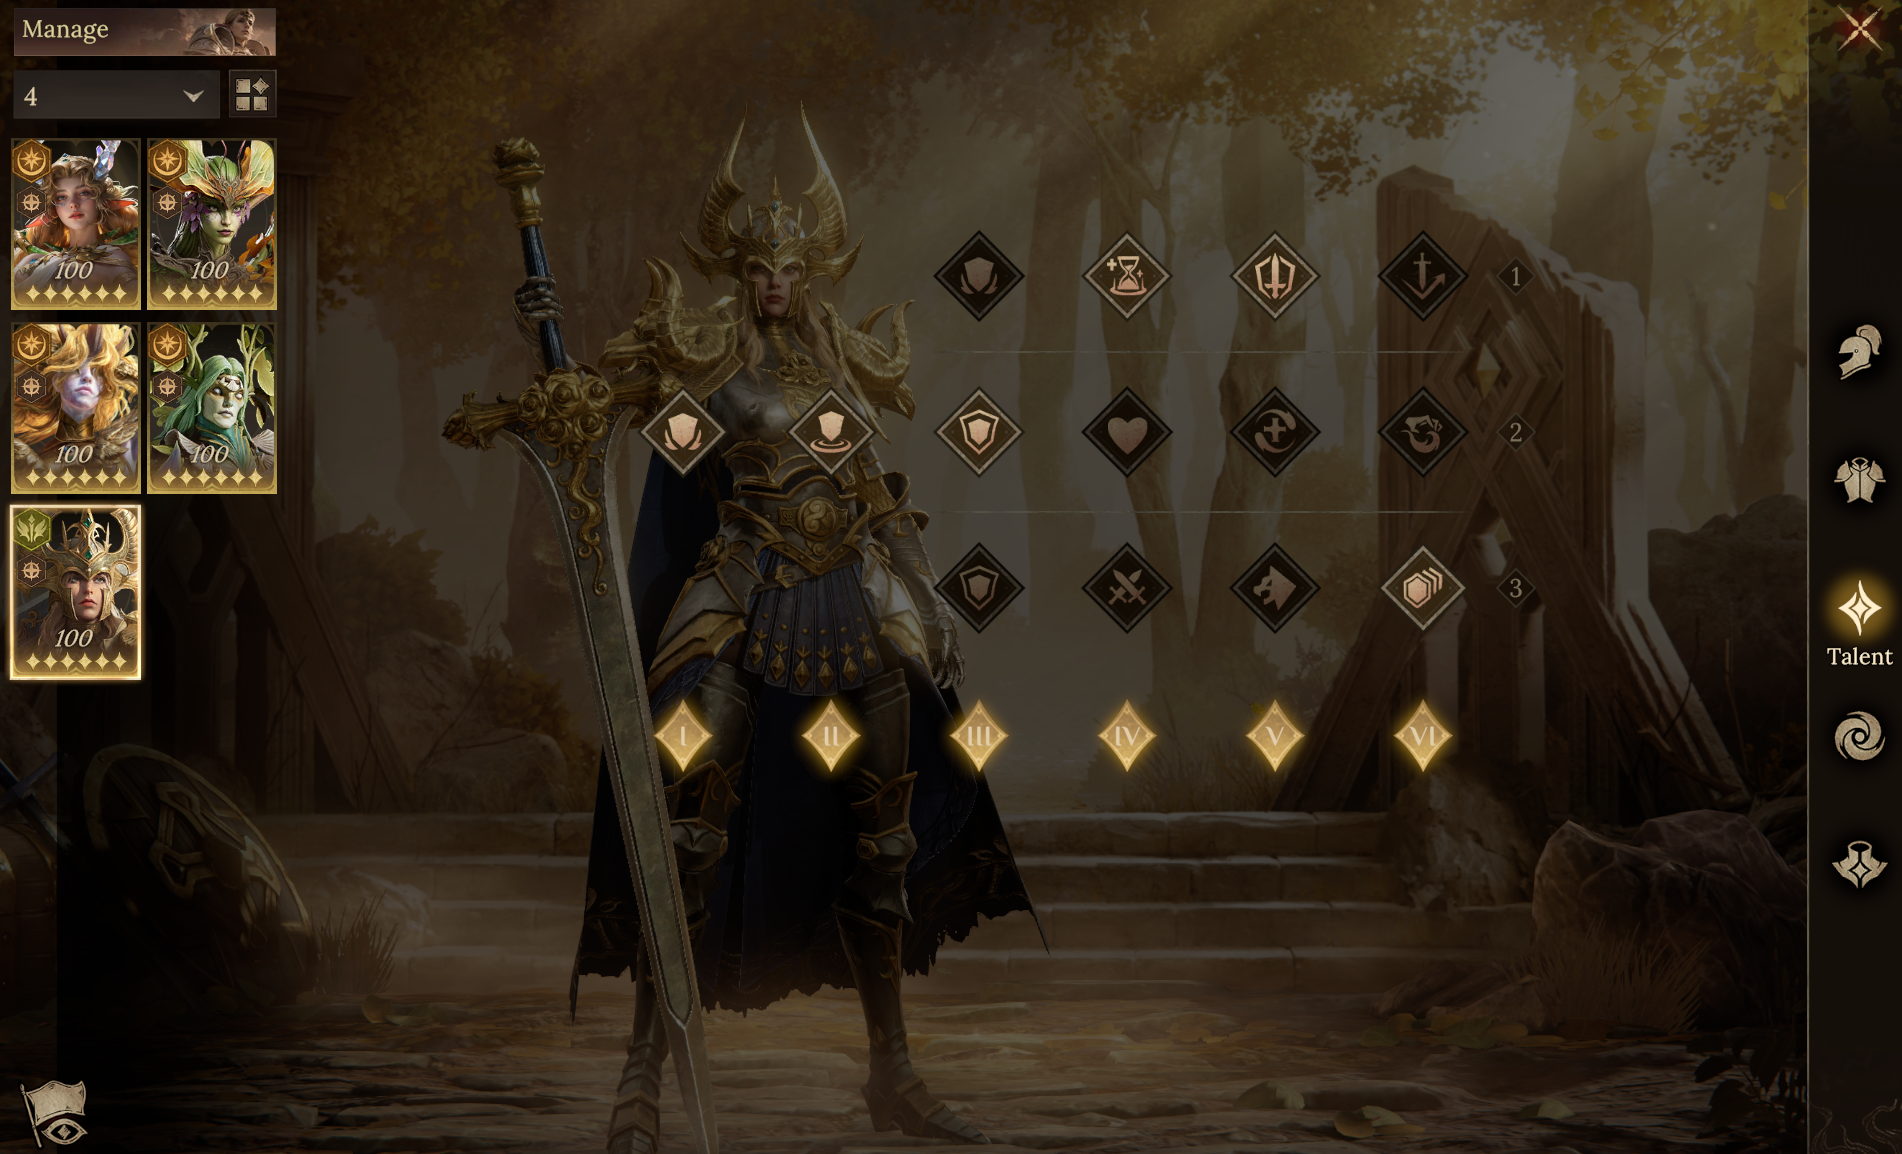
 ● Team Aura / Familiar
We recommend pairing Flora's Attack Aura with the Batwing Familiar to maximize the team's damage output.
● Recommended Skill Timing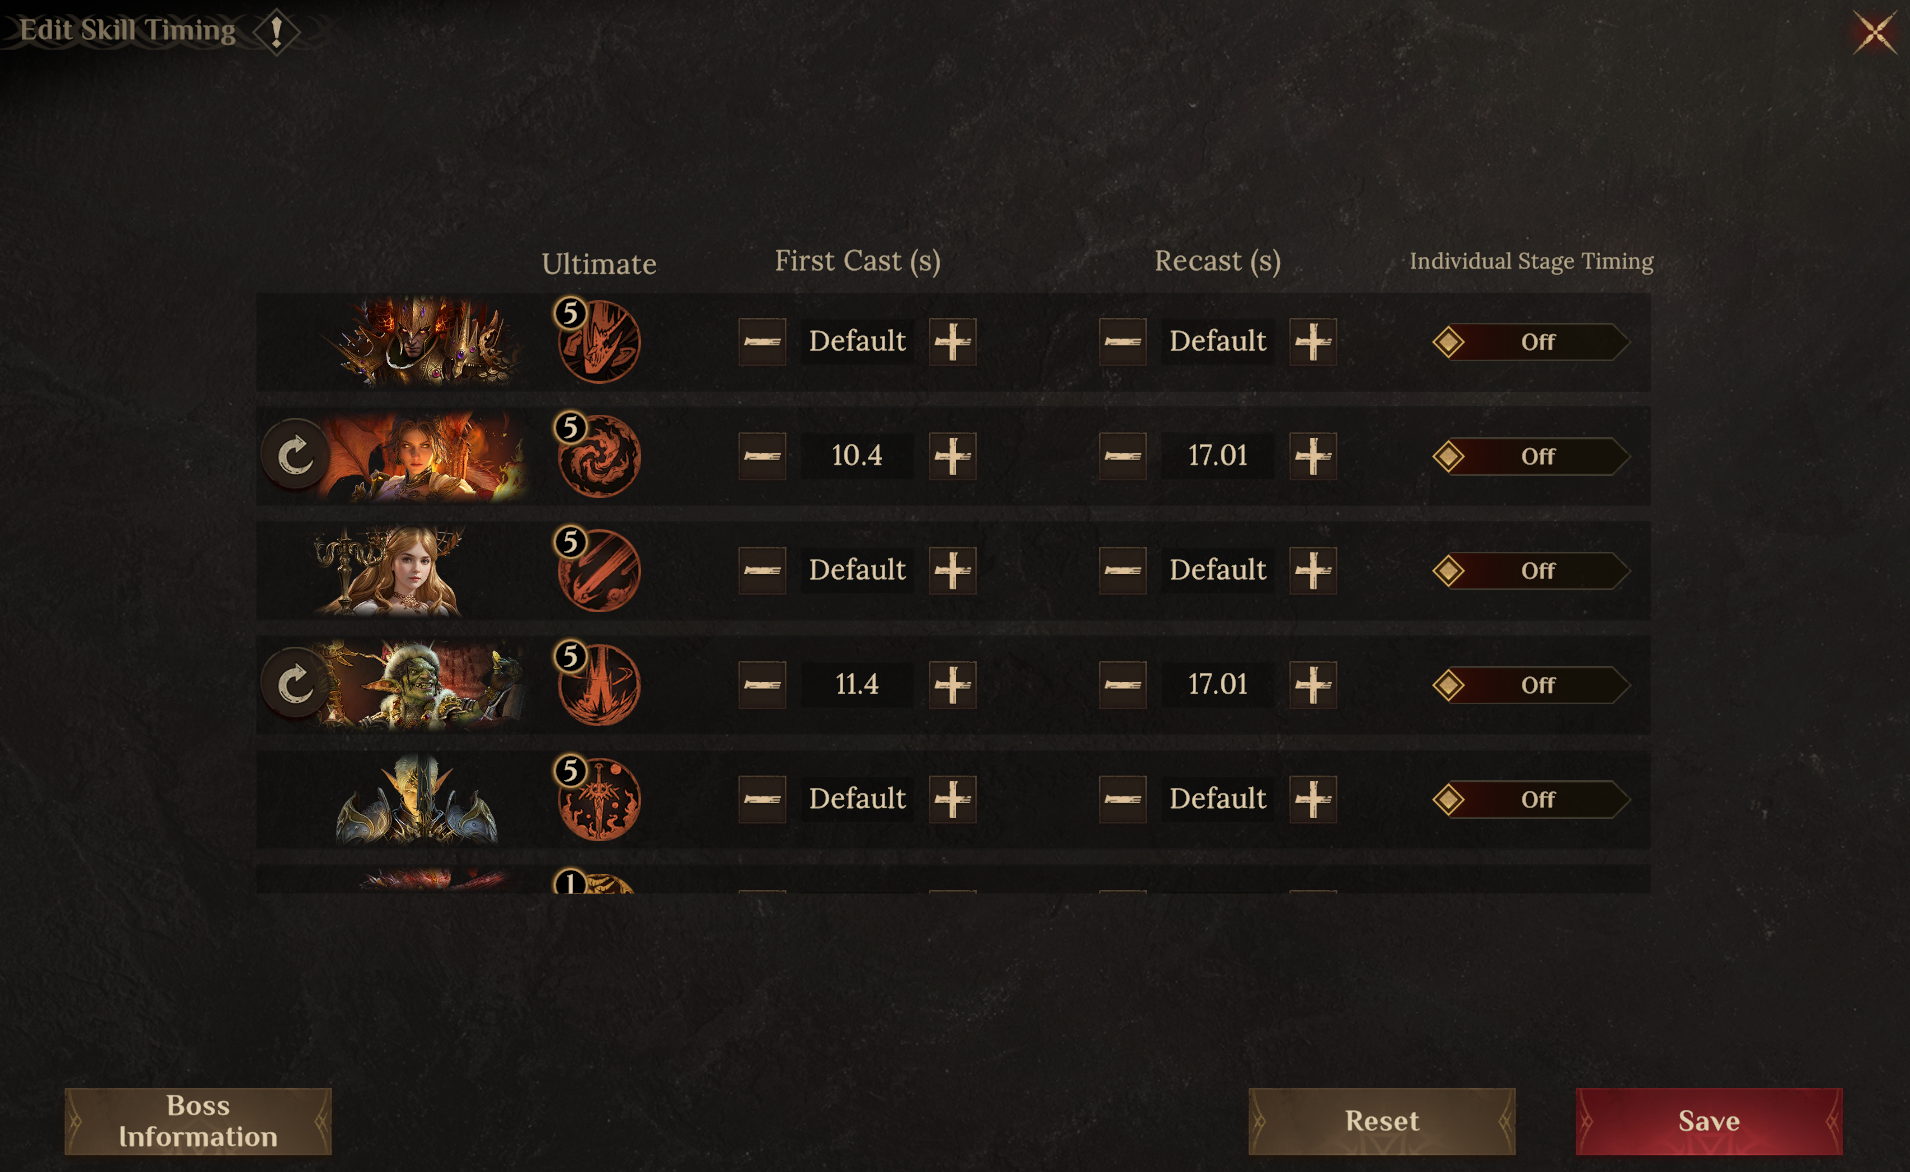 ● Important Notes
1. Stack Thorgos's Attack as high as possible to increase the stats he shares with Flora via Everlasting Candleflame. Travelers without Thorgos can replace him with Caspar, and if you don't have Synarell, you can use Feenja or Felosia instead.
2. If Thorgos's inspiration level is ≥2, it is best to cast his ultimate skill manually. Use it twice per rotation to increase total damage output: cast it once right after Flora uses her ultimate skill, then cast it again once his Ultimate Energy is full.
● Hero Substitution Options
Thorgos and Synarell: The higher the Skill Haste, the better.
Other heroes: Skill Haste > 25;
Felicity: Accuracy > 290;
Synarell: Resistance > 400. For other stats, prioritize stacking Attack.
Other heroes only need around 200 Resistance.
● Recommended Gear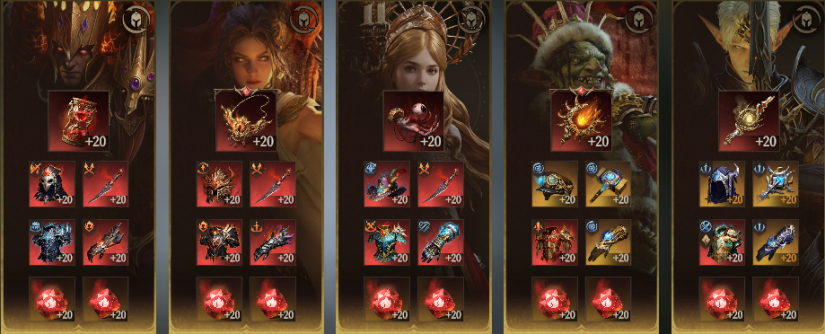 ● Recommended Talents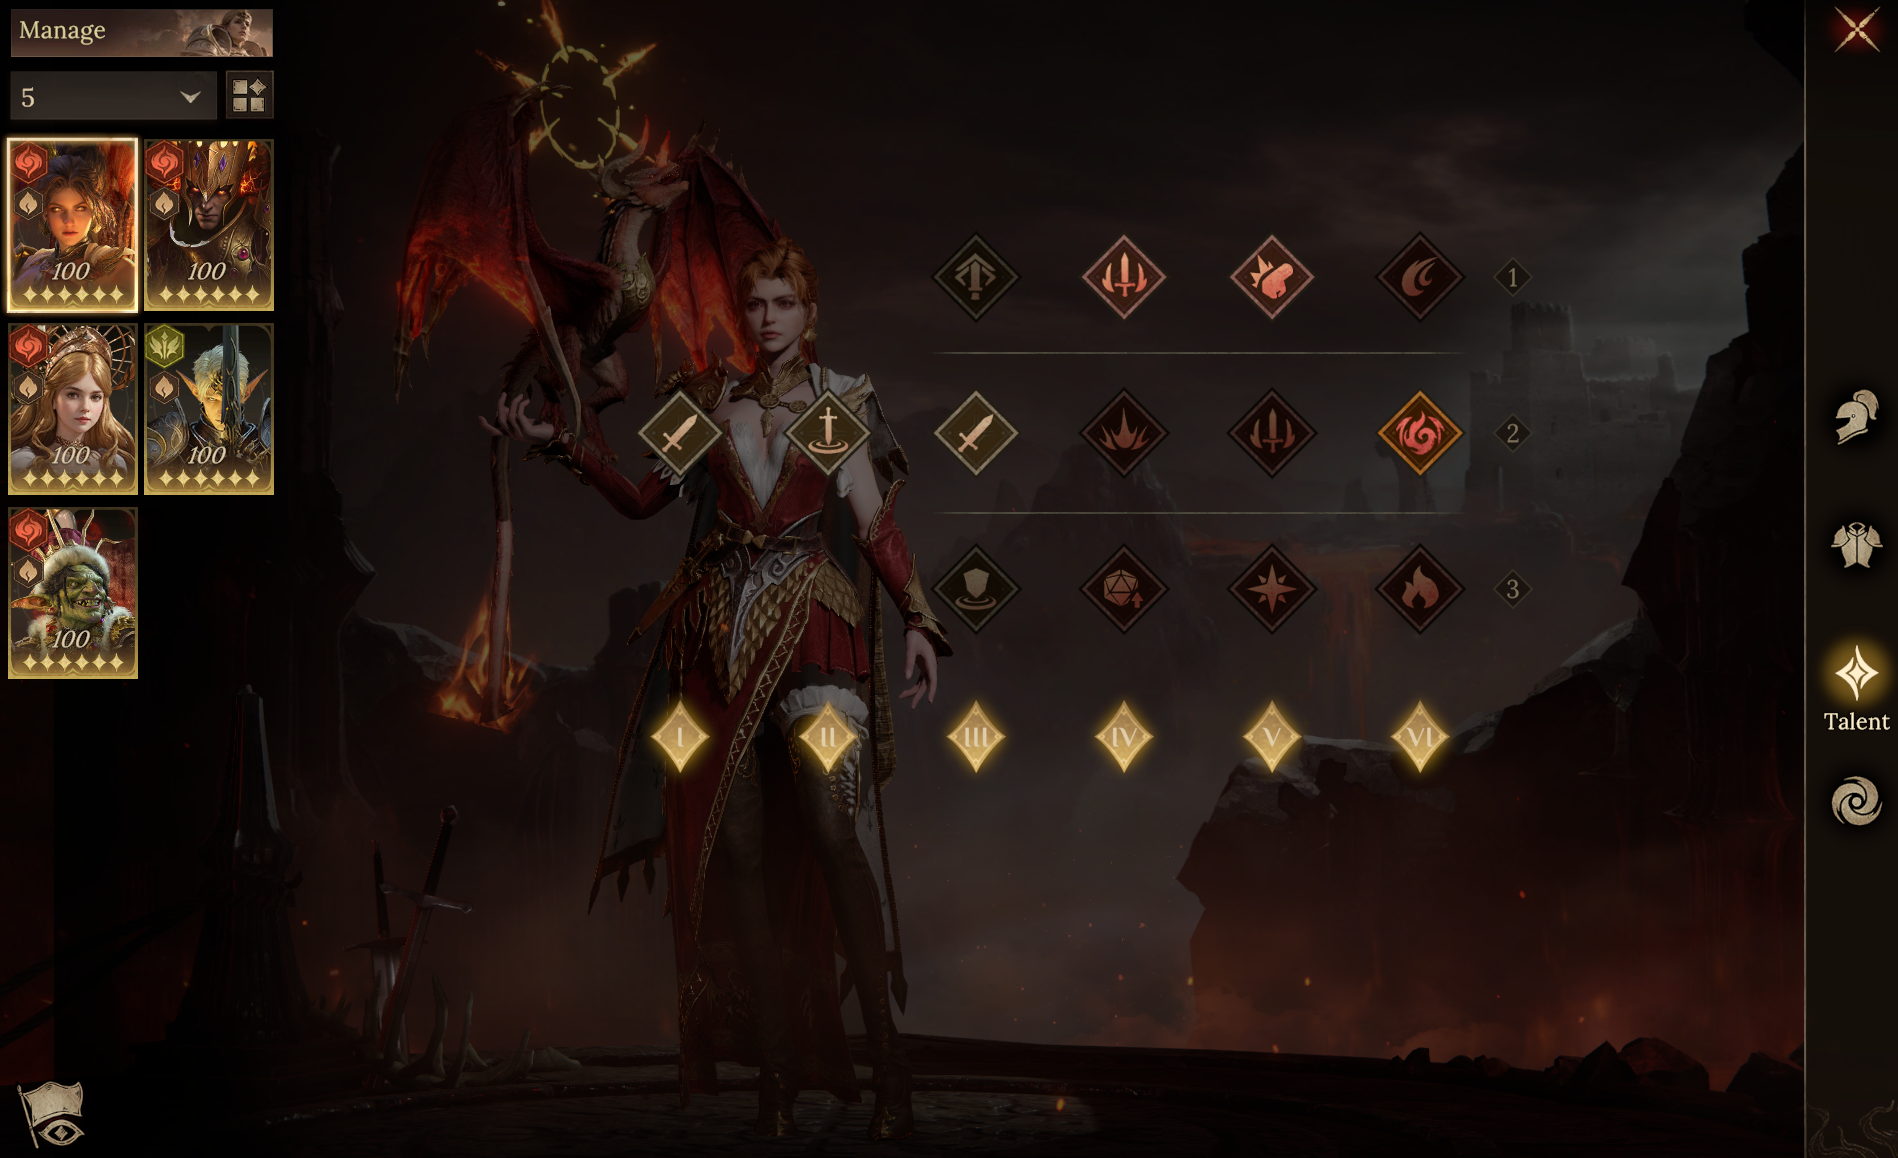
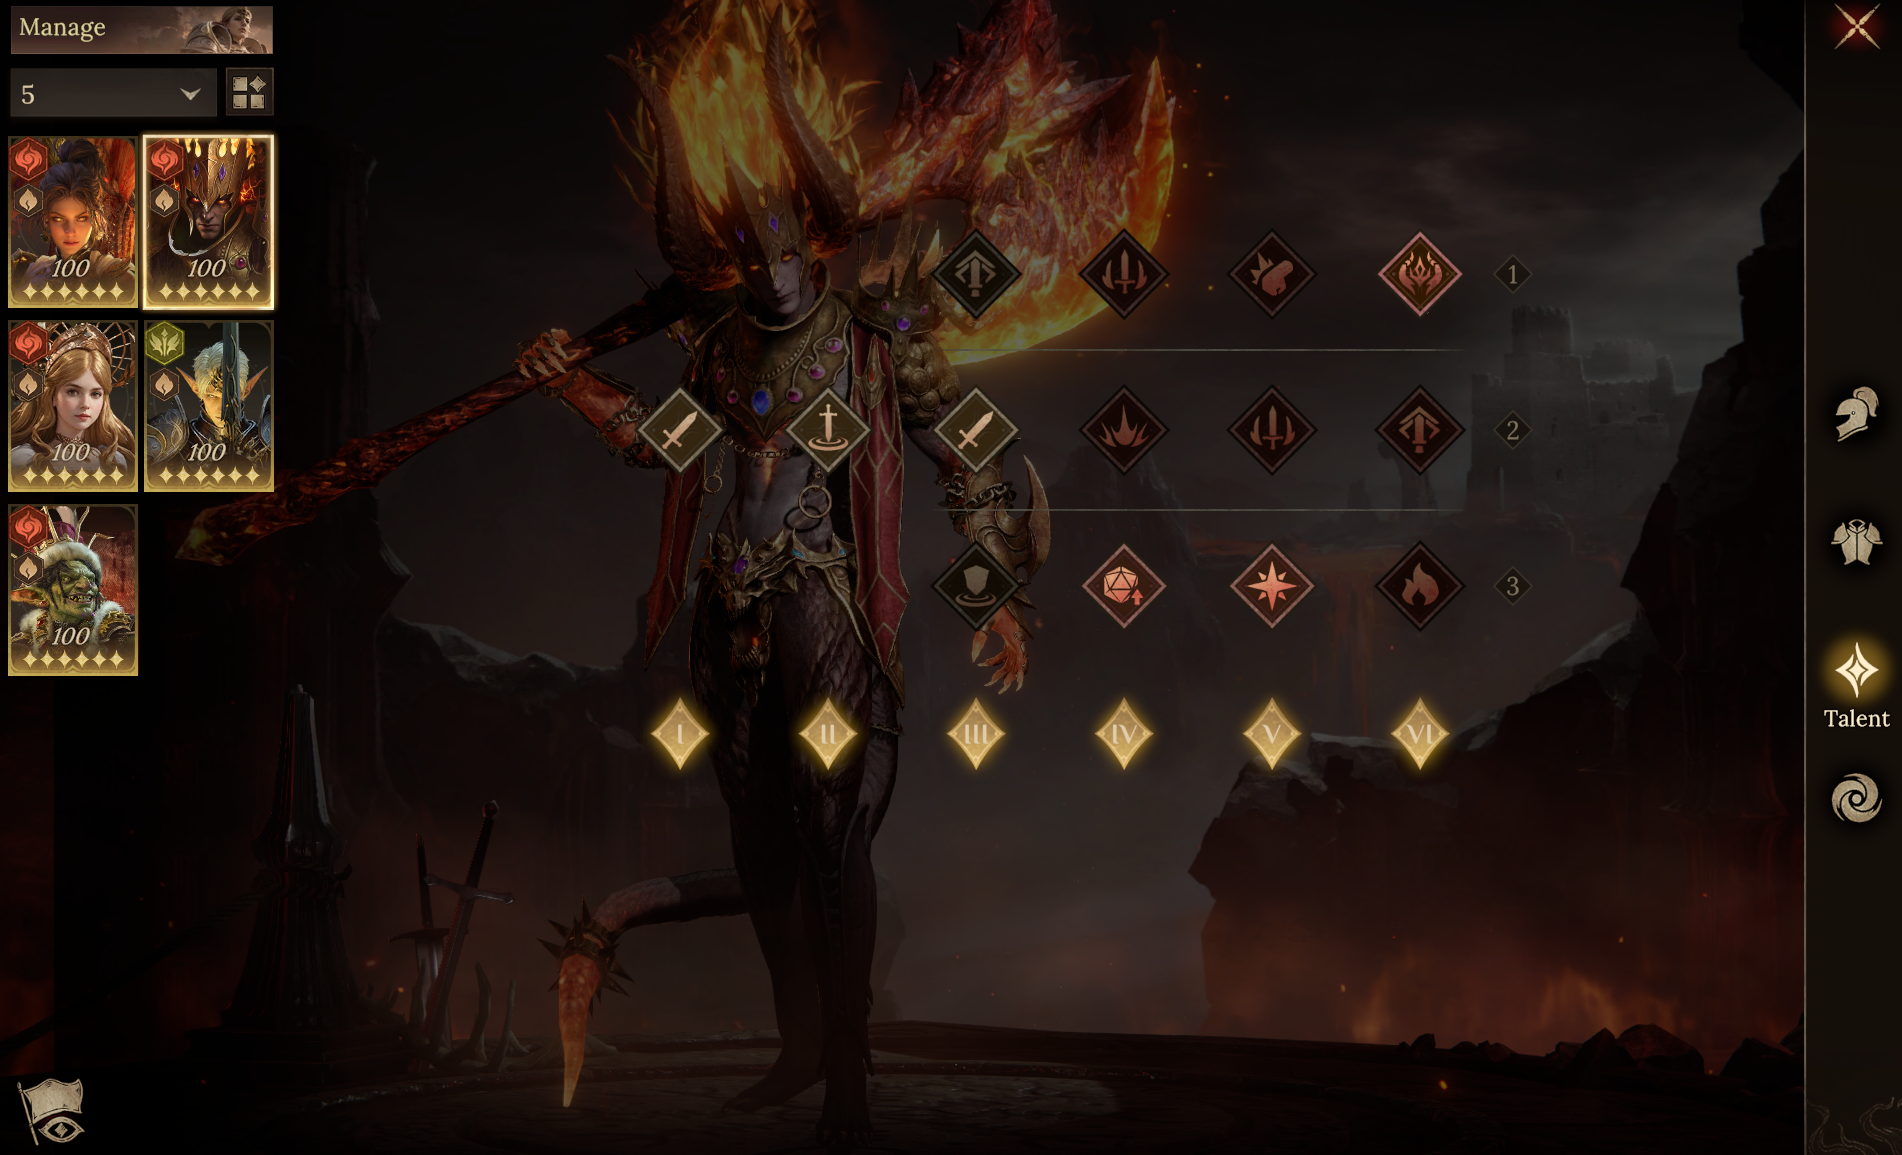
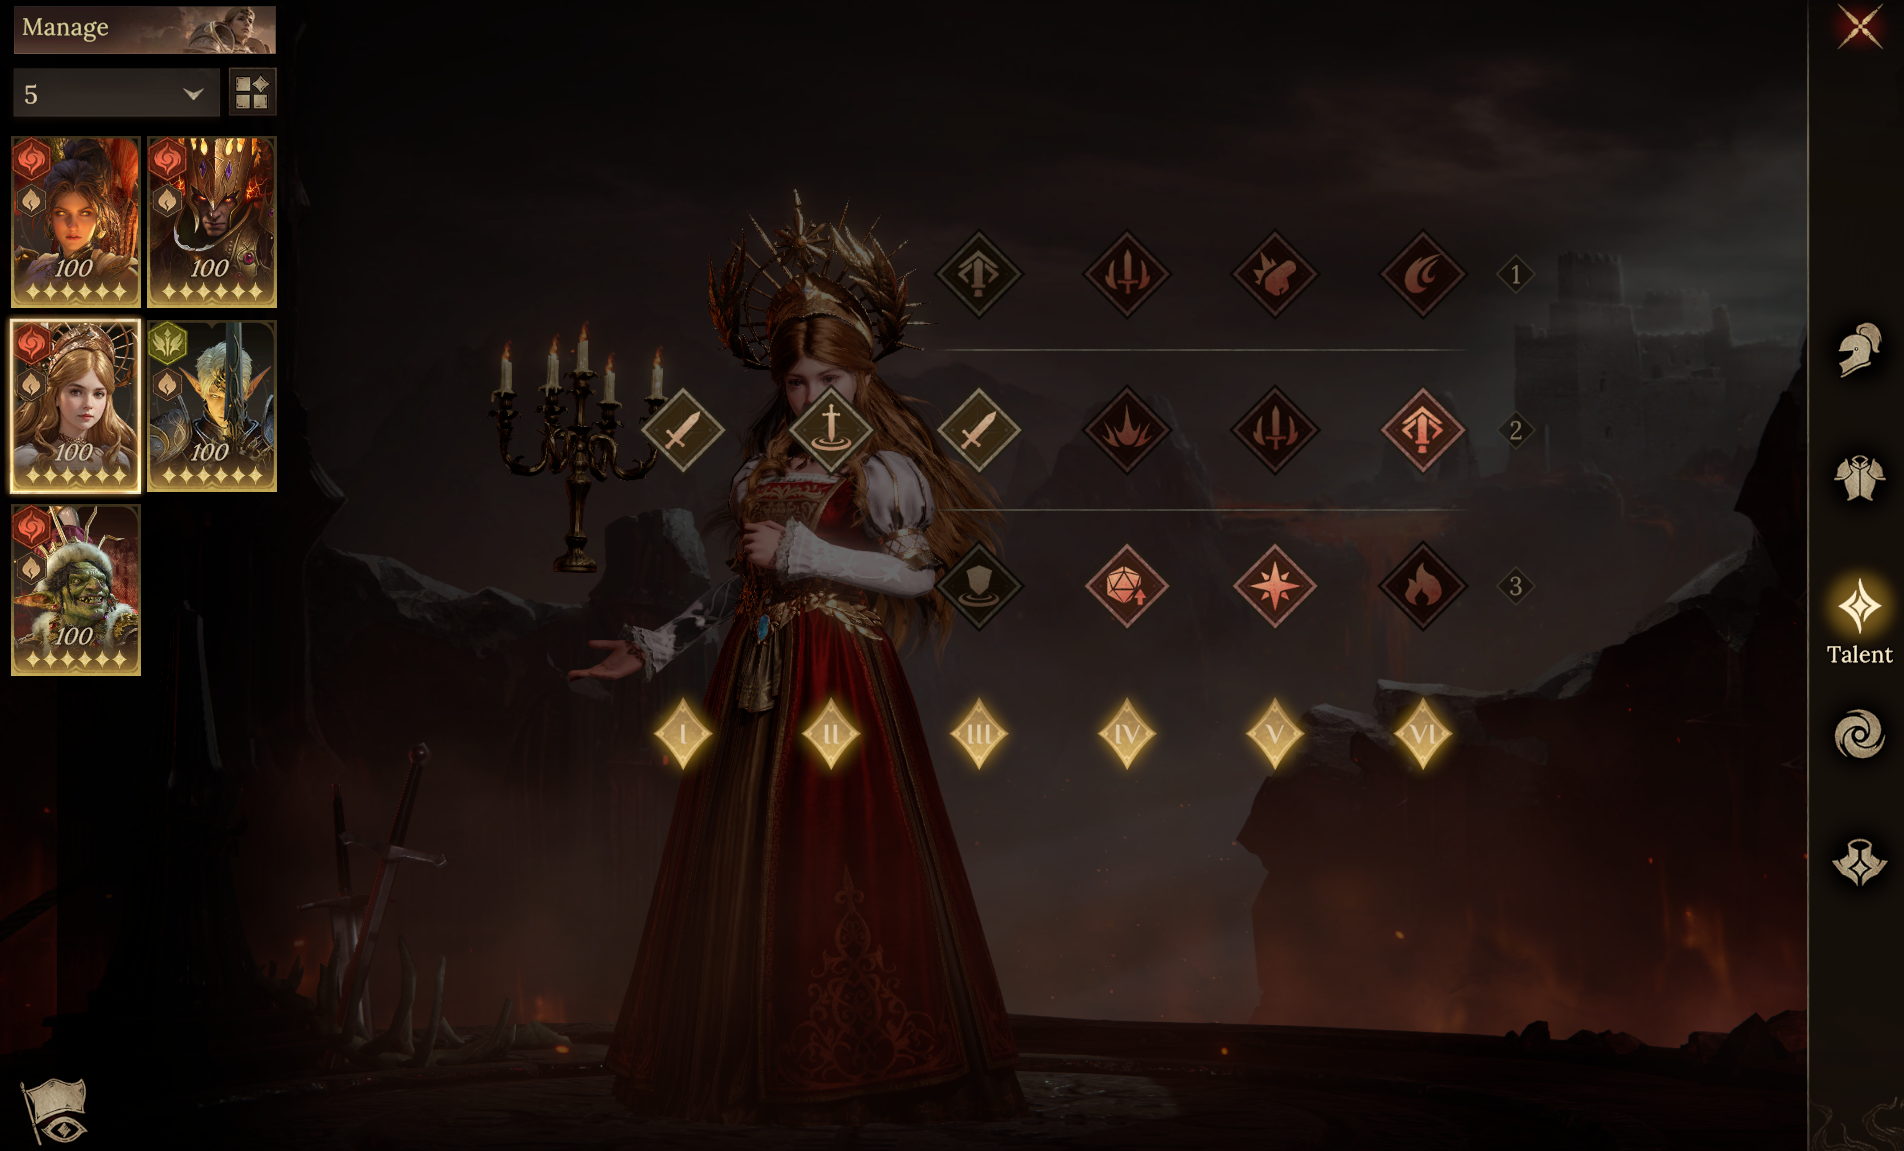
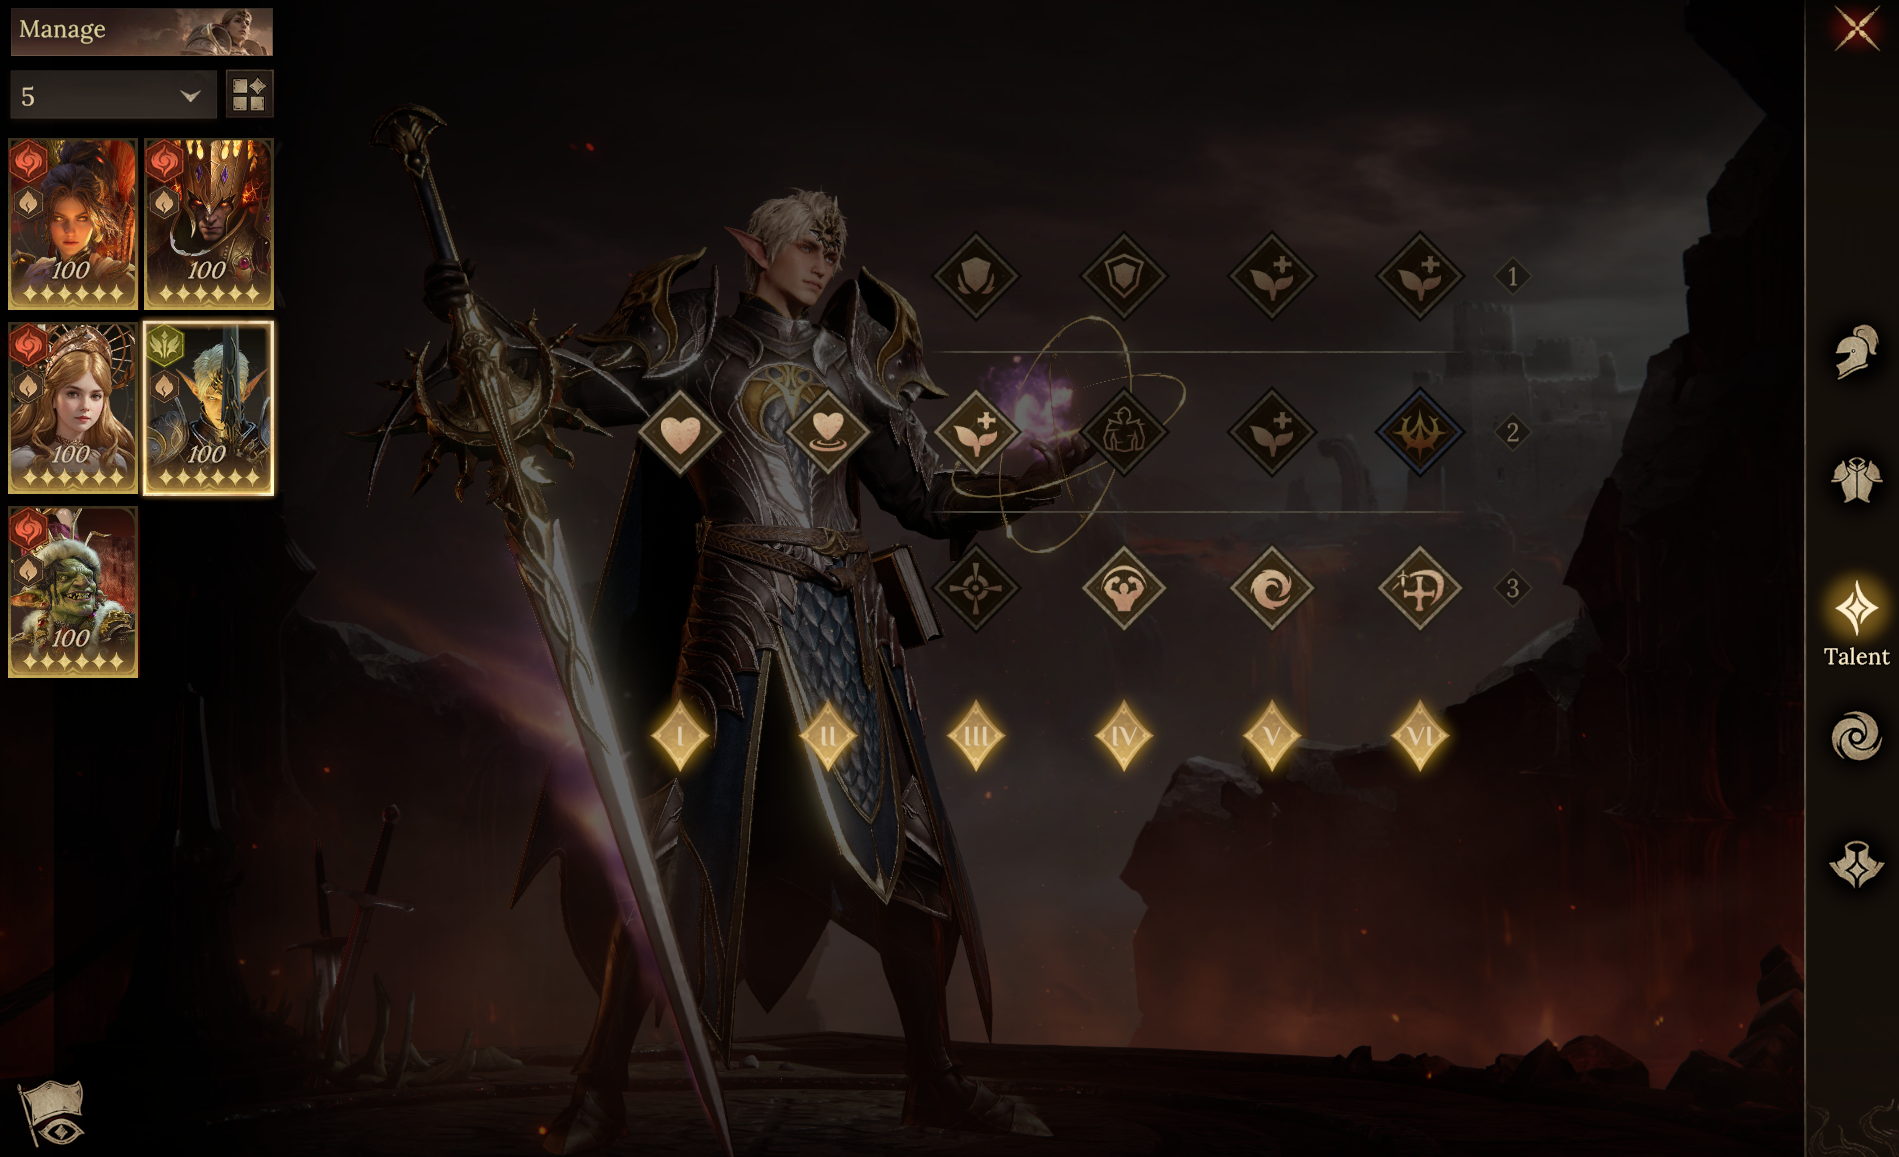
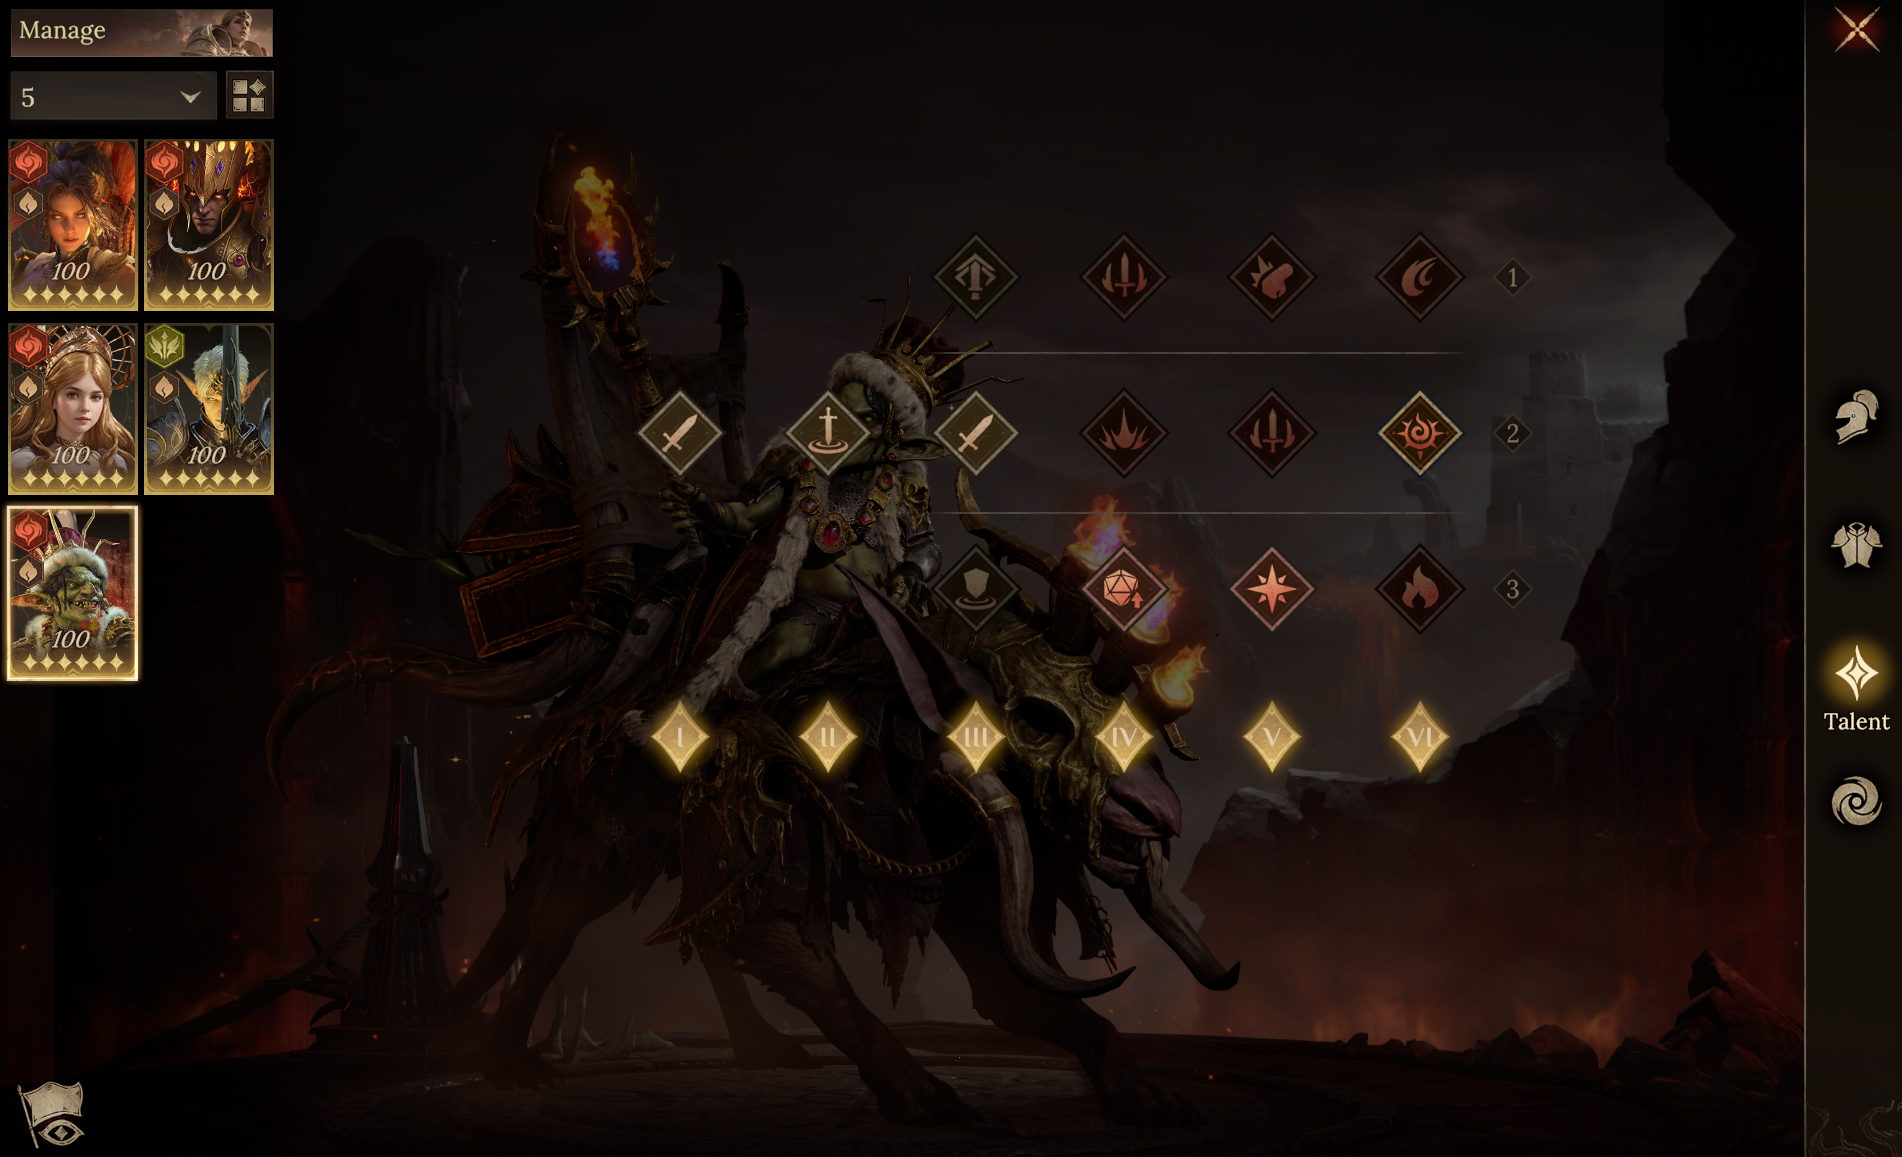
 ● Team Aura / Familiar
We recommend pairing Beldelle's Attack Aura with the Starshade Servitor/Djinn Familiar to maximize the team's damage output.
● Recommended Skill Timing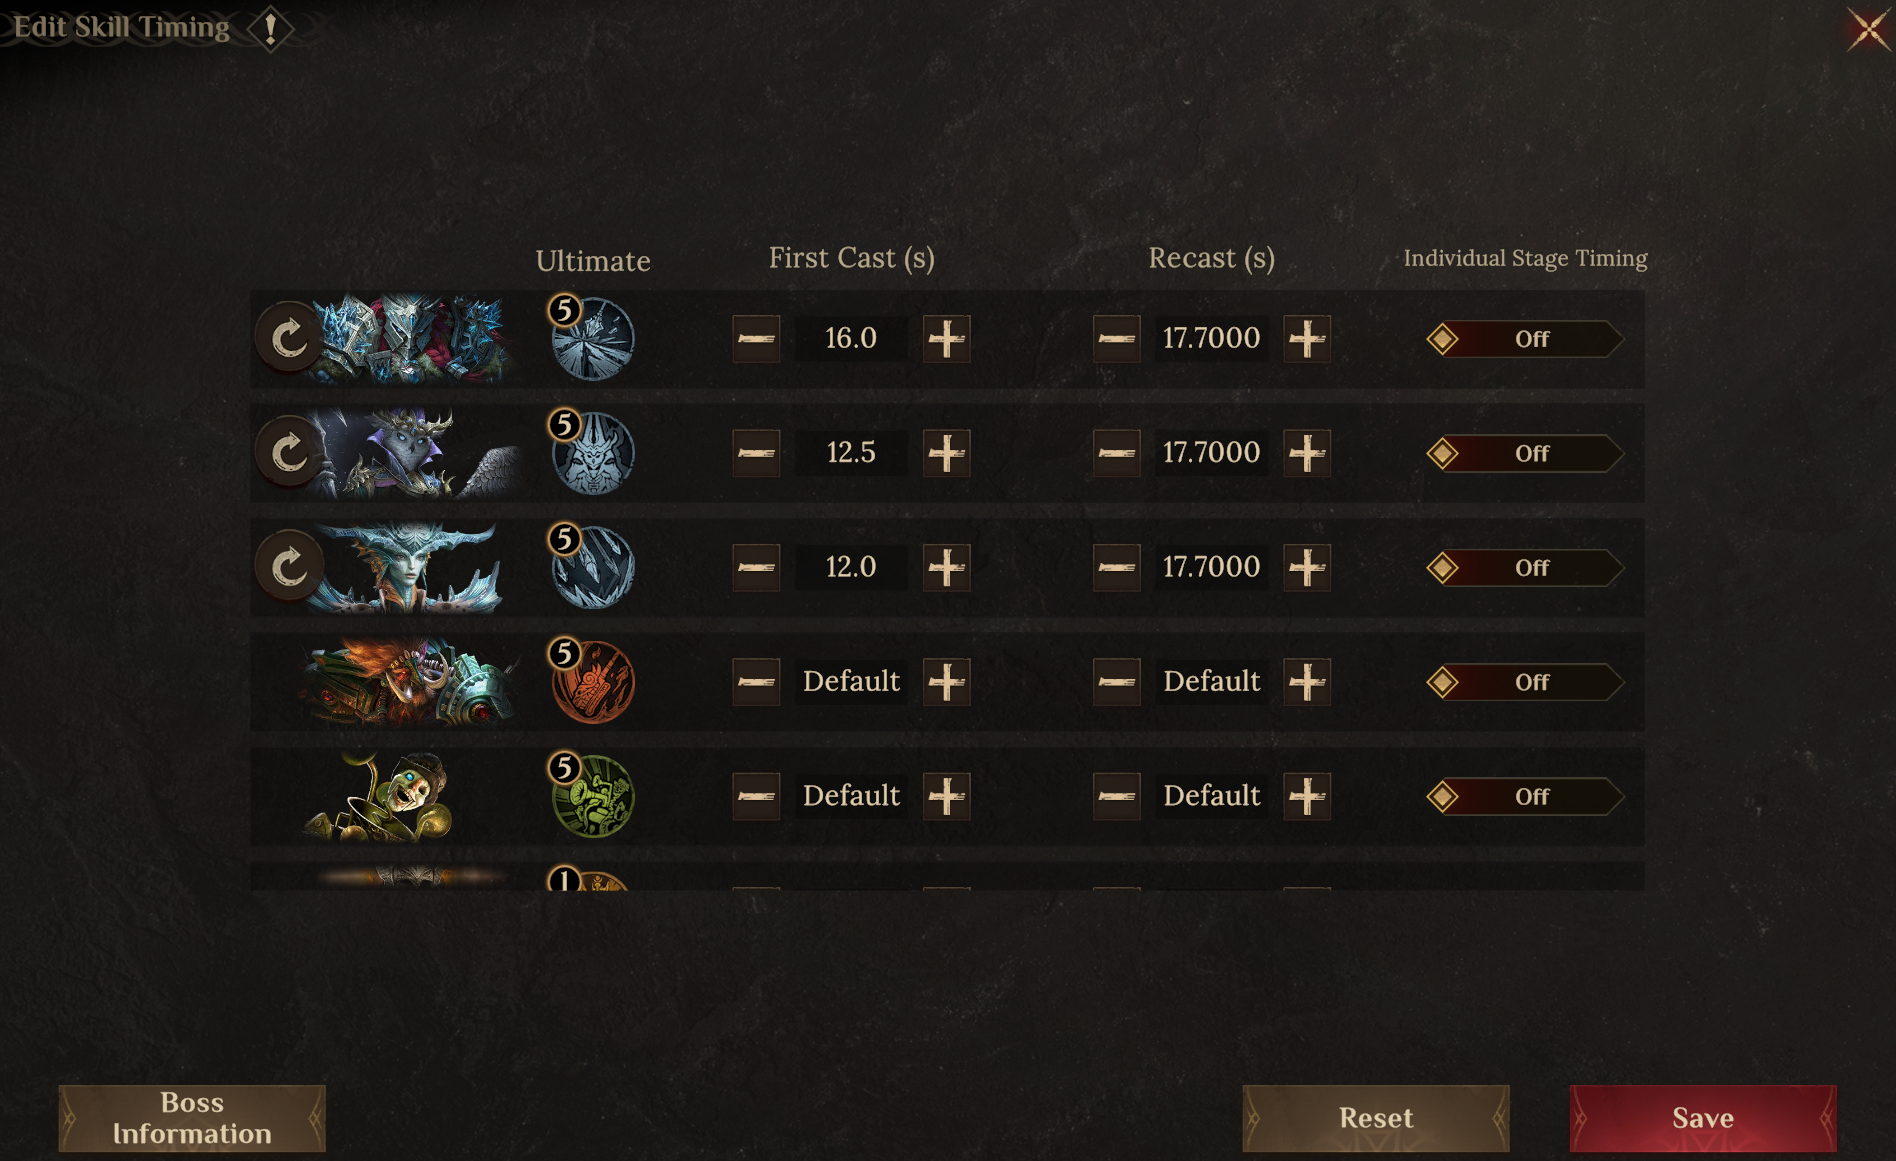 ● Important Notes
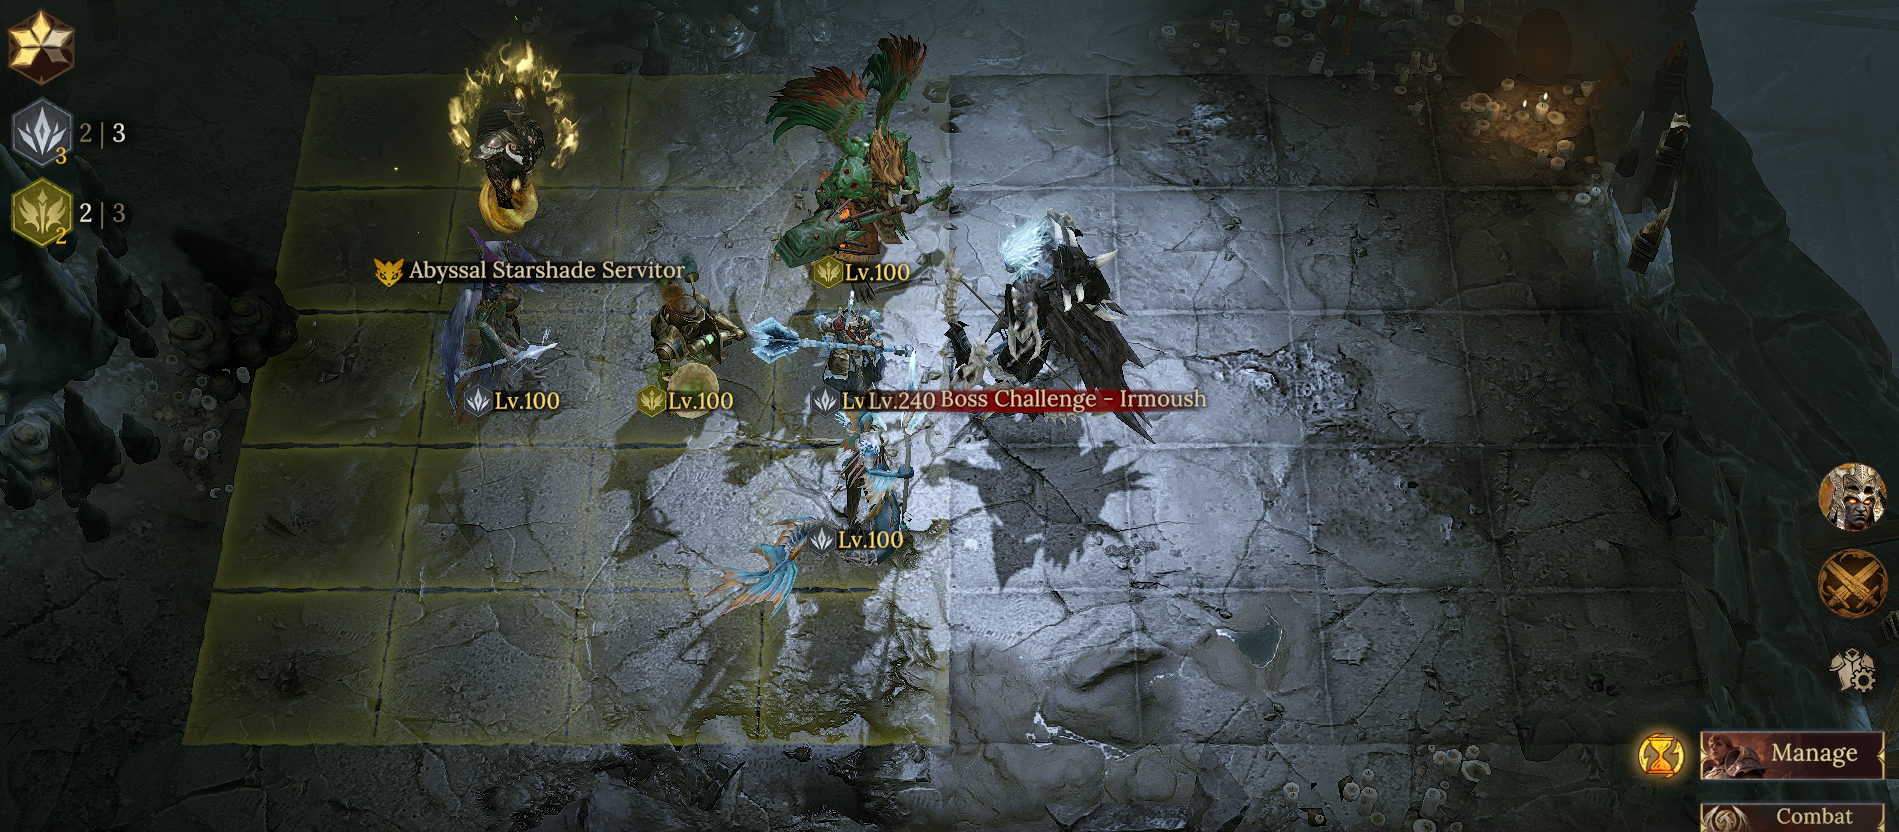
1. Blah Blah and Scaarr can be replaced by other support heroes. Just make sure your team has heroes of three different elements to trigger the stage buff.
2. We recommend placing Shinnah next to Beldelle to share stats with the latter via Everlasting Candleflame. However, doing so will prevent Shinnah from receiving shared Resistance from Blah Blah, so you should also stack her Resistance to >200.
3. Although this stage reduces the success rate of inflicting status effects, consider using a Vinyara + Mimic strategy to reduce the frequency of the boss's skills. Especially with a high Elemental Affinity level, a team of Vinyara + Beldelle + Fredegonda + Shinnah + Aethereal/Zhorak can reach a higher damage ceiling.
● Hero Substitution Options
Shinnah and Blah Blah: Accuracy > 230;
Blah Blah: Resistance > 400; Shinnah: Resistance > 200;
Other heroes only need around 160 Resistance.
● Recommended Gear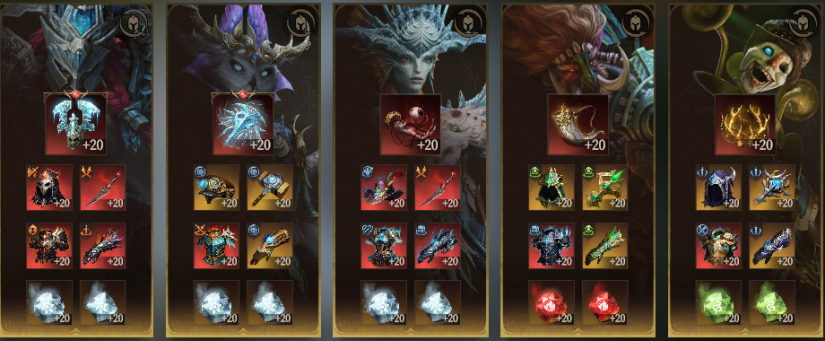 ● Recommended Talents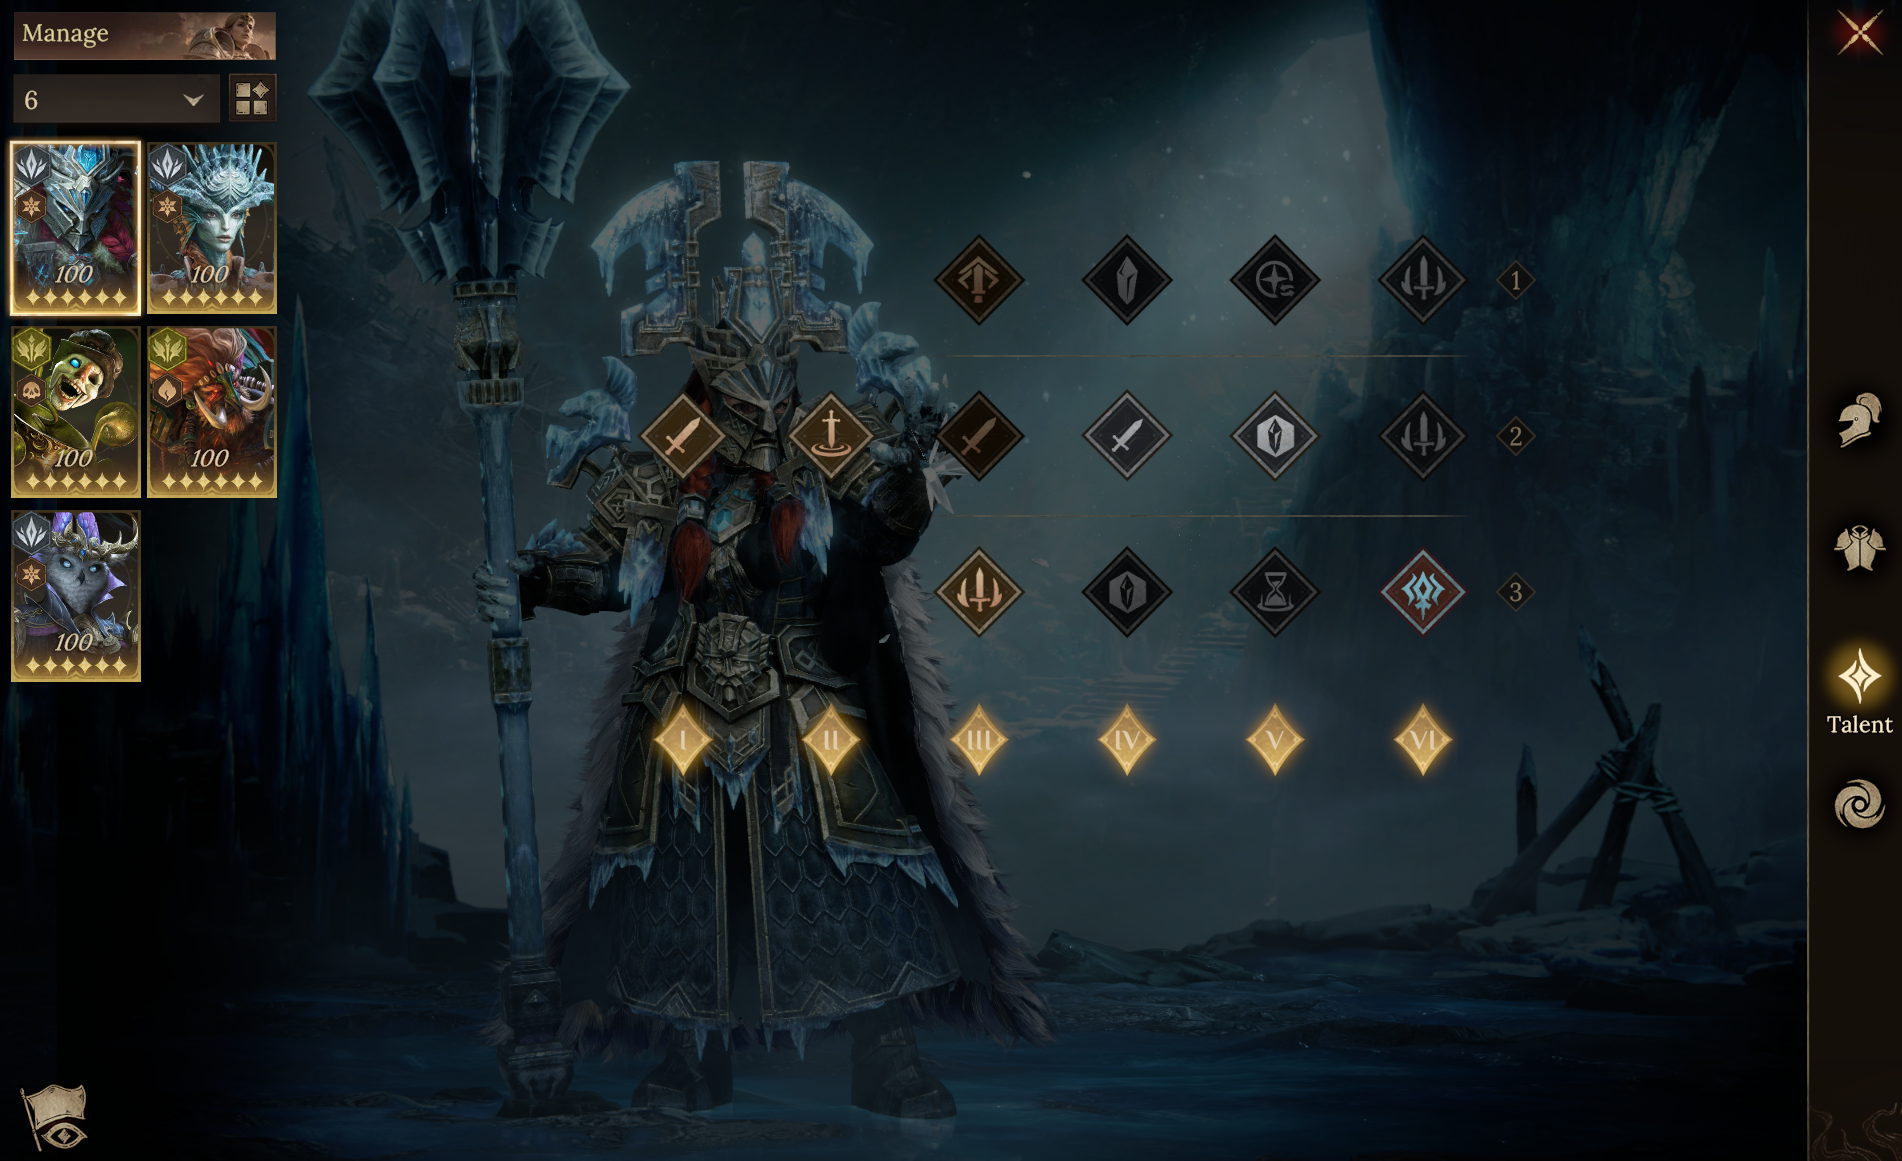
Philto
Team Composition: Reytah + Maashtur + Szecedith + Sacredeia + Rook We recommend pairing Rook's Attack Aura with the Tressym Familiar to maximize the team's damage output.
● Recommended Skill Timing
1. Position your heroes as shown to prevent the boss's skills from repeatedly hitting your backline. Reytah can be replaced with Pardis. If you don't have Maashtur, you can use Blah Blah, Oggok, or Nathaniel instead. Be sure to adjust your positioning if you make any substitutions.
2. Equip Rook with Steam Sonata or stack over 10 Skill Haste on all Corrosion heroes. This lets you manually cast Rook's ultimate skill one more time just before the challenge ends, achieving higher total damage.
● Hero Substitution Options
 Healing, Shield Inflicts Debuffs Grants Buffs |  Healing Extends Debuffs Attack Penalty |  Secondary Damage Dealer Inflicts Corrosion |  Boosts Ally Damage Output |  Main Damage Dealer |
| Replacement Options | ||||
 Healing, Shield Defense Up Dispels Buff |  Healing Attack Penalty |  Inflicts Corrosion |  Boosts Ally Damage Output |  Main Damage Dealer |
Build Reference
● Key Attribute RequirementsMaashtur: Skill Haste > 60;
Sacredeia, Maashtur, Reytah: Accuracy > 290;
Reytah: Focus on Attack and ensure Skill Haste > 12.
● Recommended Gear
Ladehlia
Team Composition: Serpentemis + Sleight + Twitch + Calavera + Nathaniel This team composition can only use Nathaniel's HP Aura. We recommend selecting the Batwing Familiar to maximize the team's damage output.
● Recommended Skill Timing
1. Position your team as shown in the image to make enemy summoned units spawn within your skill range, ensuring you can attack 4 targets at once.
2. Travelers without Sleight can replace him with Corrin or Durango. If you have a well-built Reytah, Blah Blah, Oggok, or Maashtur, you can also adopt a 1 Support + 4 DPS strategy by adding Vicana, Lothair, or Sacredeia to boost your damage output.
● Hero Substitution Options
 Secondary Damage Dealer Inflicts Virulent Poison |  Secondary Damage Dealer Inflicts Toxin |  Main Damage Dealer |
| Replacement Options | ||
 Secondary Damage Dealer Refreshes Toxin |  Inflicts Toxin |  Main Damage Dealer |
Build Reference
● Key Attribute RequirementsNathaniel: Skill Haste > 60. For all other stats, prioritize stacking HP.
Calavera: Skill Haste > 40. For all other stats, prioritize stacking Accuracy and Defense.
It’s recommended to equip her with Bone Resonance and stack >450 Accuracy.
In this case, other Toxin heroes only need >130 Accuracy.
Stack as much Skill Haste as possible for Twitch and Sleight through Rune Secondary Attributes.
● Recommended Gear
Ergander
Team Composition: Irmoush + Oggok + Guinavivre + Nastjenka + Kurvida We recommend using Nastjenka's Attack Aura with the Starshade Servitor/Djinn Familiar to maximize the team's damage output.
● Recommended Skill Timing
1. Position your team as shown to give all allies the shared Resistance from Oggok's Talent, Stand United. This also allows Nastjenka to provide Guinavivre and Kurvida with the Damage Bonus from Whirling Edge after the battle starts.
2. Oggok can be replaced with Blah Blah, Stegamoffyn, or Nathaniel, and Irmoush can be replaced with Reytah, Maashtur, or Calavera. If you have a Fathomdown with a high inspiration level, you can use a 1 Support + 4 DPS strategy. In this case, no one except Fathomdown needs to stack Resistance, and you can also add Tharivol to increase damage output.
● Hero Substitution Options
 Healing, Immortality Attack Penalty Dispels Debuff |  Main Damage Dealer Attack Speed Up |  High-Frequency Basic Attack Boosts Ally Damage Output |  Main Damage Dealer Follow-up Attack |
| Replacement Options | |||
 Healing Debuff Immunity |  Main Damage Dealer |  High-Frequency Basic Attack |  Secondary Damage Dealer Follow-up Attack |
Build Reference
● Key Attribute RequirementsIrmoush, Kurvida: Accuracy > 290;
Oggok: Resistance > 450; for other stats, prioritize Attack.
Other heroes only need around 200 Resistance.
If stacking Resistance is difficult, you can also use Oggok's Resistance Aura.
● Recommended Gear
● Recommended Talents
Lossenia
Team Composition: Talethia + Diantha + Lincos + Anneliesis + Acilia We recommend pairing Diantha's Attack Aura with the Tressym Familiar to maximize the team's damage output.
● Recommended Skill Timing
1. Stack as much Attack on Lincos as possible, ensuring Talethia's Attack remains lower than his in battle. This makes her the target for buffs from Lincos's passive skill and ultimate skill.
2. If you have a Rena with Inspiration Lv. 1 or higher, we recommend using her to replace Acilia.
3. The boss summons two enemies in sequence during the battle. This team composition will achieve a higher total damage output when the boss summons Hochadir first, followed by Lucien.
● Hero Substitution Options
 Healing Dispels Debuff Debuff Immunity |  Healing, Shield Dispels Debuff Boosts Ally Stats |  Main Damage Dealer |  Boosts Ally Damage Output Restores Aura Energy |  Boosts Ally Damage Output Restores Aura Energy |
| Replacement Options | ||||
 Healing Dispels Debuff Defense Up |  Healing Debuff Immunity |  Main Damage Dealer |  Boosts Ally Damage Output Restores Aura Energy |  Boosts Ally Damage Output Restores Aura Energy |
Build Reference
● Key Attribute RequirementsDiantha: Accuracy > 290, and stack Attack Speed via Rune Secondary Attributes.
Anneliesis: Prioritize stacking HP and Defense, and stack Skill Haste via Rune Secondary Attributes.
Acilia: Prioritize stacking Enlightenment; for other stats, stack as much HP and Defense as possible.
● Recommended Gear
● Recommended Talents
Victor
Team Composition: Flora + Felicity + Chorak + Thorgos + Synarell We recommend pairing Flora's Attack Aura with the Batwing Familiar to maximize the team's damage output.
● Recommended Skill Timing
1. Stack Thorgos's Attack as high as possible to increase the stats he shares with Flora via Everlasting Candleflame. Travelers without Thorgos can replace him with Caspar, and if you don't have Synarell, you can use Feenja or Felosia instead.
2. If Thorgos's inspiration level is ≥2, it is best to cast his ultimate skill manually. Use it twice per rotation to increase total damage output: cast it once right after Flora uses her ultimate skill, then cast it again once his Ultimate Energy is full.
● Hero Substitution Options
 Healing, Invincibility Dispels Debuff Attack Penalty |  Defense Penalty Frequent Wild Dice Rolls |  Increases Wild Dice Roll Points |  Secondary Damage Dealer Frequent Wild Dice Rolls |
| Replacement Options | |||
 Ultimate Up Healing, Shield |  Secondary Damage Dealer Frequent Wild Dice Rolls |  Increases Wild Dice Roll Points |  Secondary Damage Dealer |
Build Reference
● Key Attribute RequirementsThorgos and Synarell: The higher the Skill Haste, the better.
Other heroes: Skill Haste > 25;
Felicity: Accuracy > 290;
Synarell: Resistance > 400. For other stats, prioritize stacking Attack.
Other heroes only need around 200 Resistance.
● Recommended Gear
Irmoush
Team Composition: Scaarr + Blah Blah + Beldelle + Fredegonda + Shinnah We recommend pairing Beldelle's Attack Aura with the Starshade Servitor/Djinn Familiar to maximize the team's damage output.
● Recommended Skill Timing
1. Blah Blah and Scaarr can be replaced by other support heroes. Just make sure your team has heroes of three different elements to trigger the stage buff.
2. We recommend placing Shinnah next to Beldelle to share stats with the latter via Everlasting Candleflame. However, doing so will prevent Shinnah from receiving shared Resistance from Blah Blah, so you should also stack her Resistance to >200.
3. Although this stage reduces the success rate of inflicting status effects, consider using a Vinyara + Mimic strategy to reduce the frequency of the boss's skills. Especially with a high Elemental Affinity level, a team of Vinyara + Beldelle + Fredegonda + Shinnah + Aethereal/Zhorak can reach a higher damage ceiling.
● Hero Substitution Options
 Shield, Healing Dispels Buff Talent - Stand United |  Healing Shares Buffs Boosts Ally Damage Output |  Replenishes Ally Ice Crystals Boosts Ally Damage Output |  Grants Ice Crystal Boosts Ally Damage Output |  Main Damage Dealer |
| Replacement Options | ||||
 Healing Dispels Debuff Talent - Stand United |  Boosts Ally Damage Output |  Grants Ice Crystal Boosts Ally Damage Output |  Grants Ice Crystal |  Main Damage Dealer |
Build Reference
● Key Attribute RequirementsShinnah and Blah Blah: Accuracy > 230;
Blah Blah: Resistance > 400; Shinnah: Resistance > 200;
Other heroes only need around 160 Resistance.
● Recommended Gear
© 2023 www.dragonheir.info Inc.All Rights Reserved.